let's make something fantastic.

Blog

TMF: Saying Goodbye
TYROL 206-18.jpg

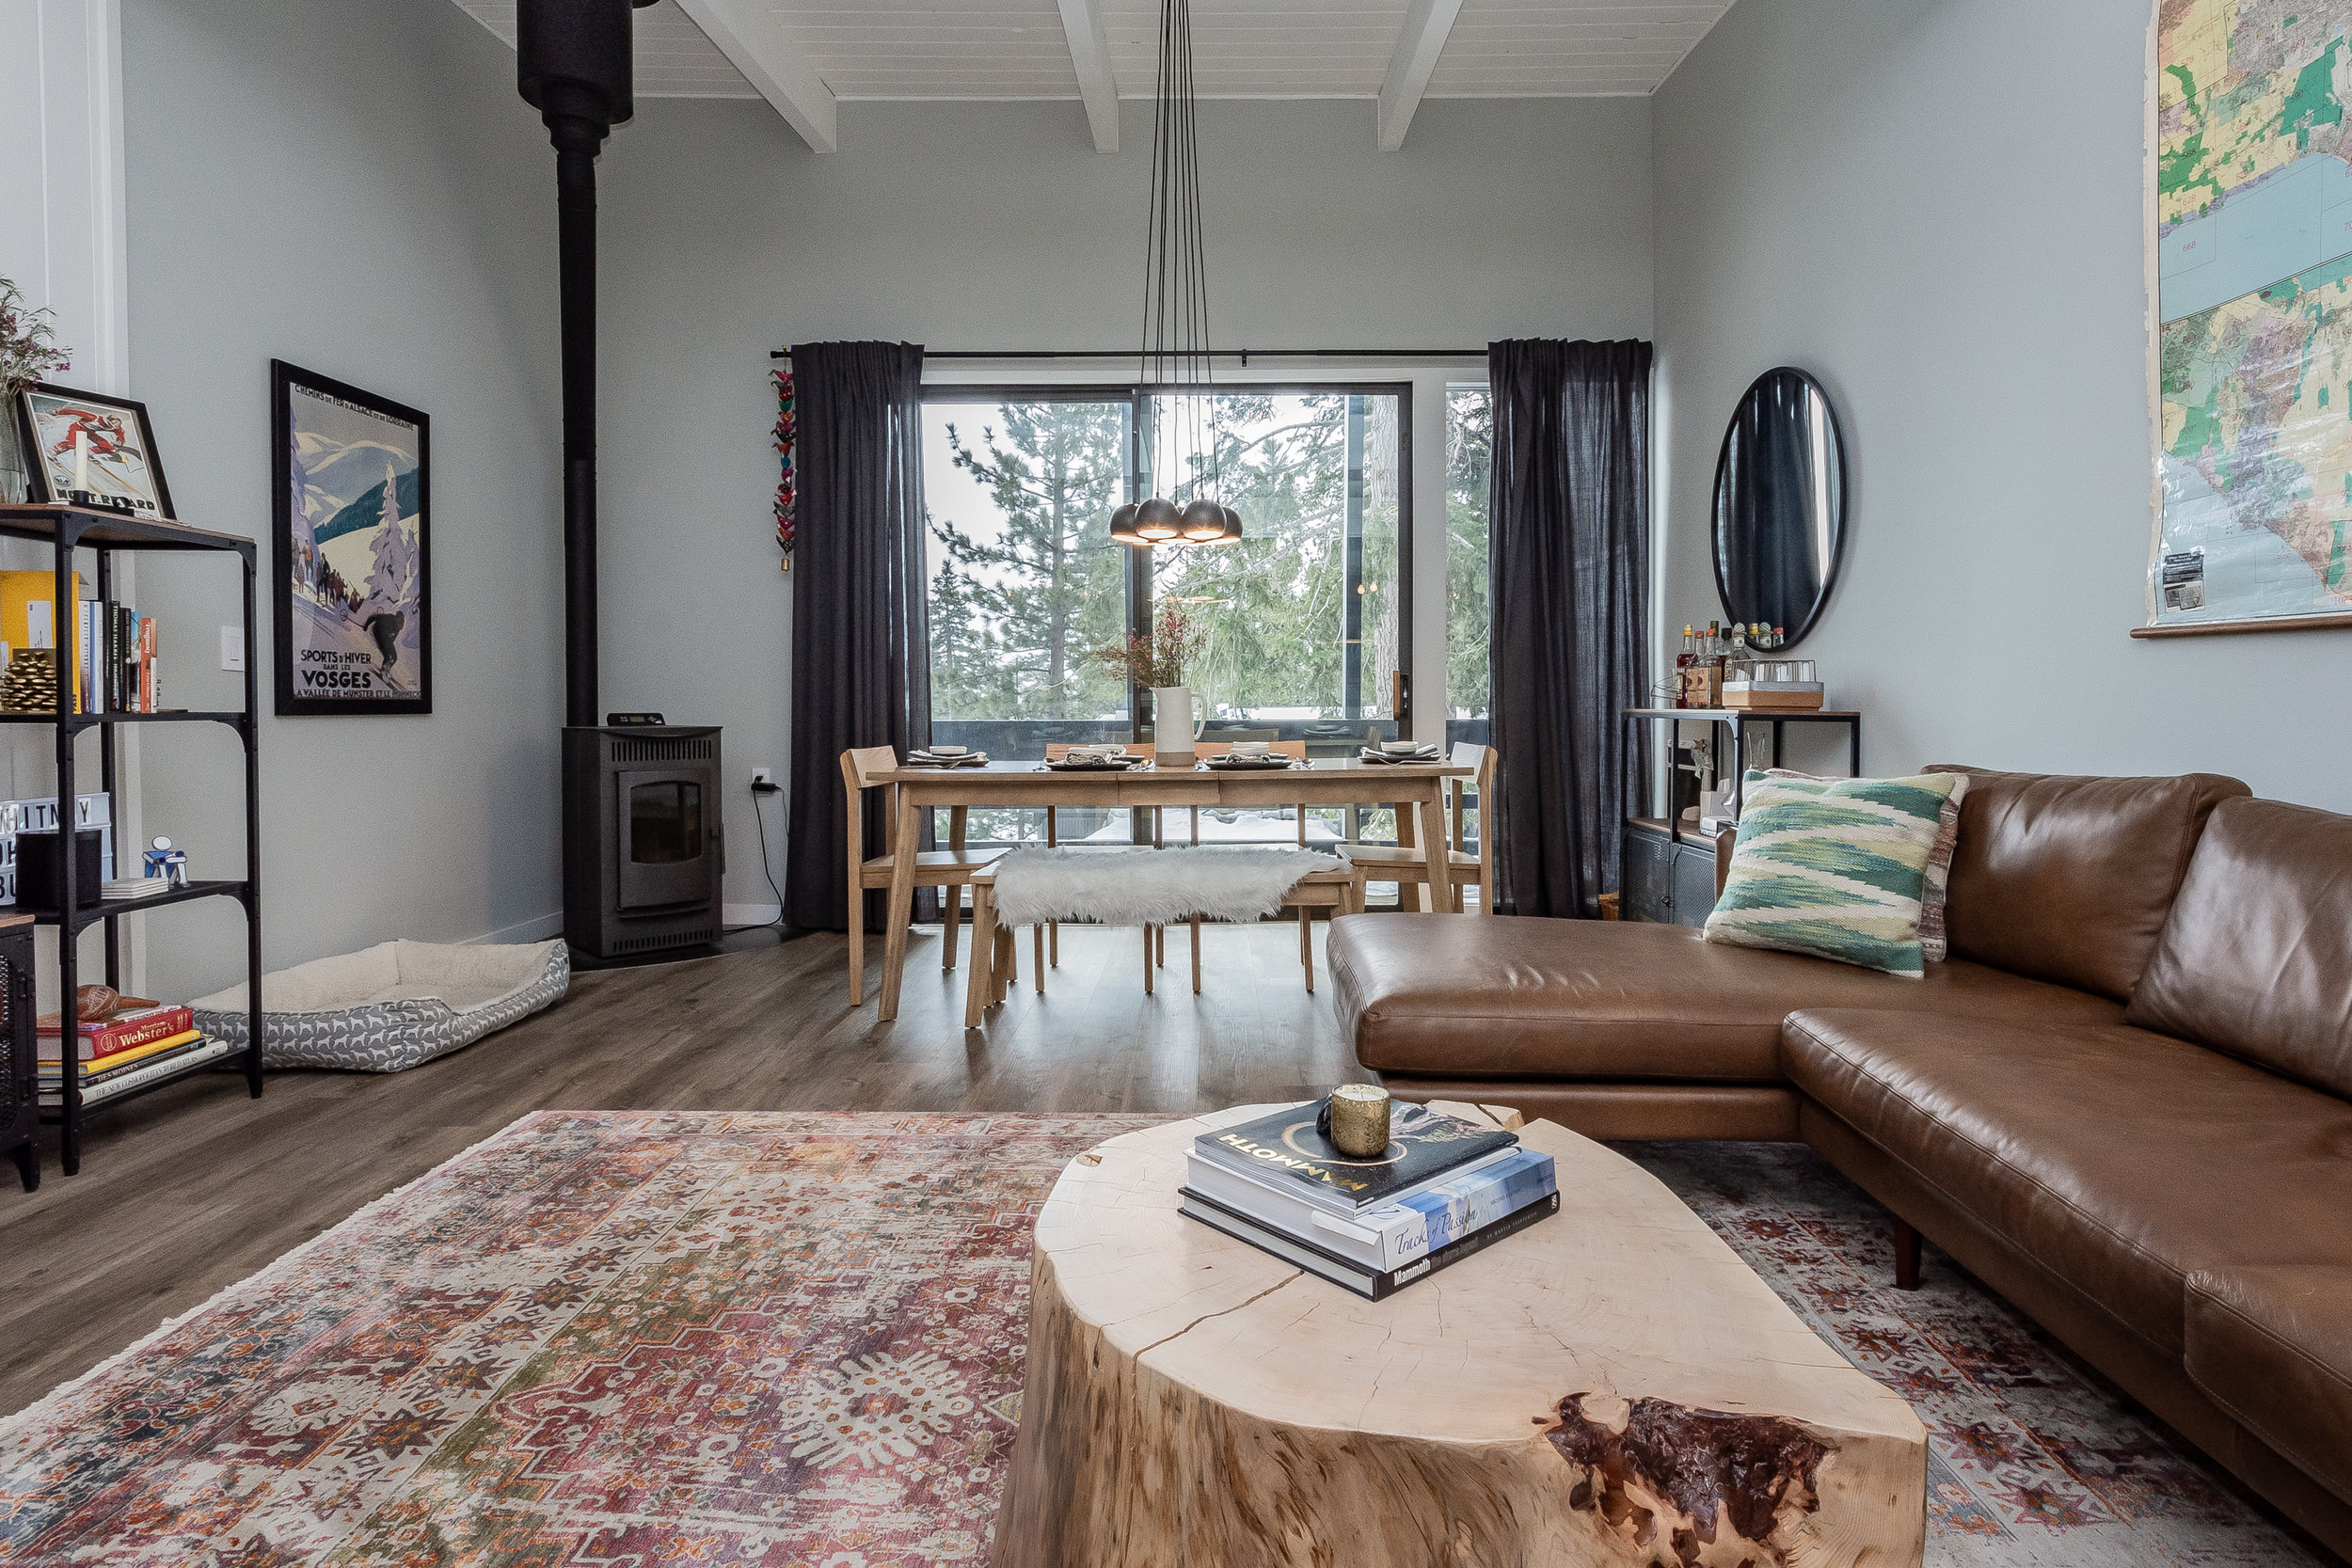
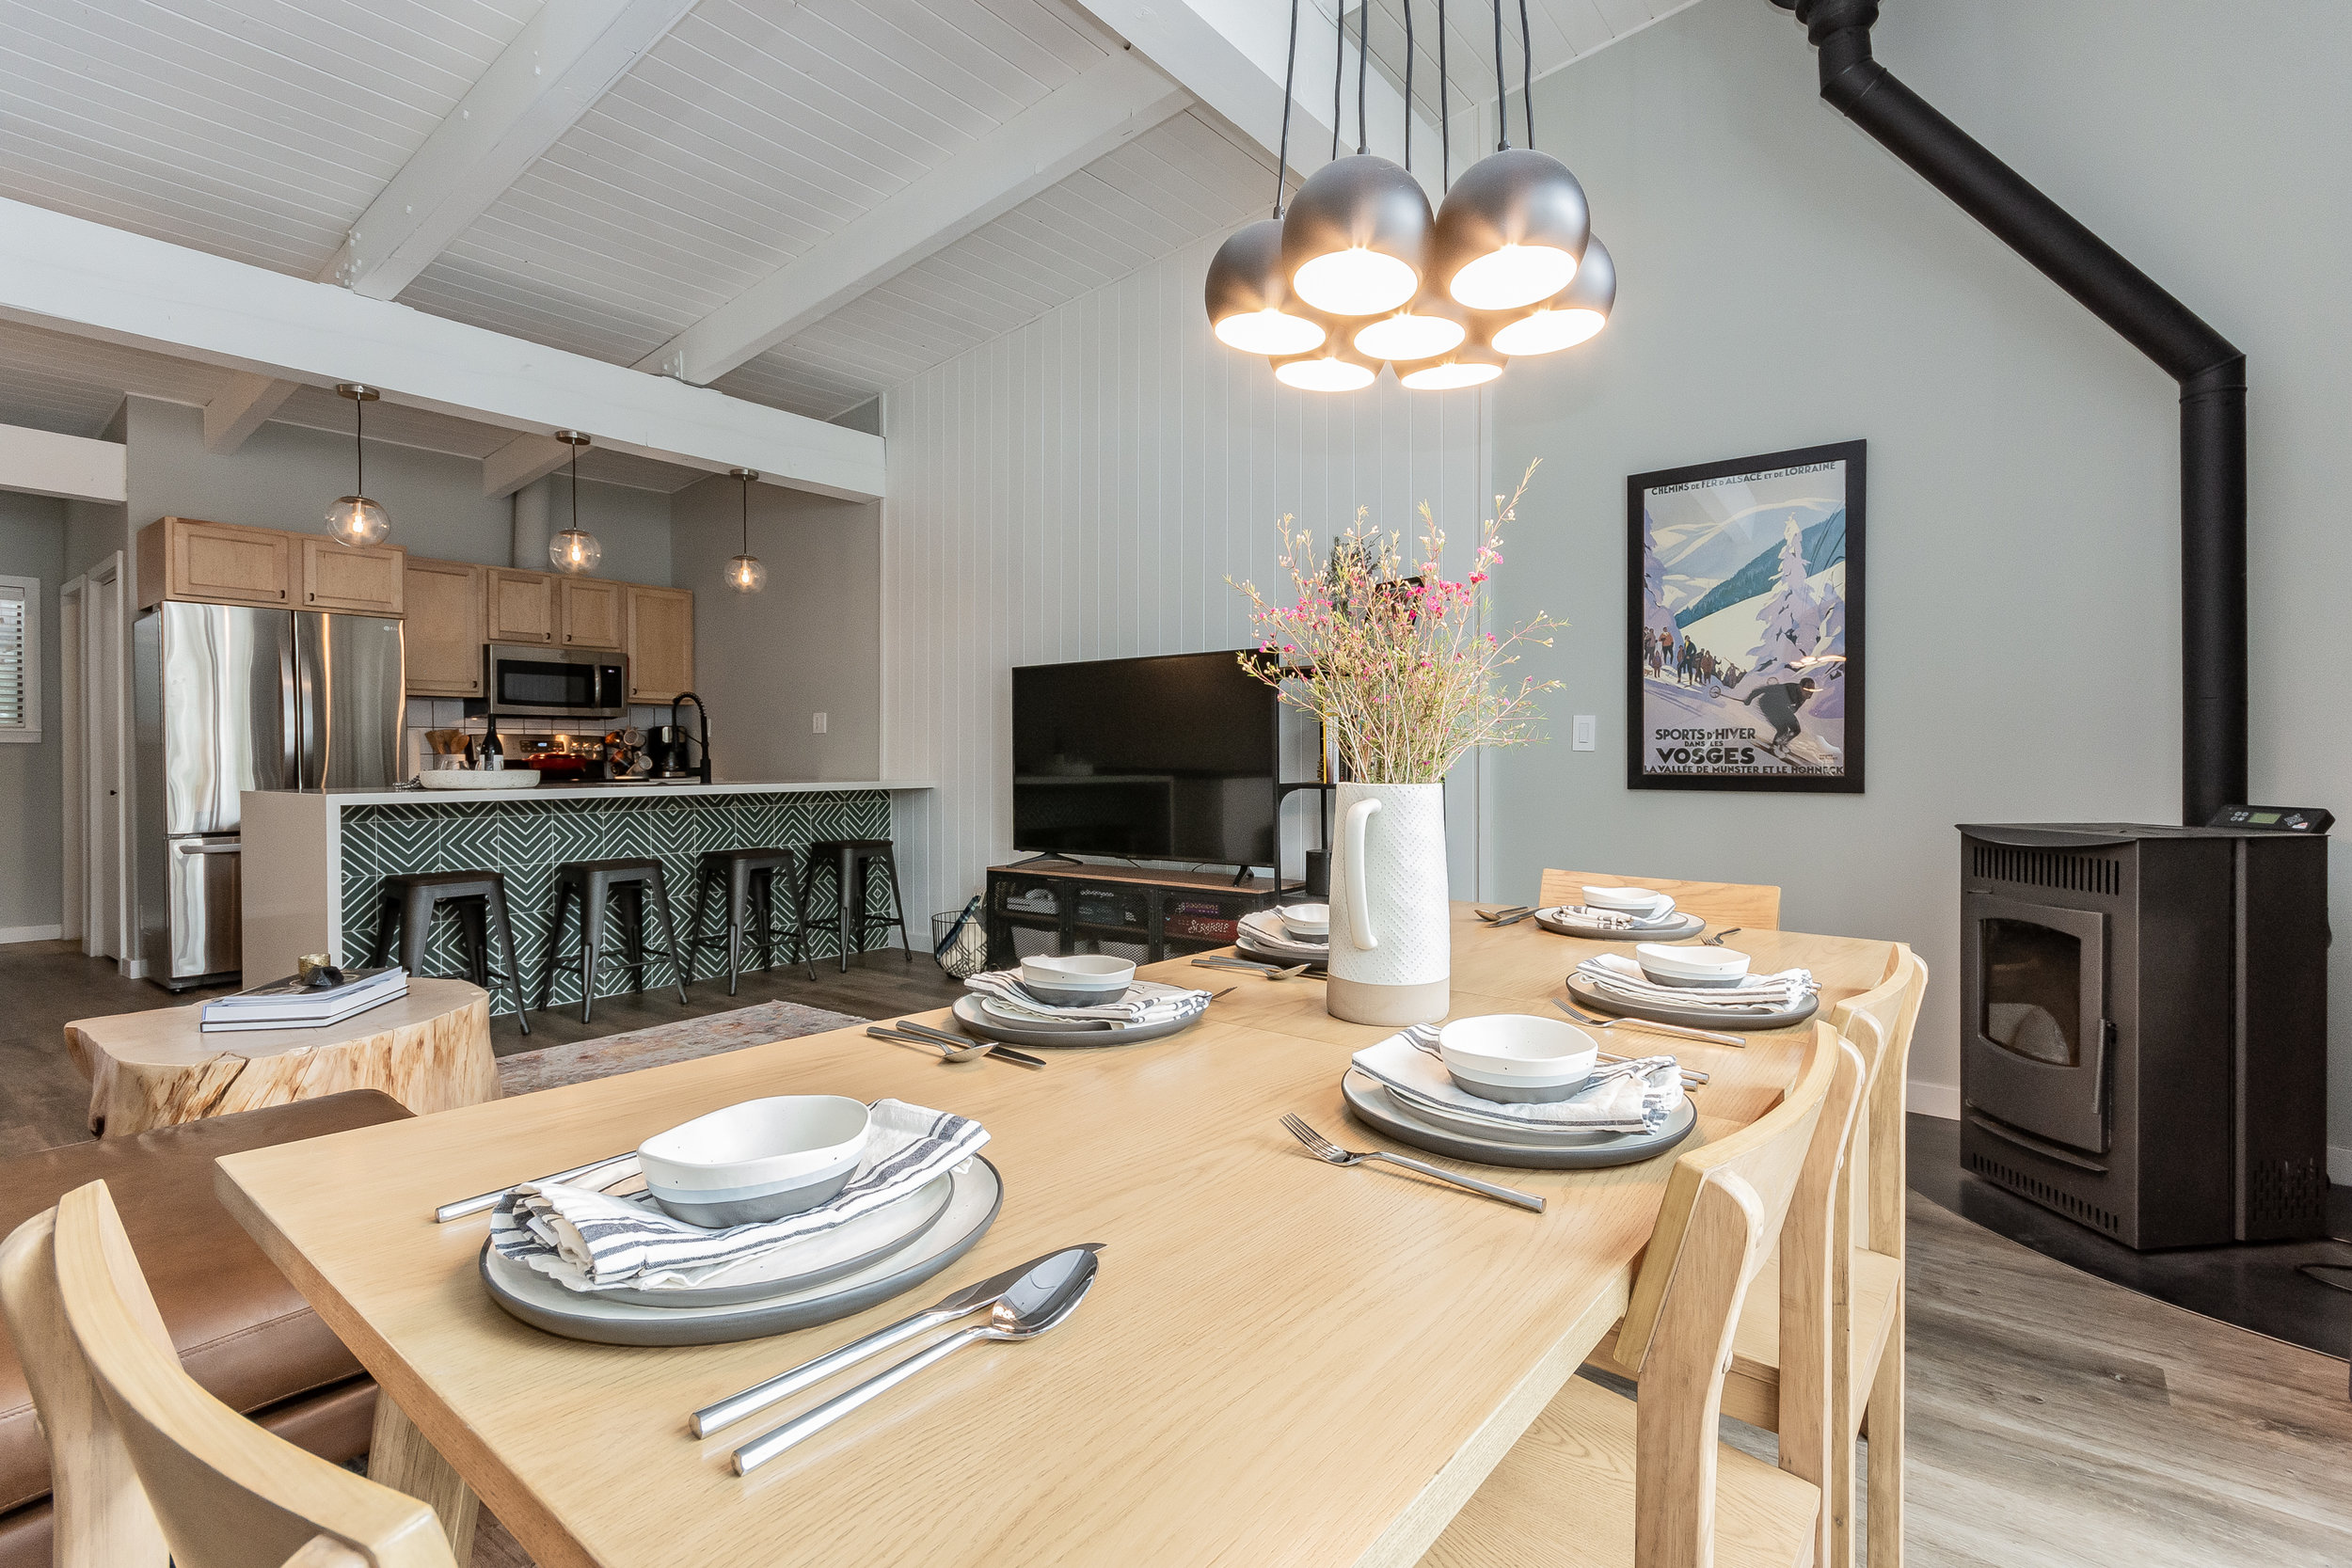
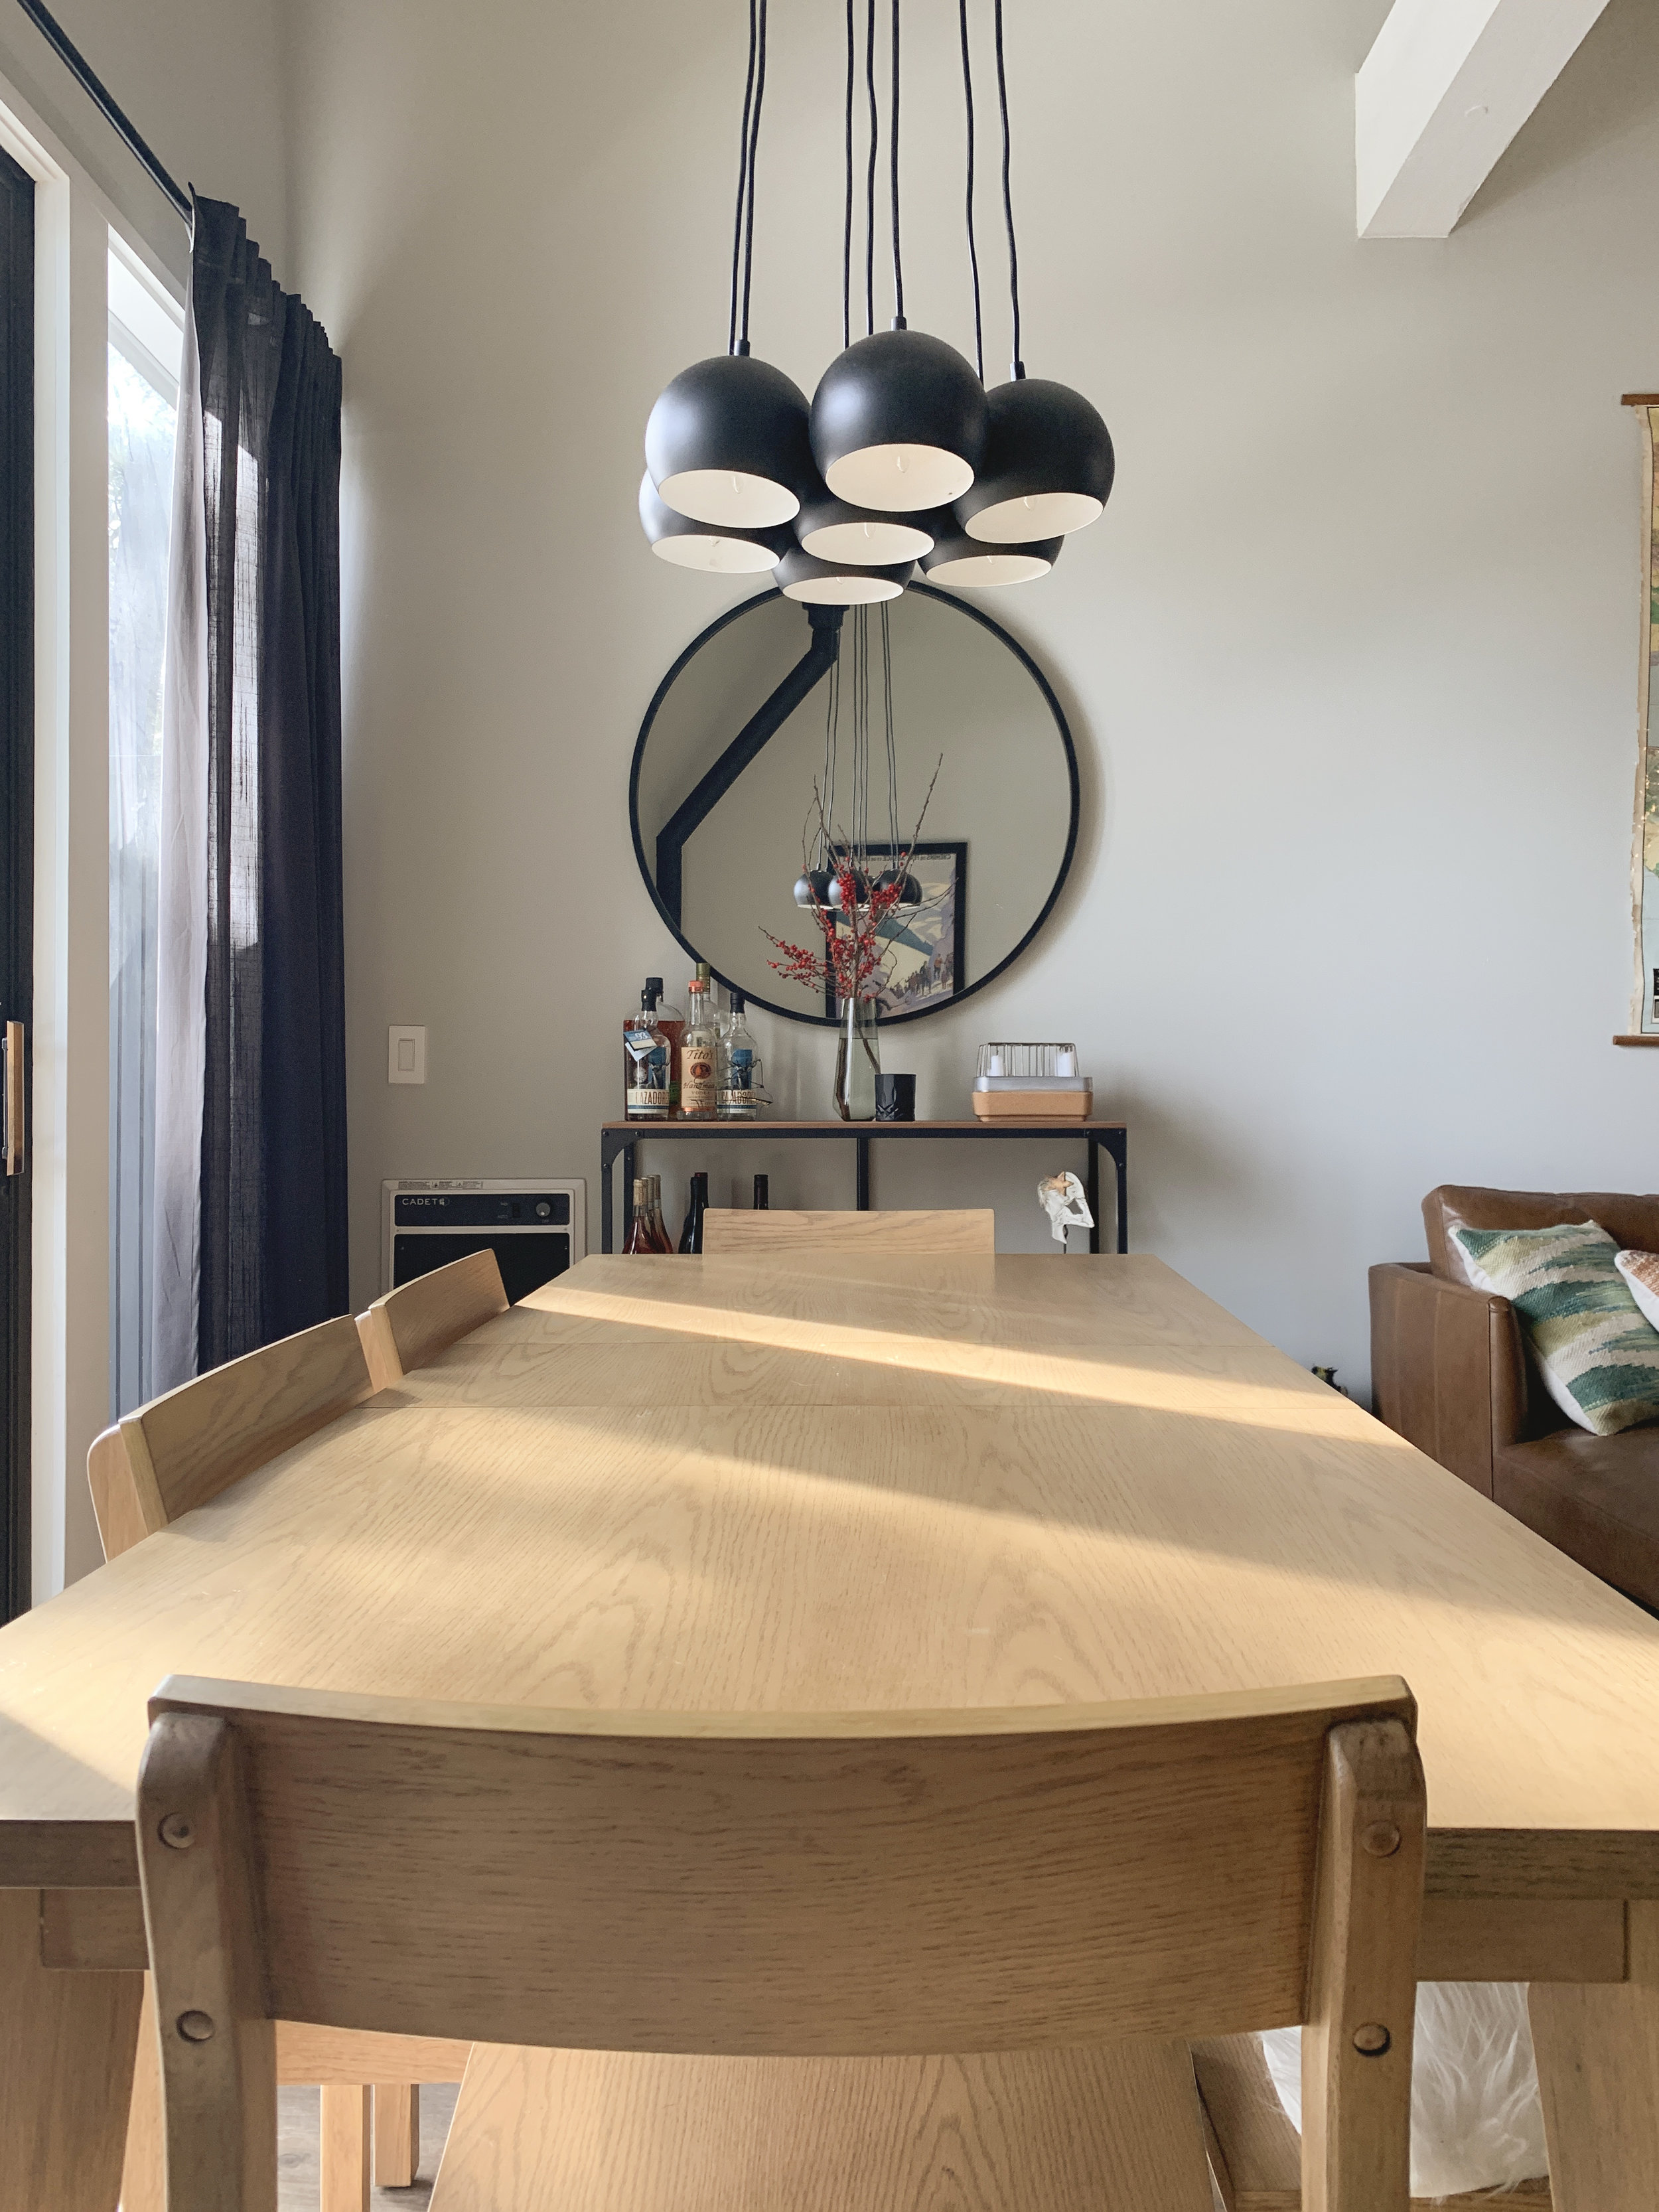
Today is a strange kind of day. I think “bittersweet” is the best way to describe it, though that word only goes so far to explain the bizarre mix of emotions I’m feeling. It’s my last day in The Mammoth Fixer and, as I sit at the table, looking out at my favorite view of the Sierras in springtime, I’m almost at a loss for words. Almost.

It will probably come as a surprise to most that we decided to sell TMF merely a year after purchasing it (and only about 6 months after finishing the renovation), and you’re not alone. It came as a surprise to us, too. Long story short: we loved the process of bringing this old property into the 21st century, and we’d really like to do it again in the future. That in mind, we saw an opportunity to recoup our investment and make a few bucks while the market is high, so we took a leap with the intention of setting ourselves up for success in the future. The condo was only on the market for 8 days before we accepted an offer, so the whole process was a bit of a whirlwind.

While part of me is heartbroken to leave this place behind after such a short time, the rest of me is so excited for what comes next, and for the new owners to love it as much as we have/do. This condo has become my happy place - Peter and I often remark about how our stress levels seem to magically reduce as soon as we pull into Mammoth Lakes - and I’ll miss it terribly. However, it has taught me so much (see: every prior blog post) and even nudged me in a new direction, professionally-speaking. The process of renovating this property has been tough, and demanding, and at times downright overwhelming. But it has also been a privilege and a joy, and I’m eager to do it again whenever it makes sense to do so.

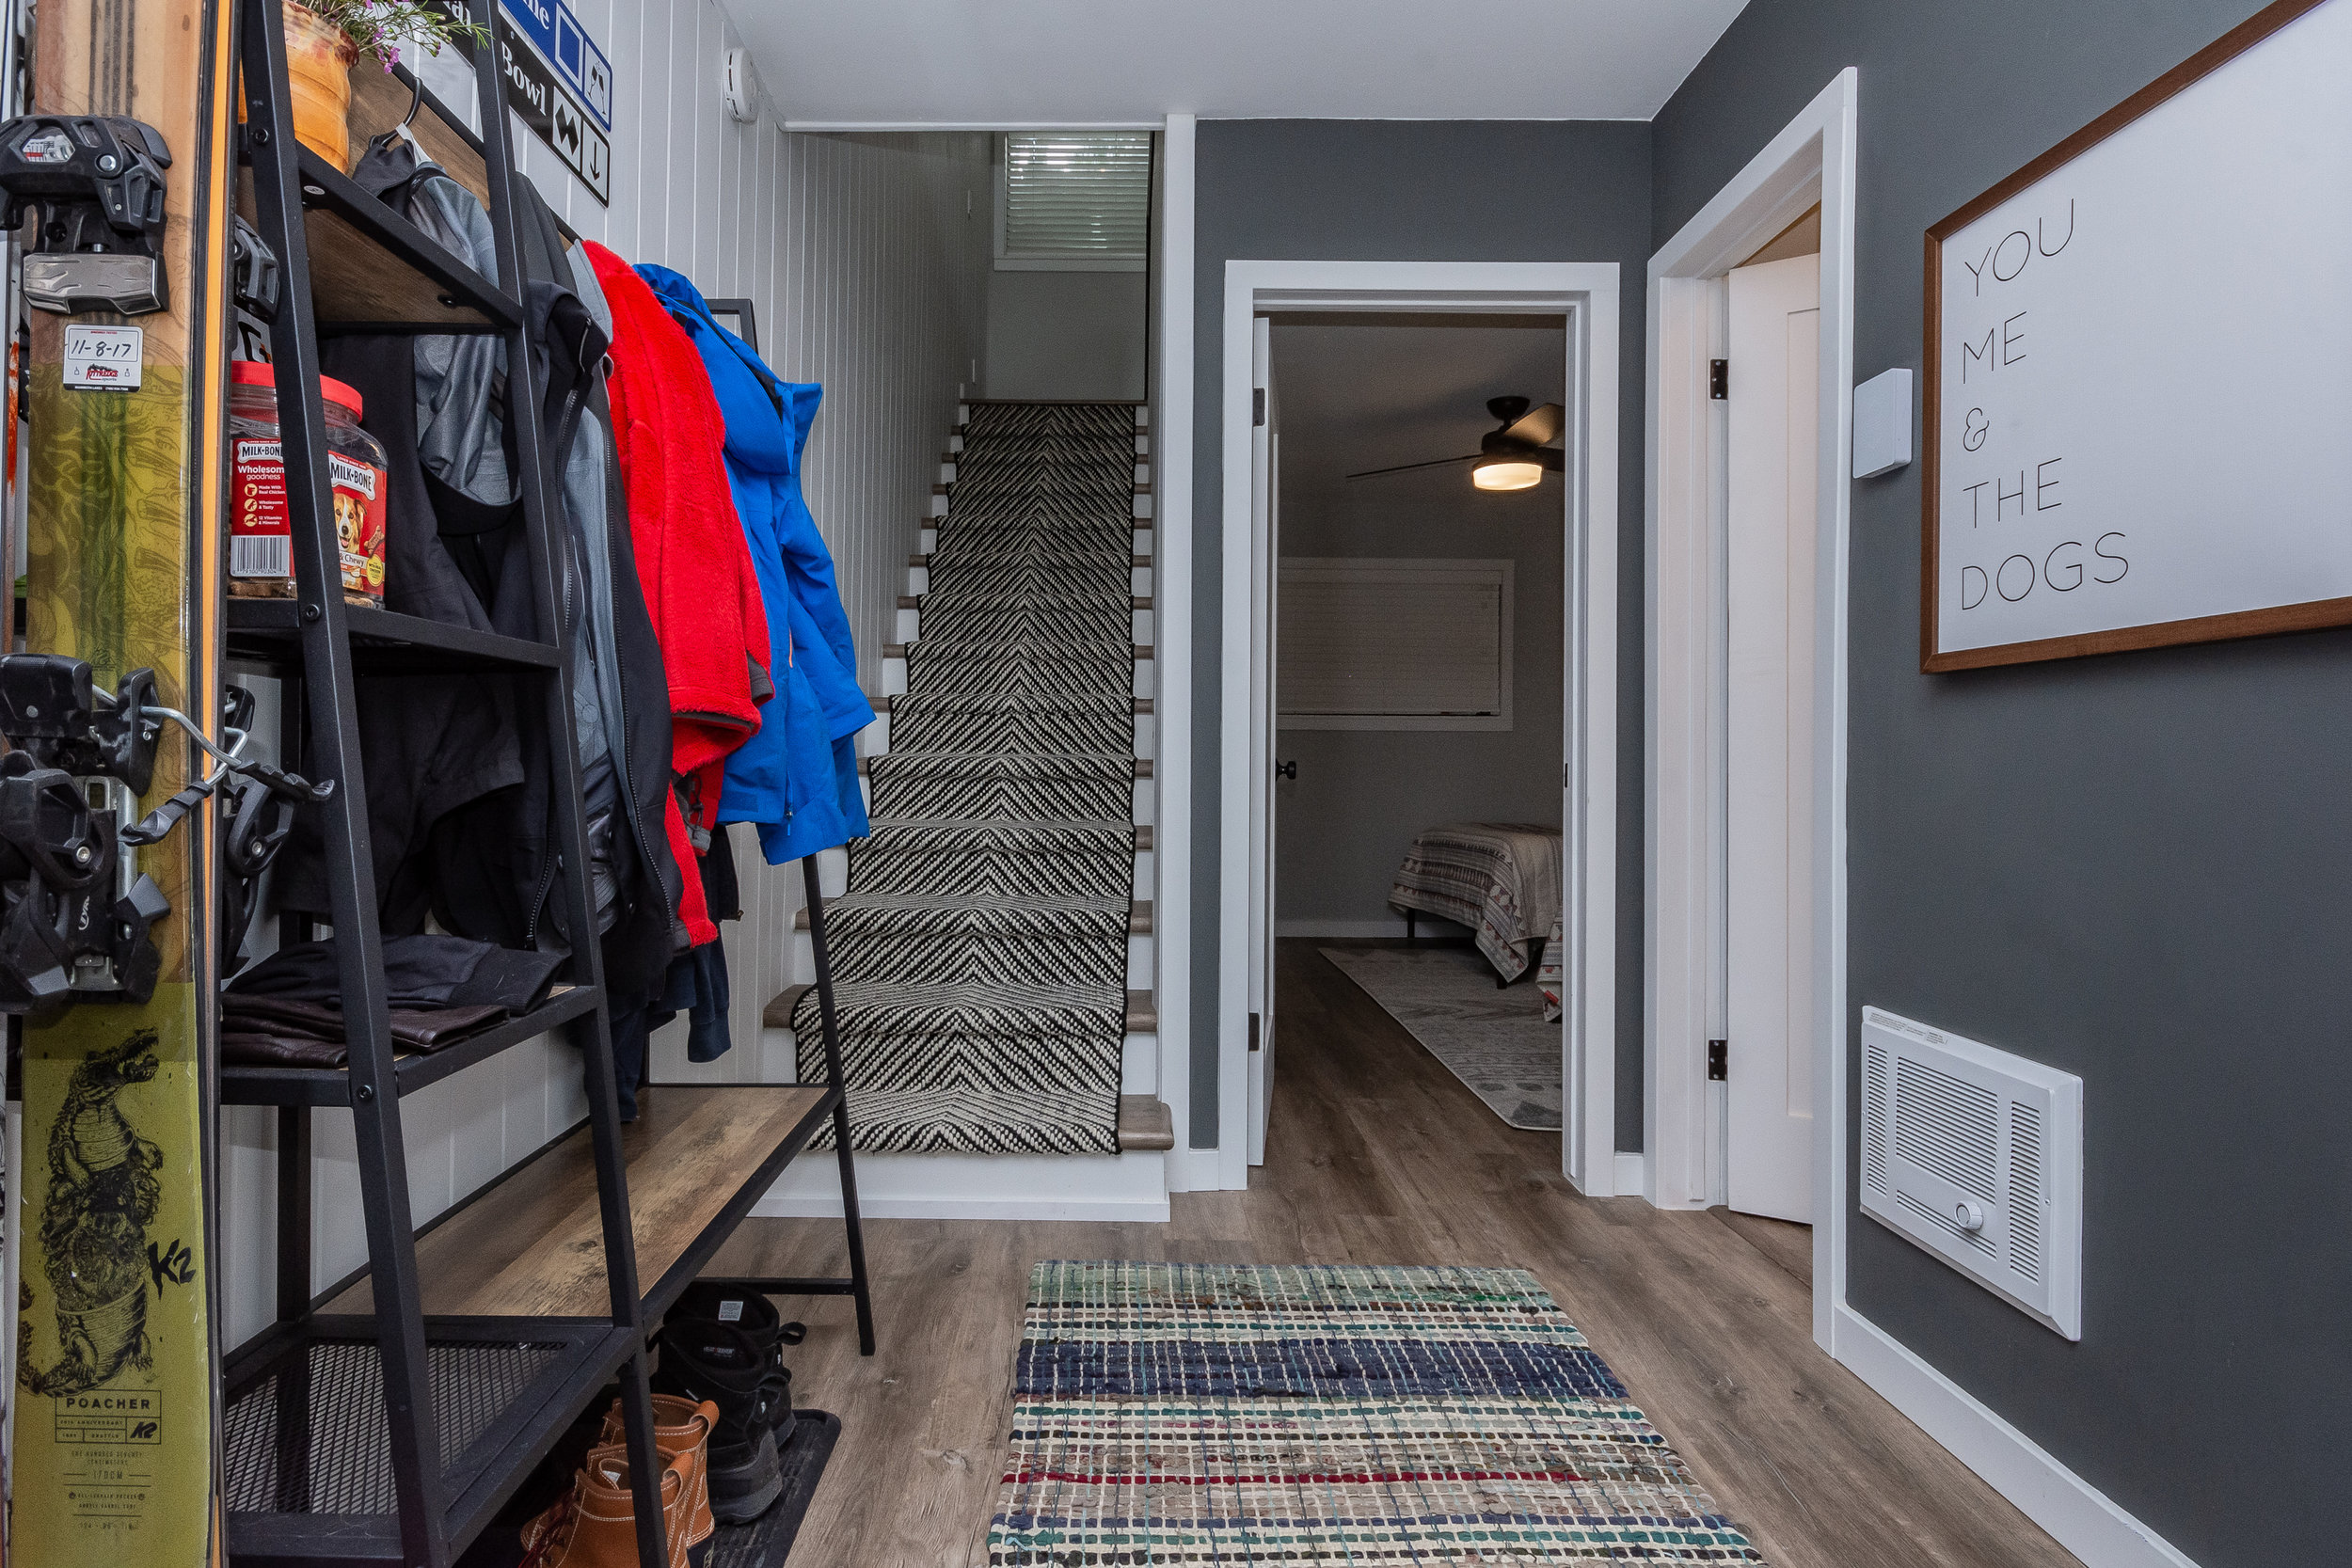
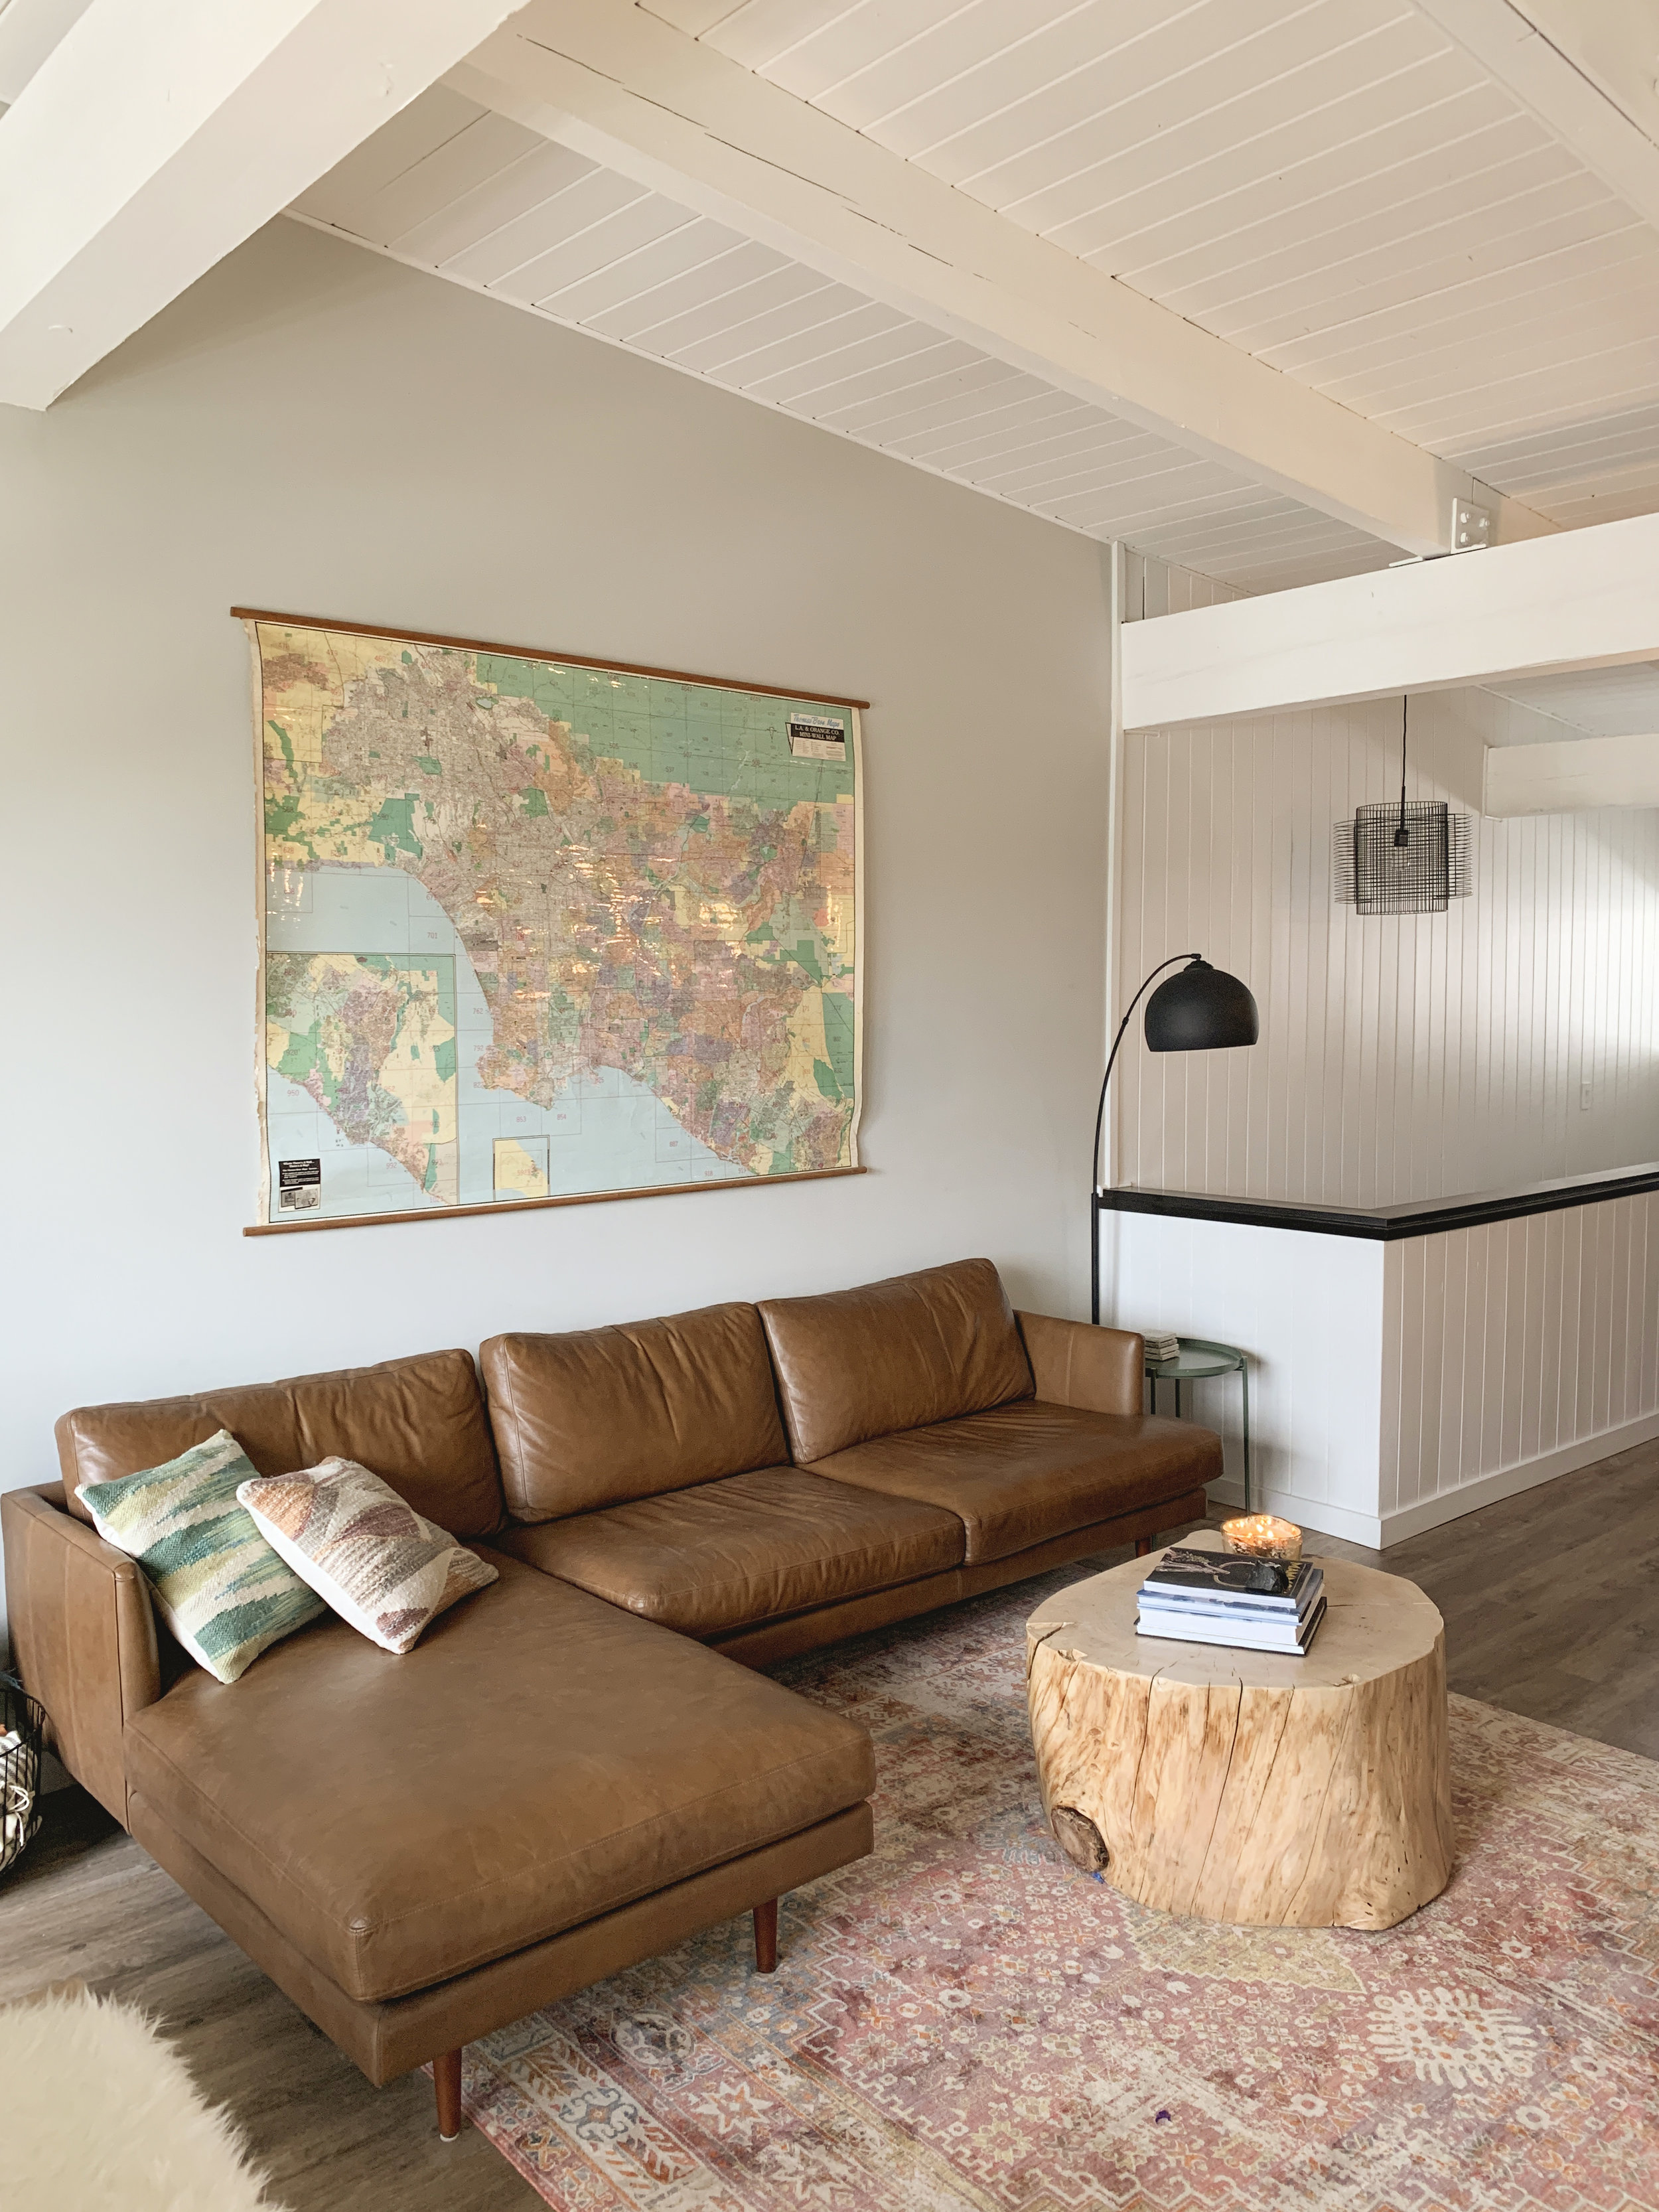
I’ve been thinking a lot about what I would have done differently around this place, and thankfully the answer is “not much.” I’m proud of the work I did, and the home we created here, and I’m honored (vindicated?) to know that others have enjoyed my vision enough to want to live here themselves. It’s a lovely feeling. My only regret I have about this property - if you can even call it that - is that I didn’t get to see all of my projects through to fruition before we put it on the market. Decorating a space is an arduous process and, while we finished shopping for most of the furnishings months ago, I still hadn’t found the perfect piece for every spot. Similarly, there remain a few blank walls downstairs that hadn’t yet found their ideal art. The downstairs patio area, slated to be my big project this spring/summer, is still an ugly patch of dirt, waiting to see its potential. Alas, these unfinished details will pass on to the new owners, and I hope they enjoy the process of adding their own taste to this space I’ve obsessed over for the better part of 12 months.

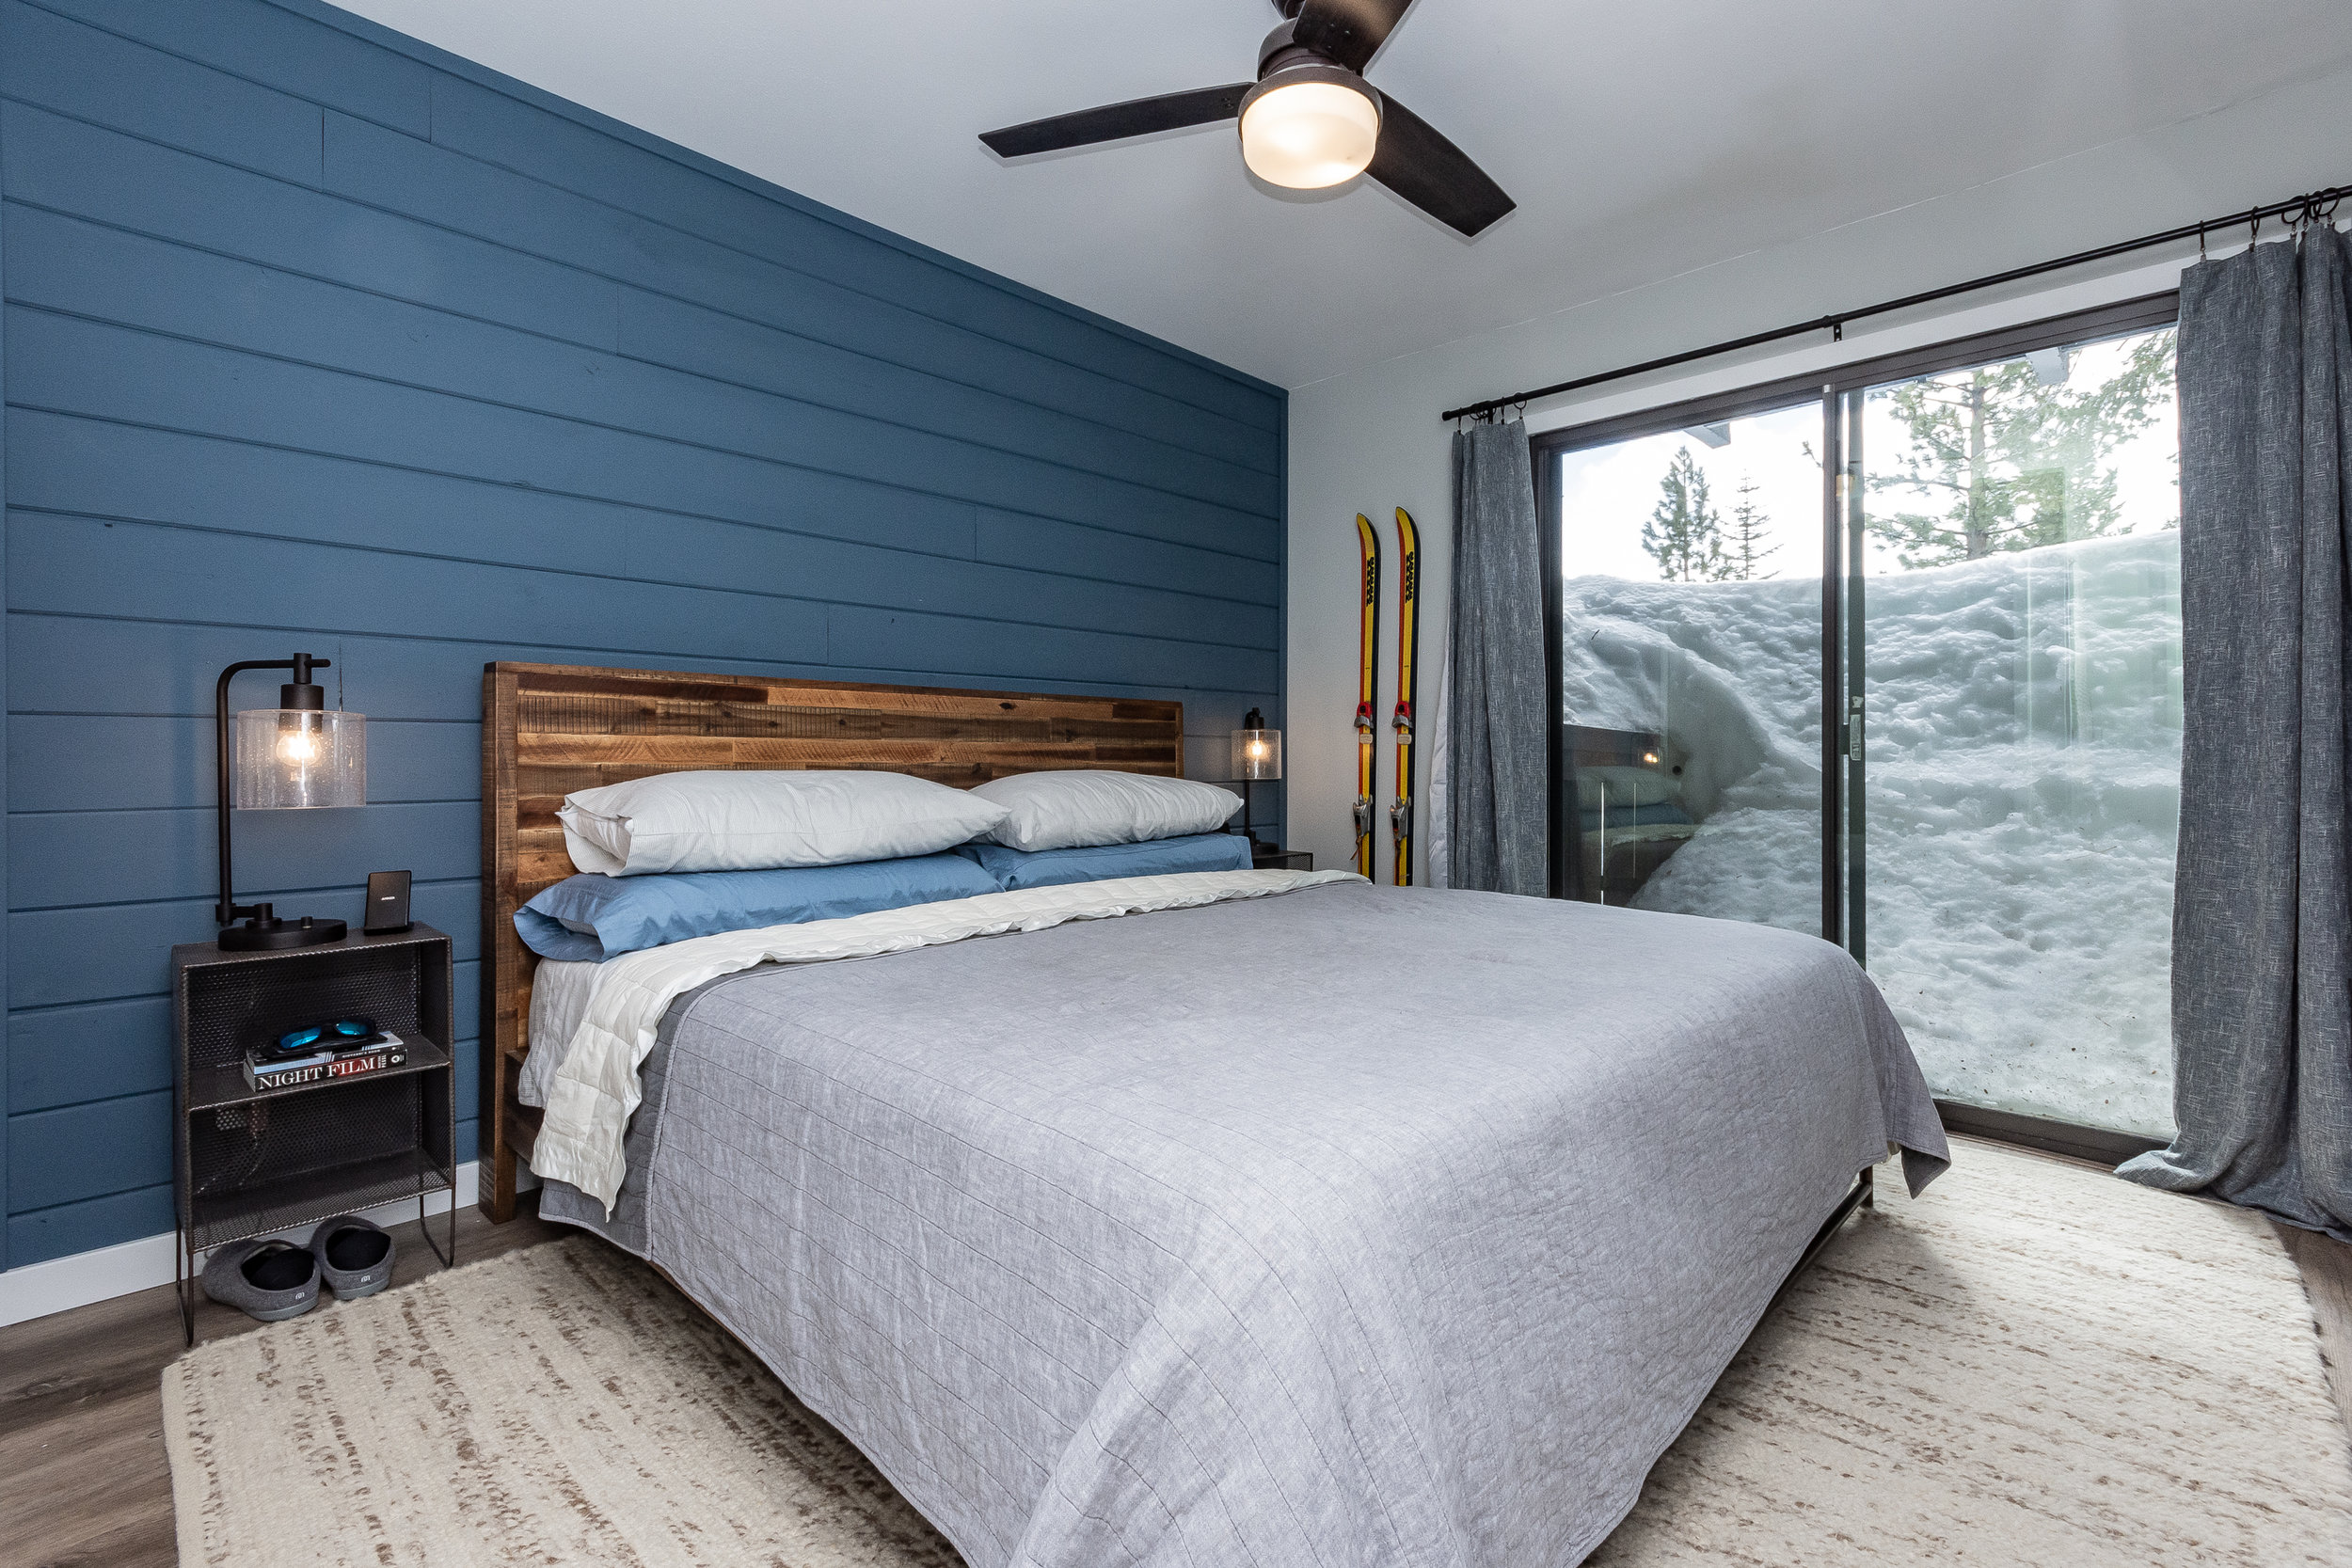
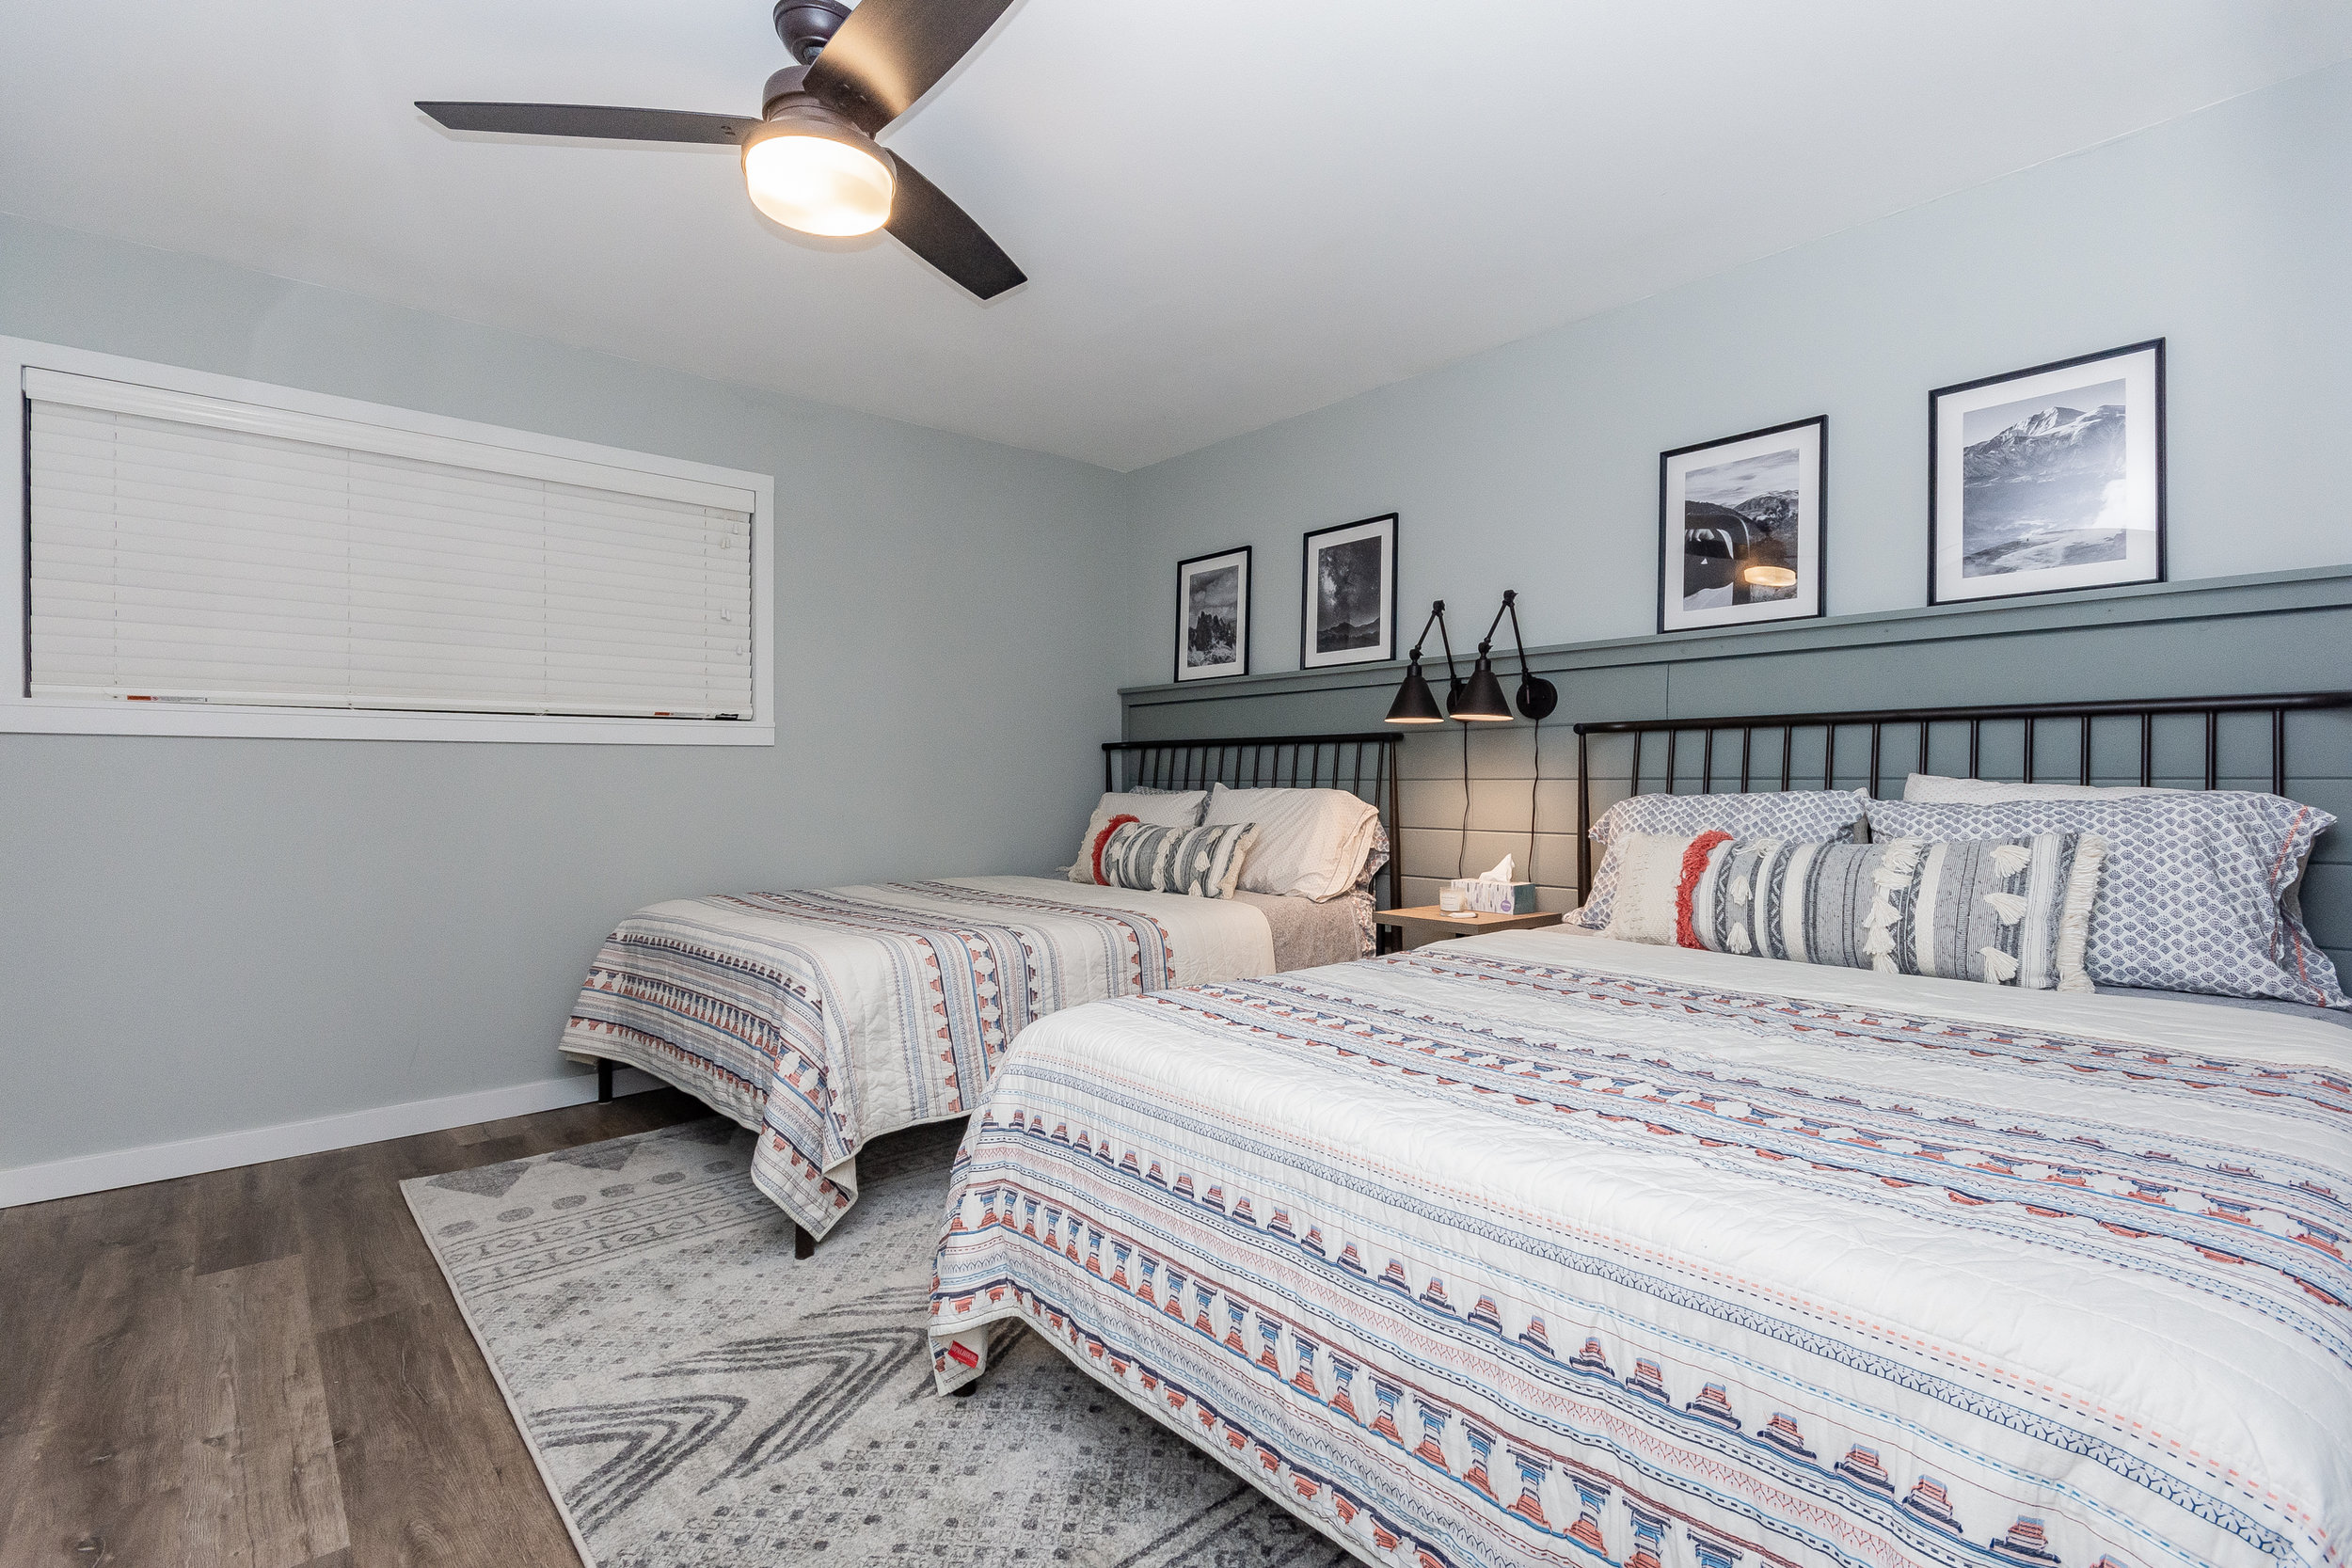
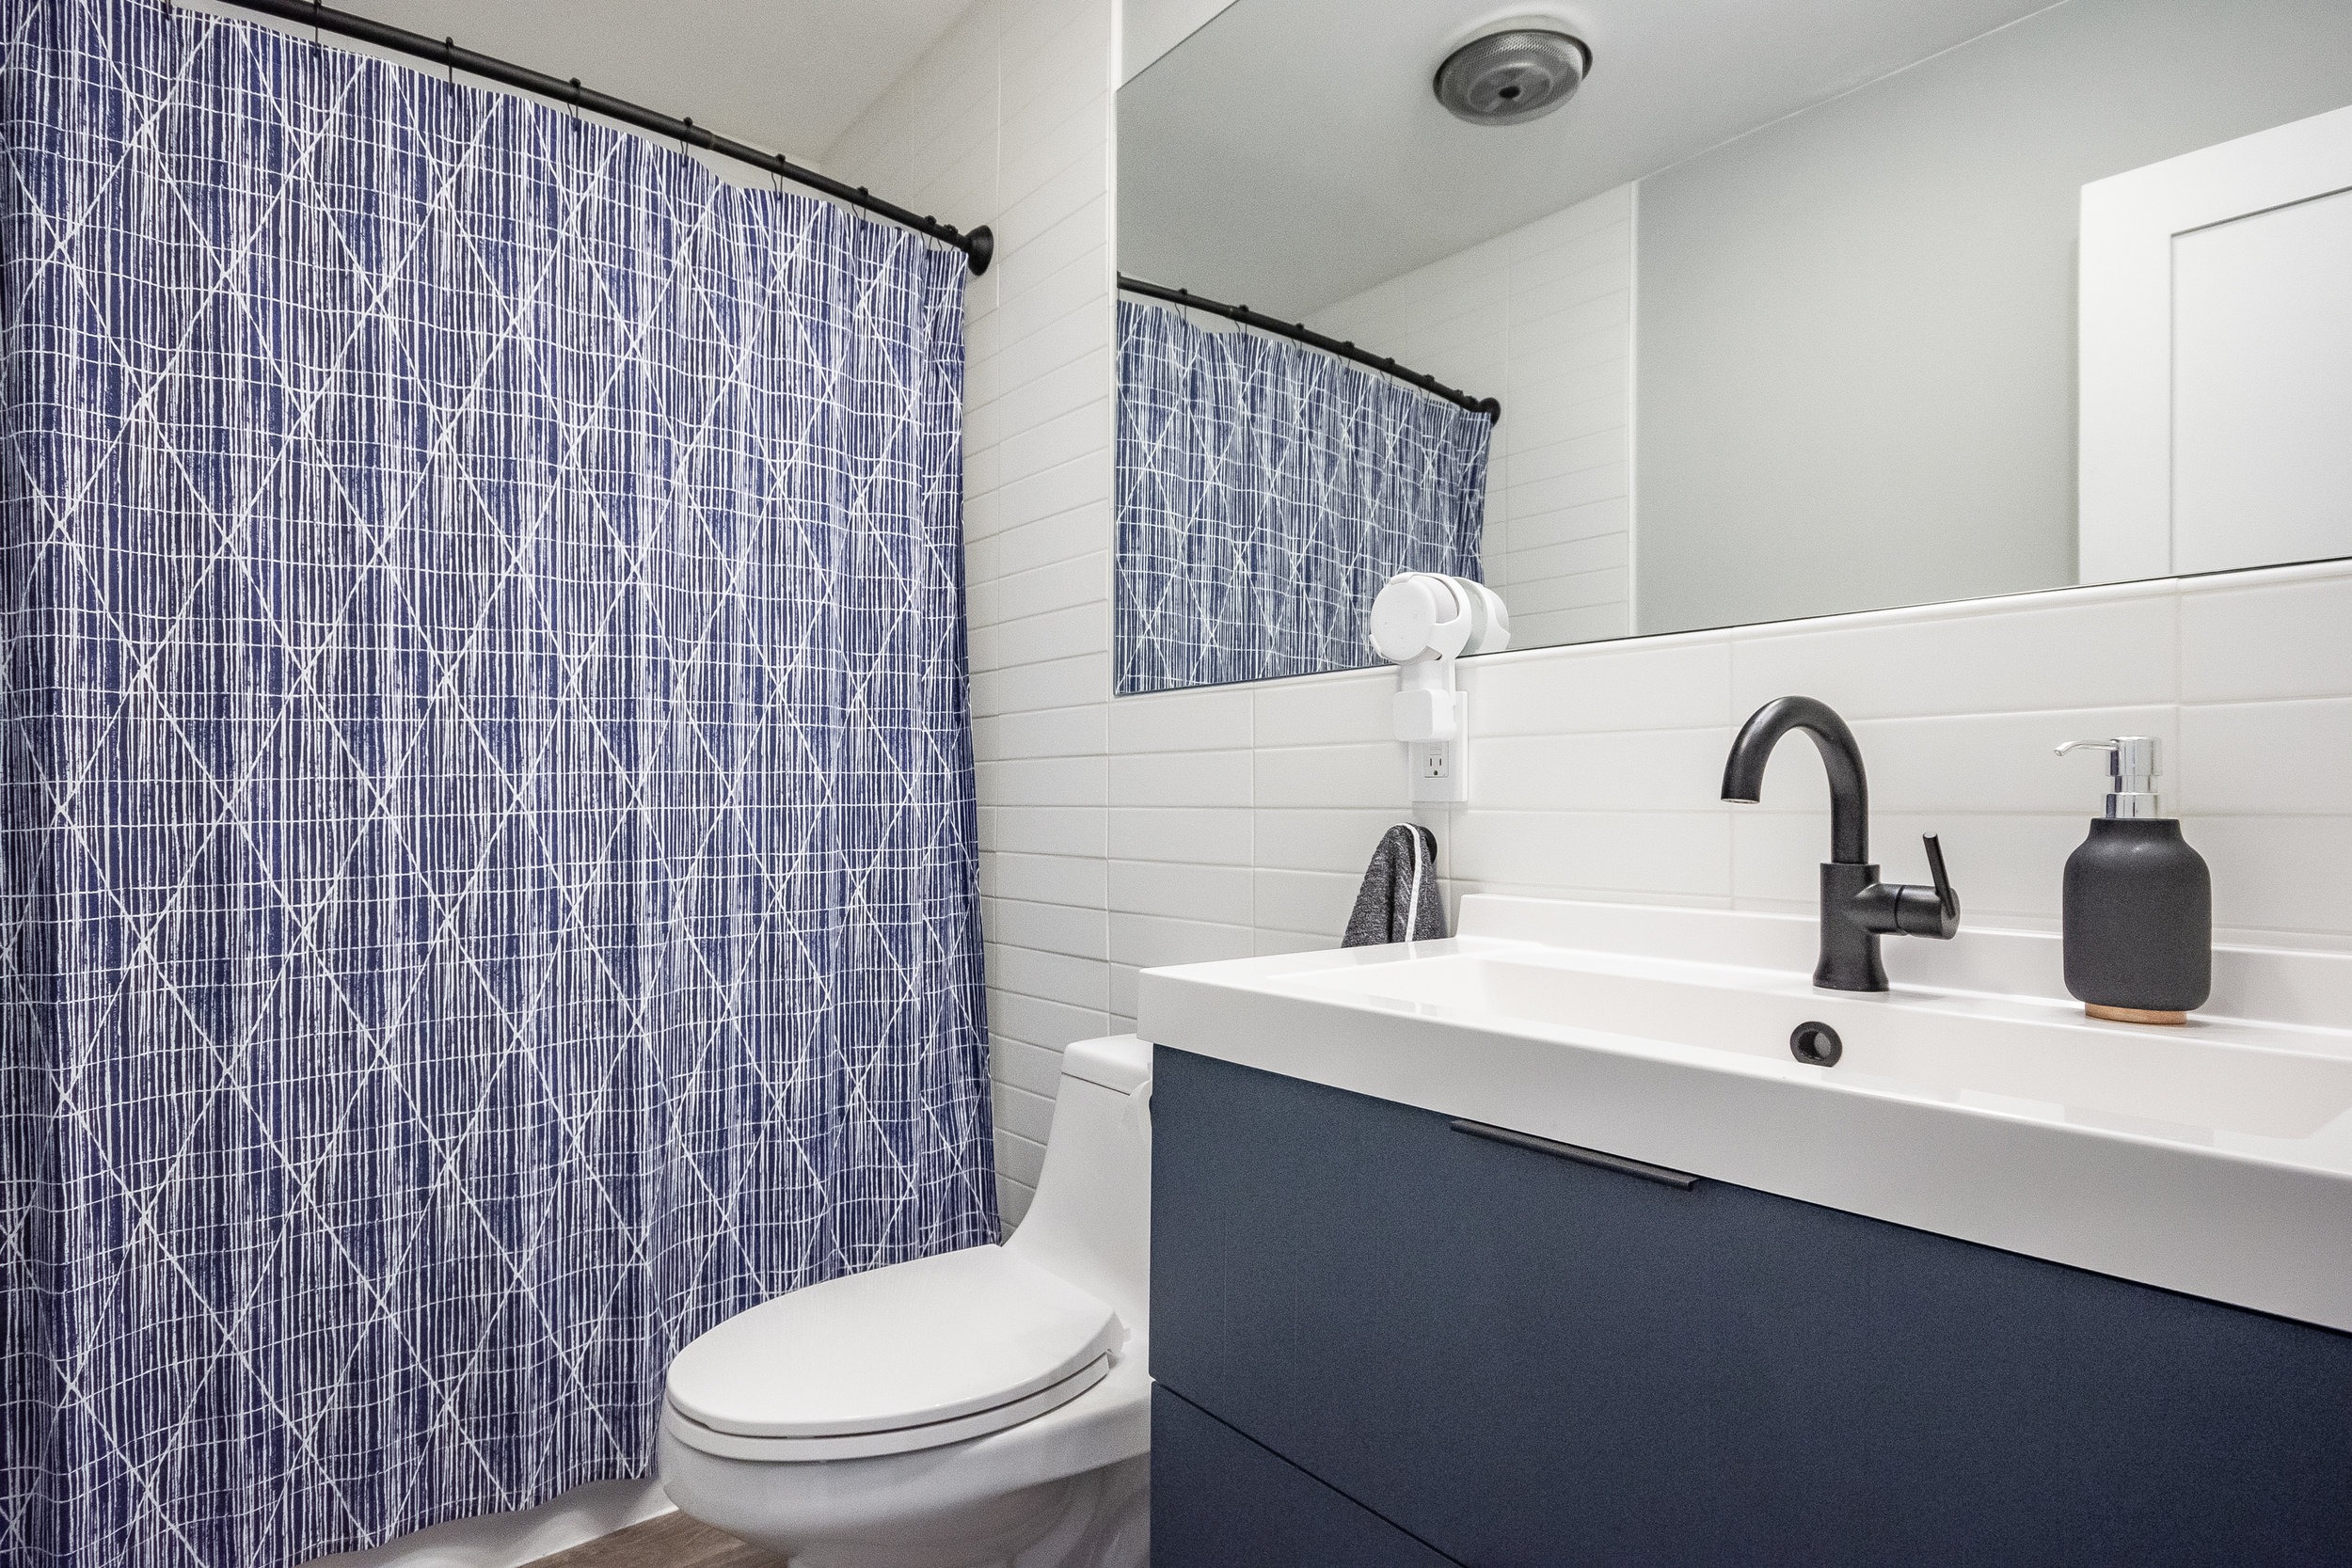
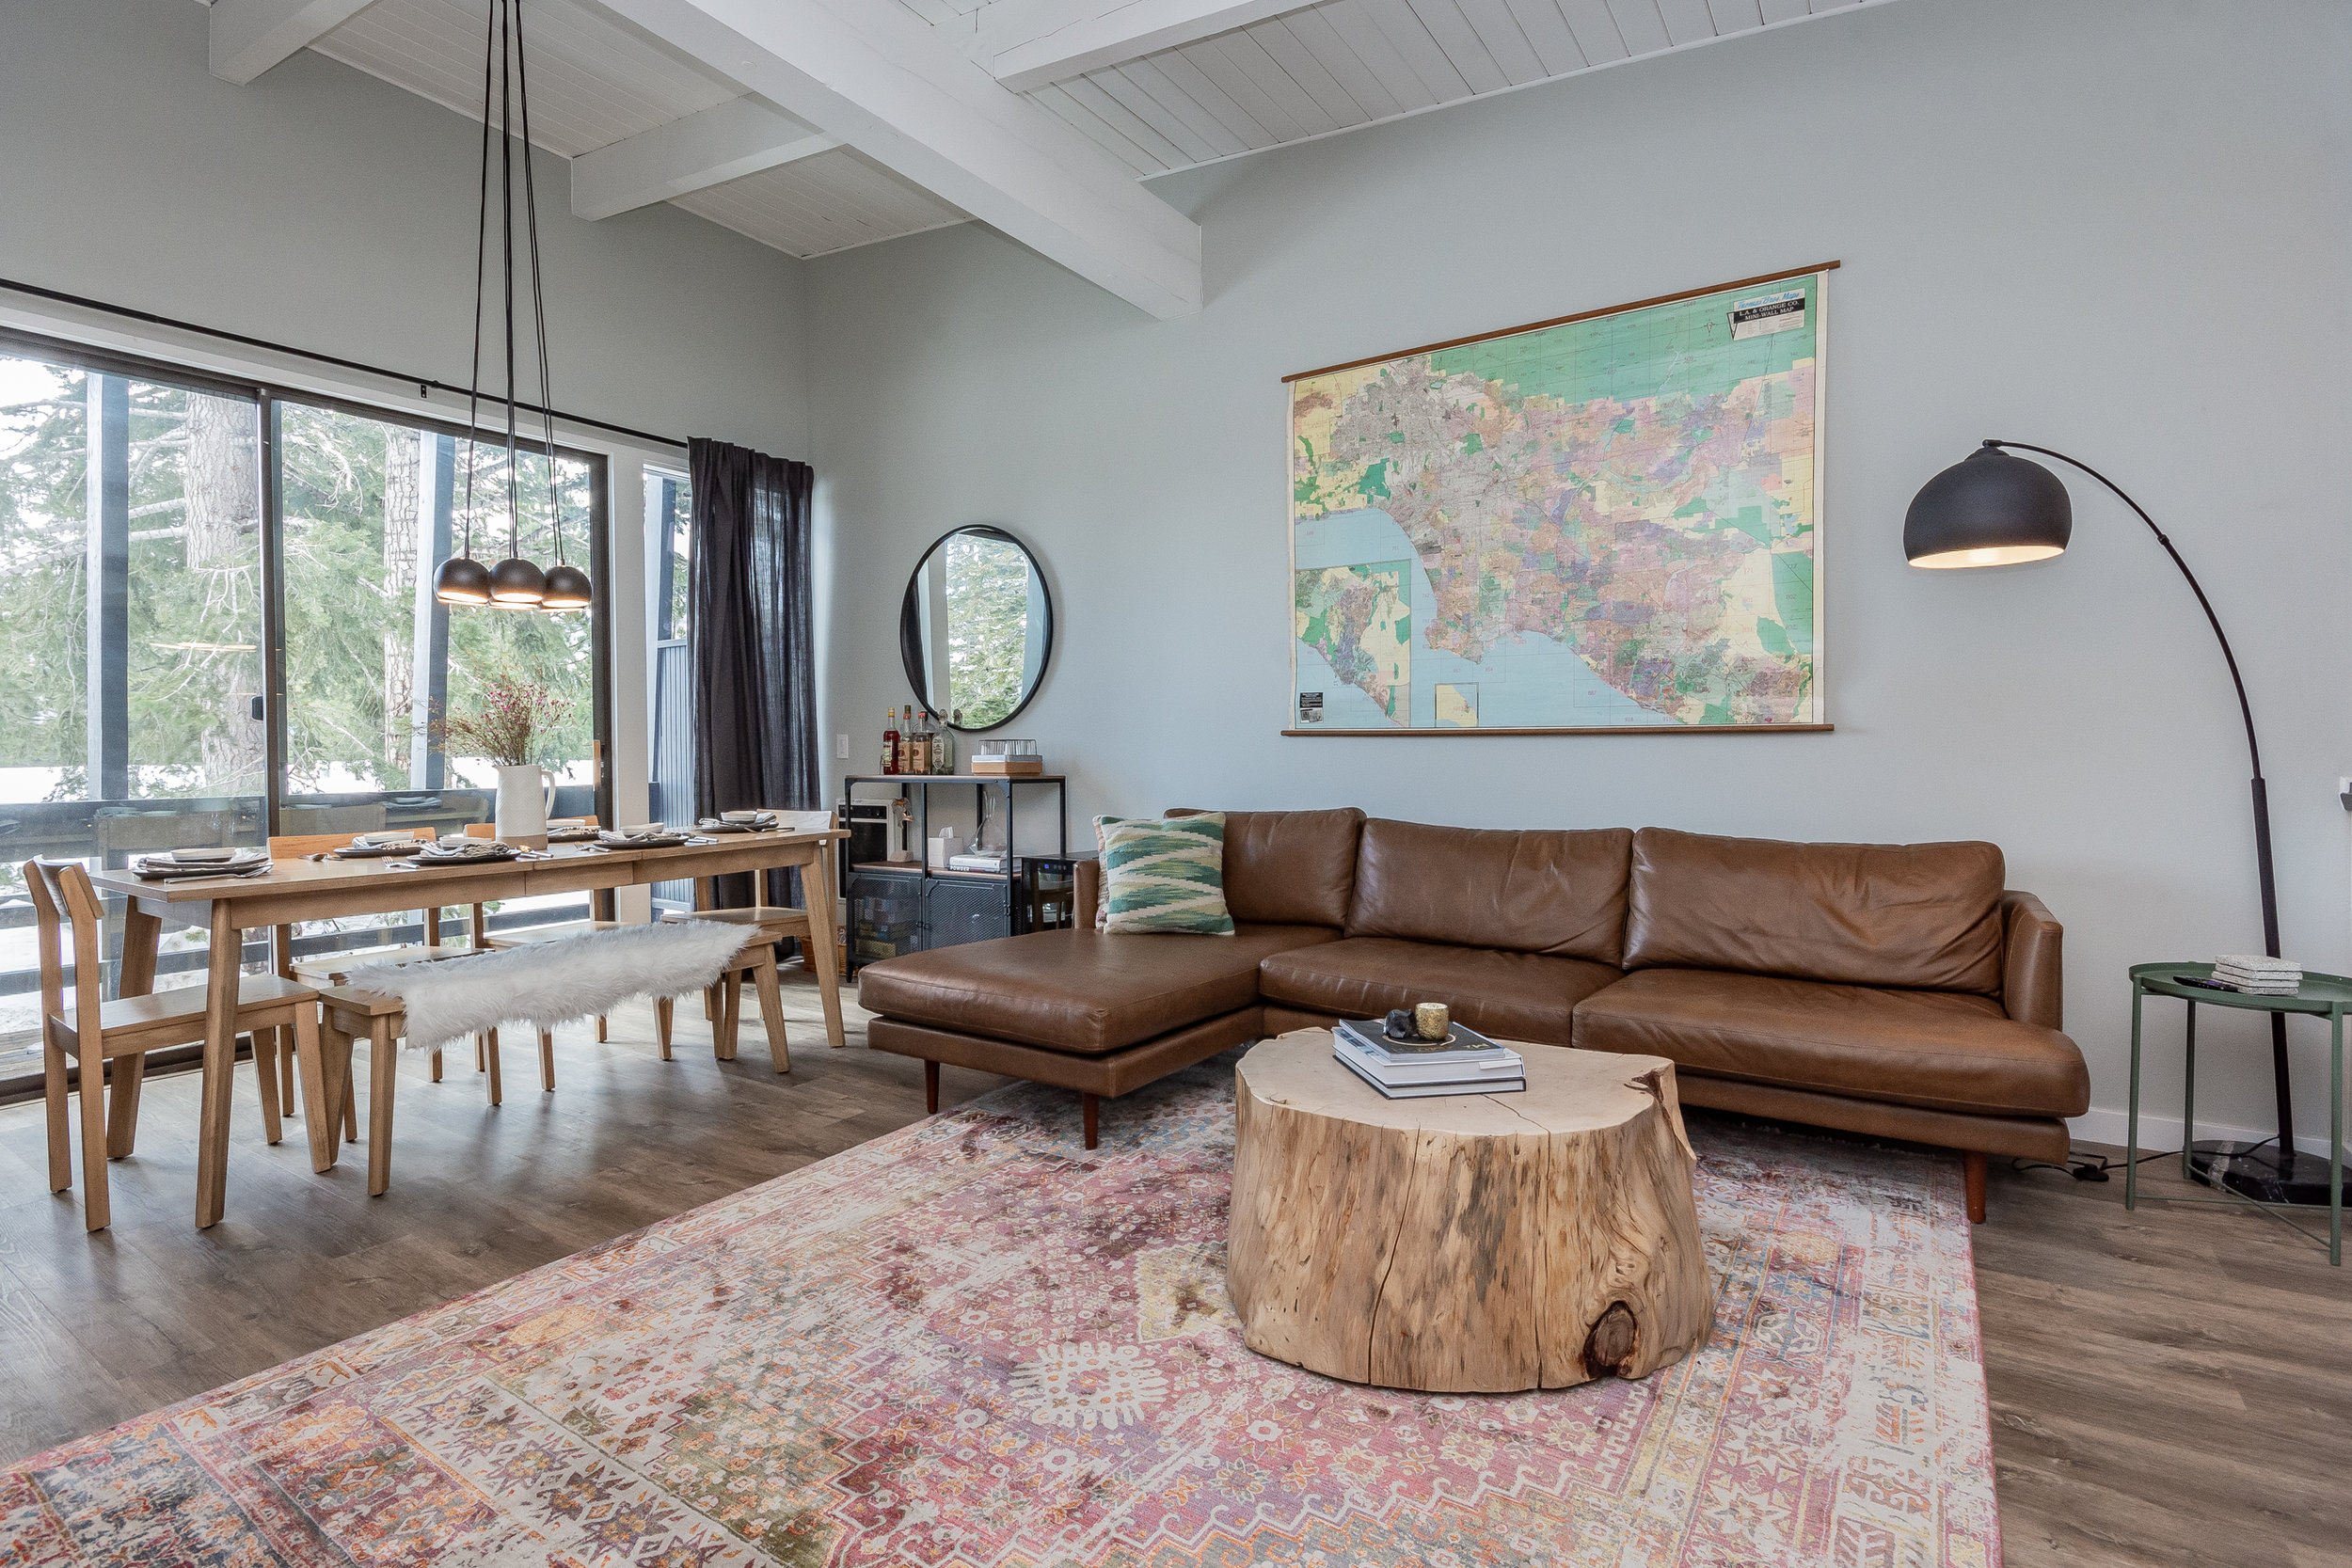
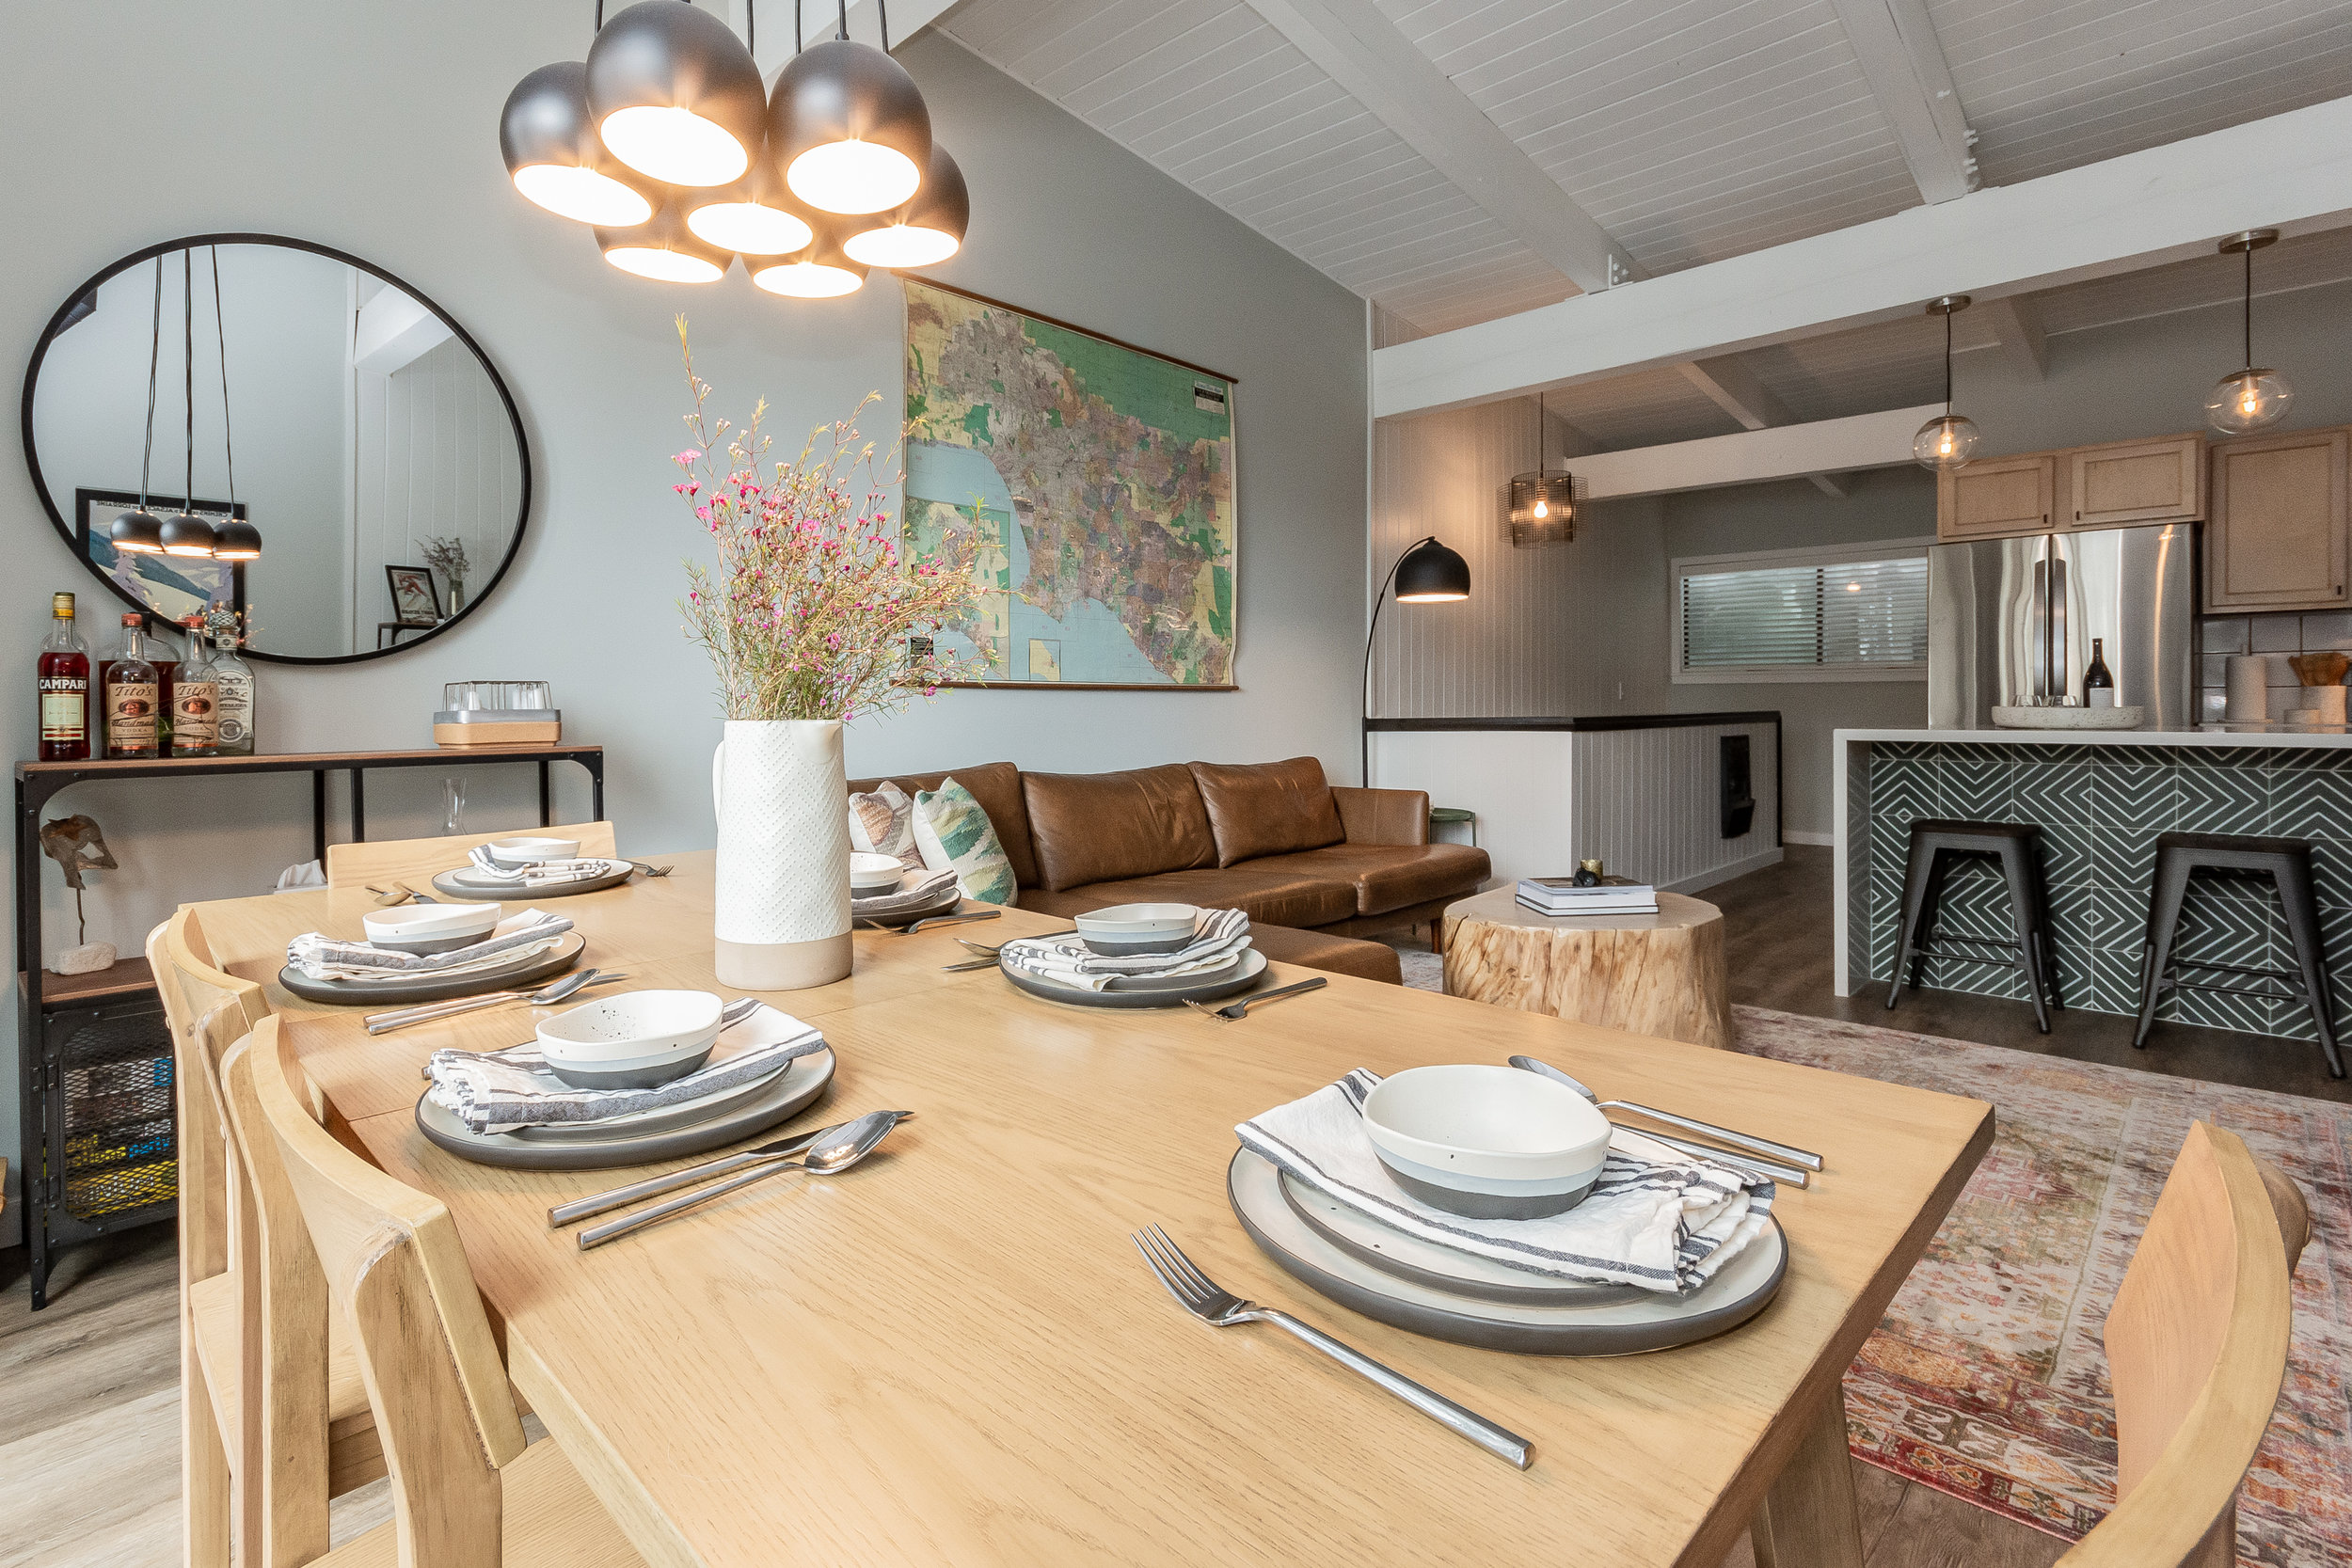
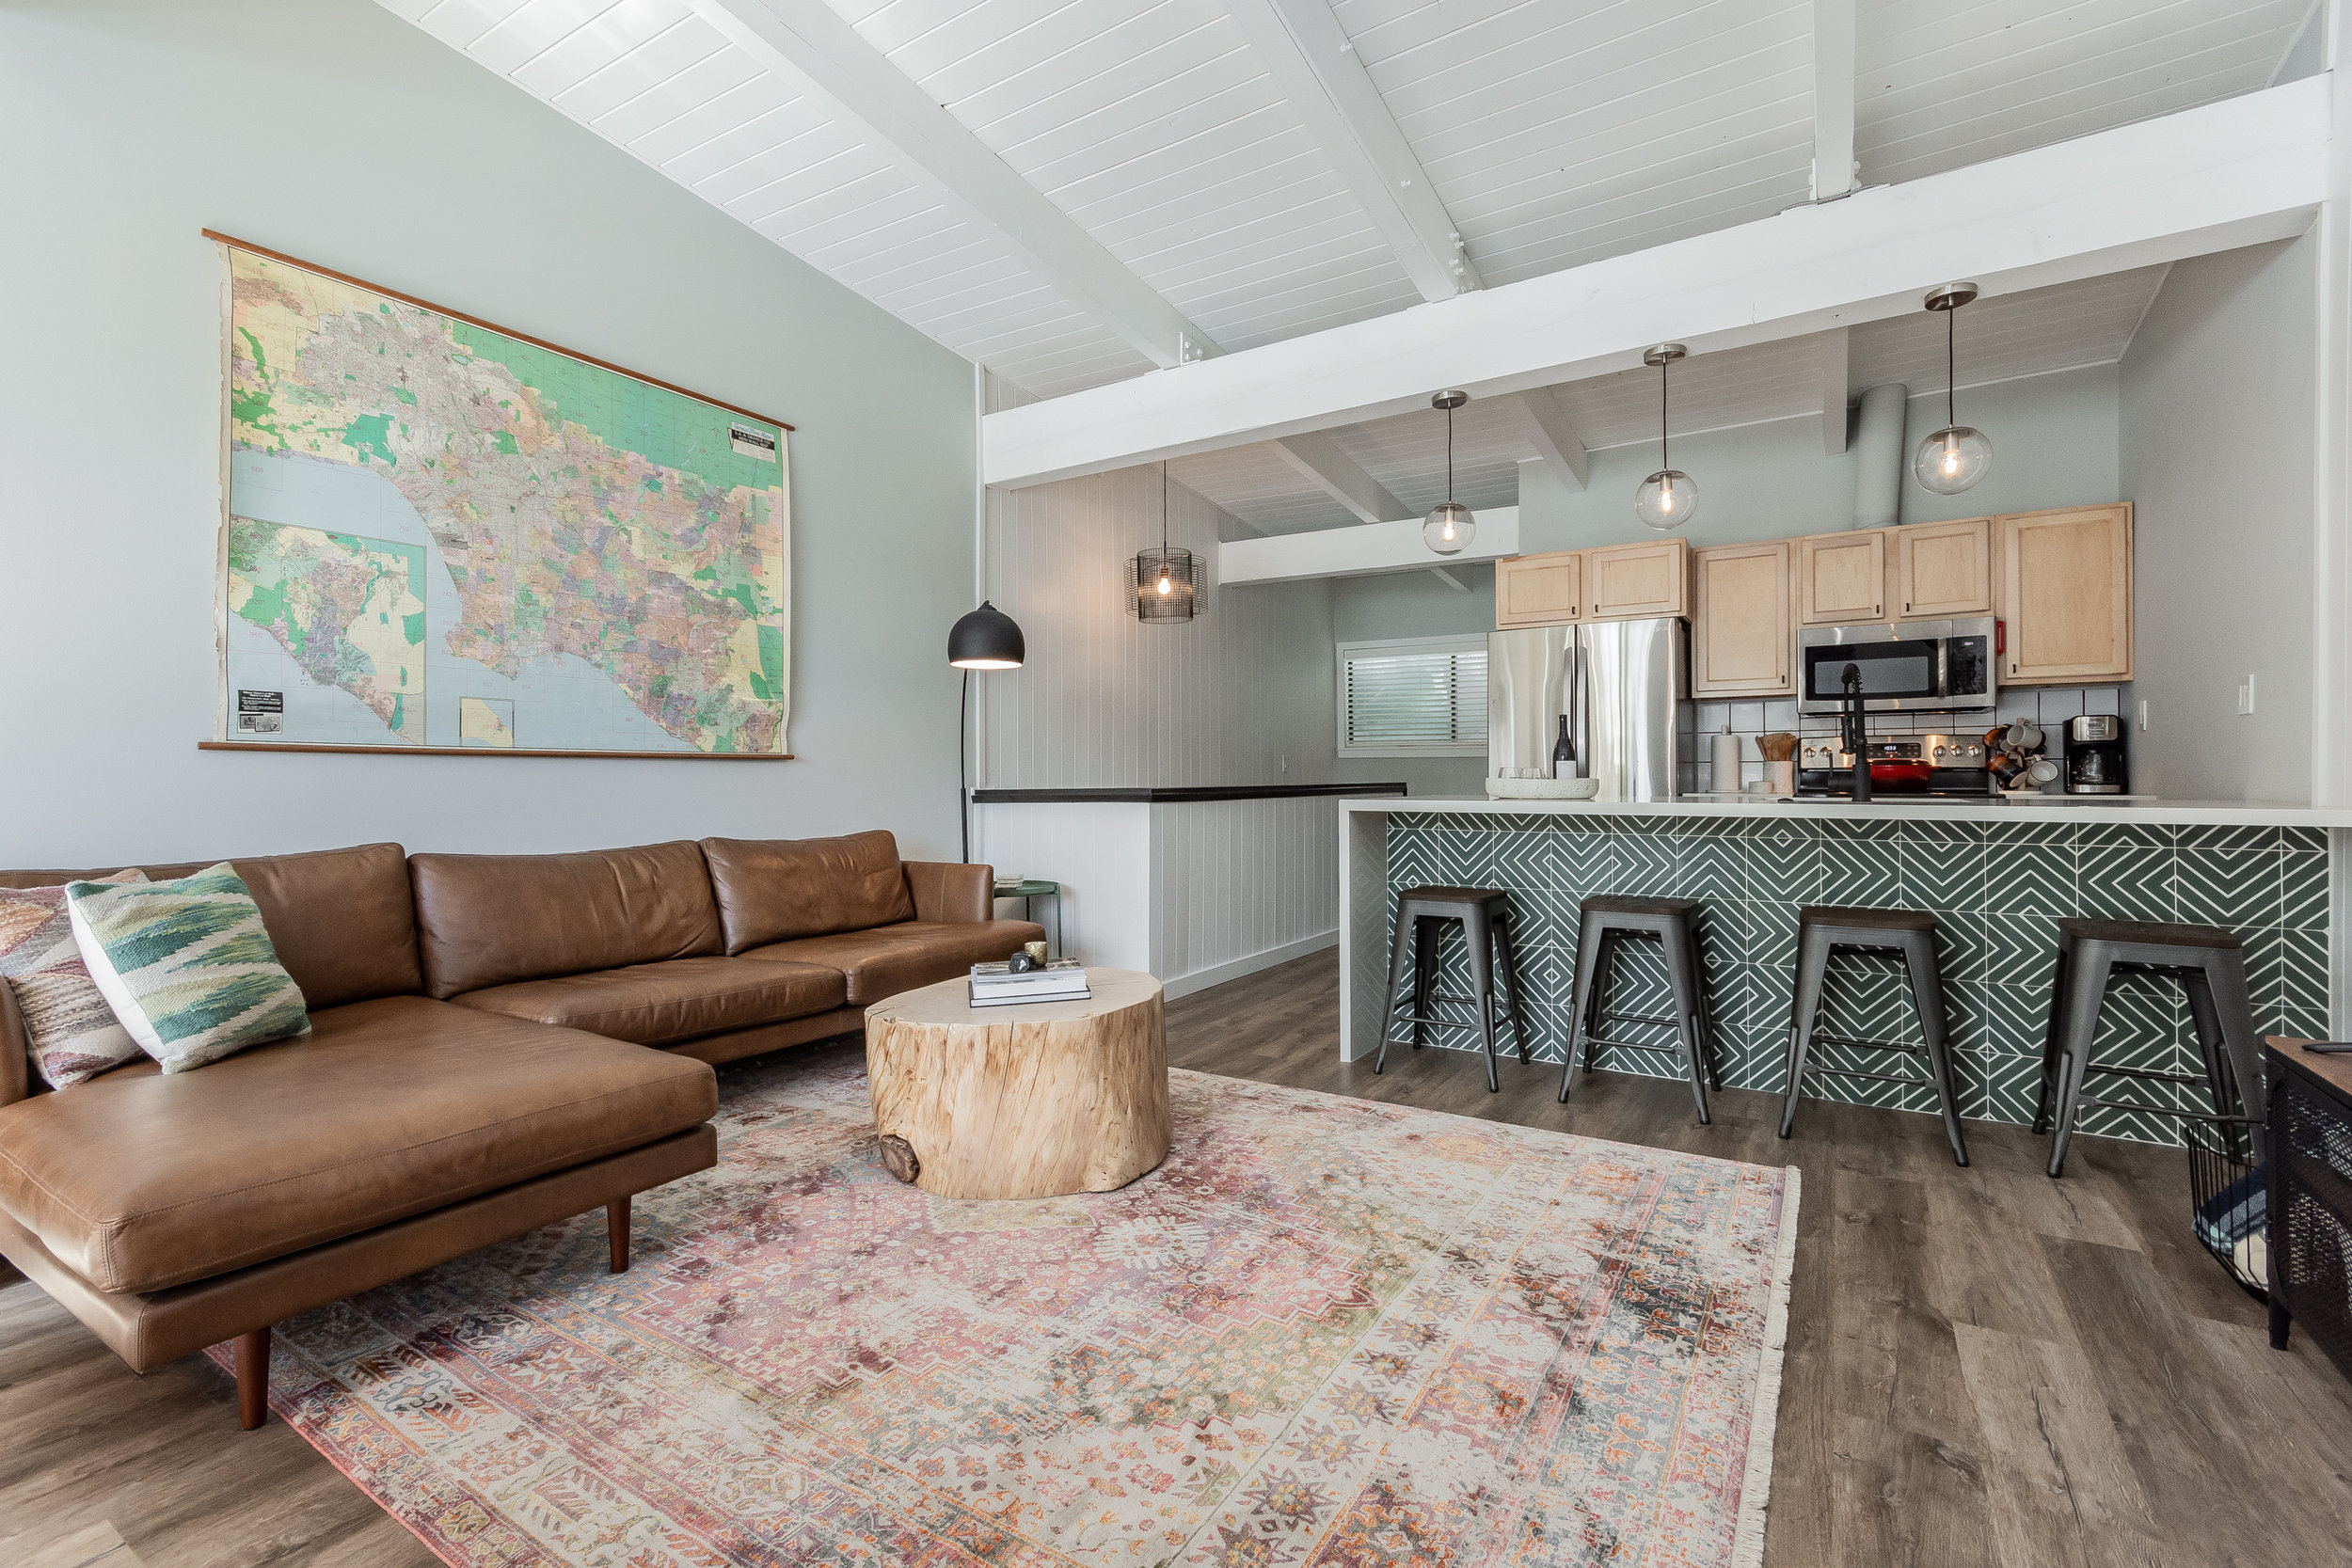
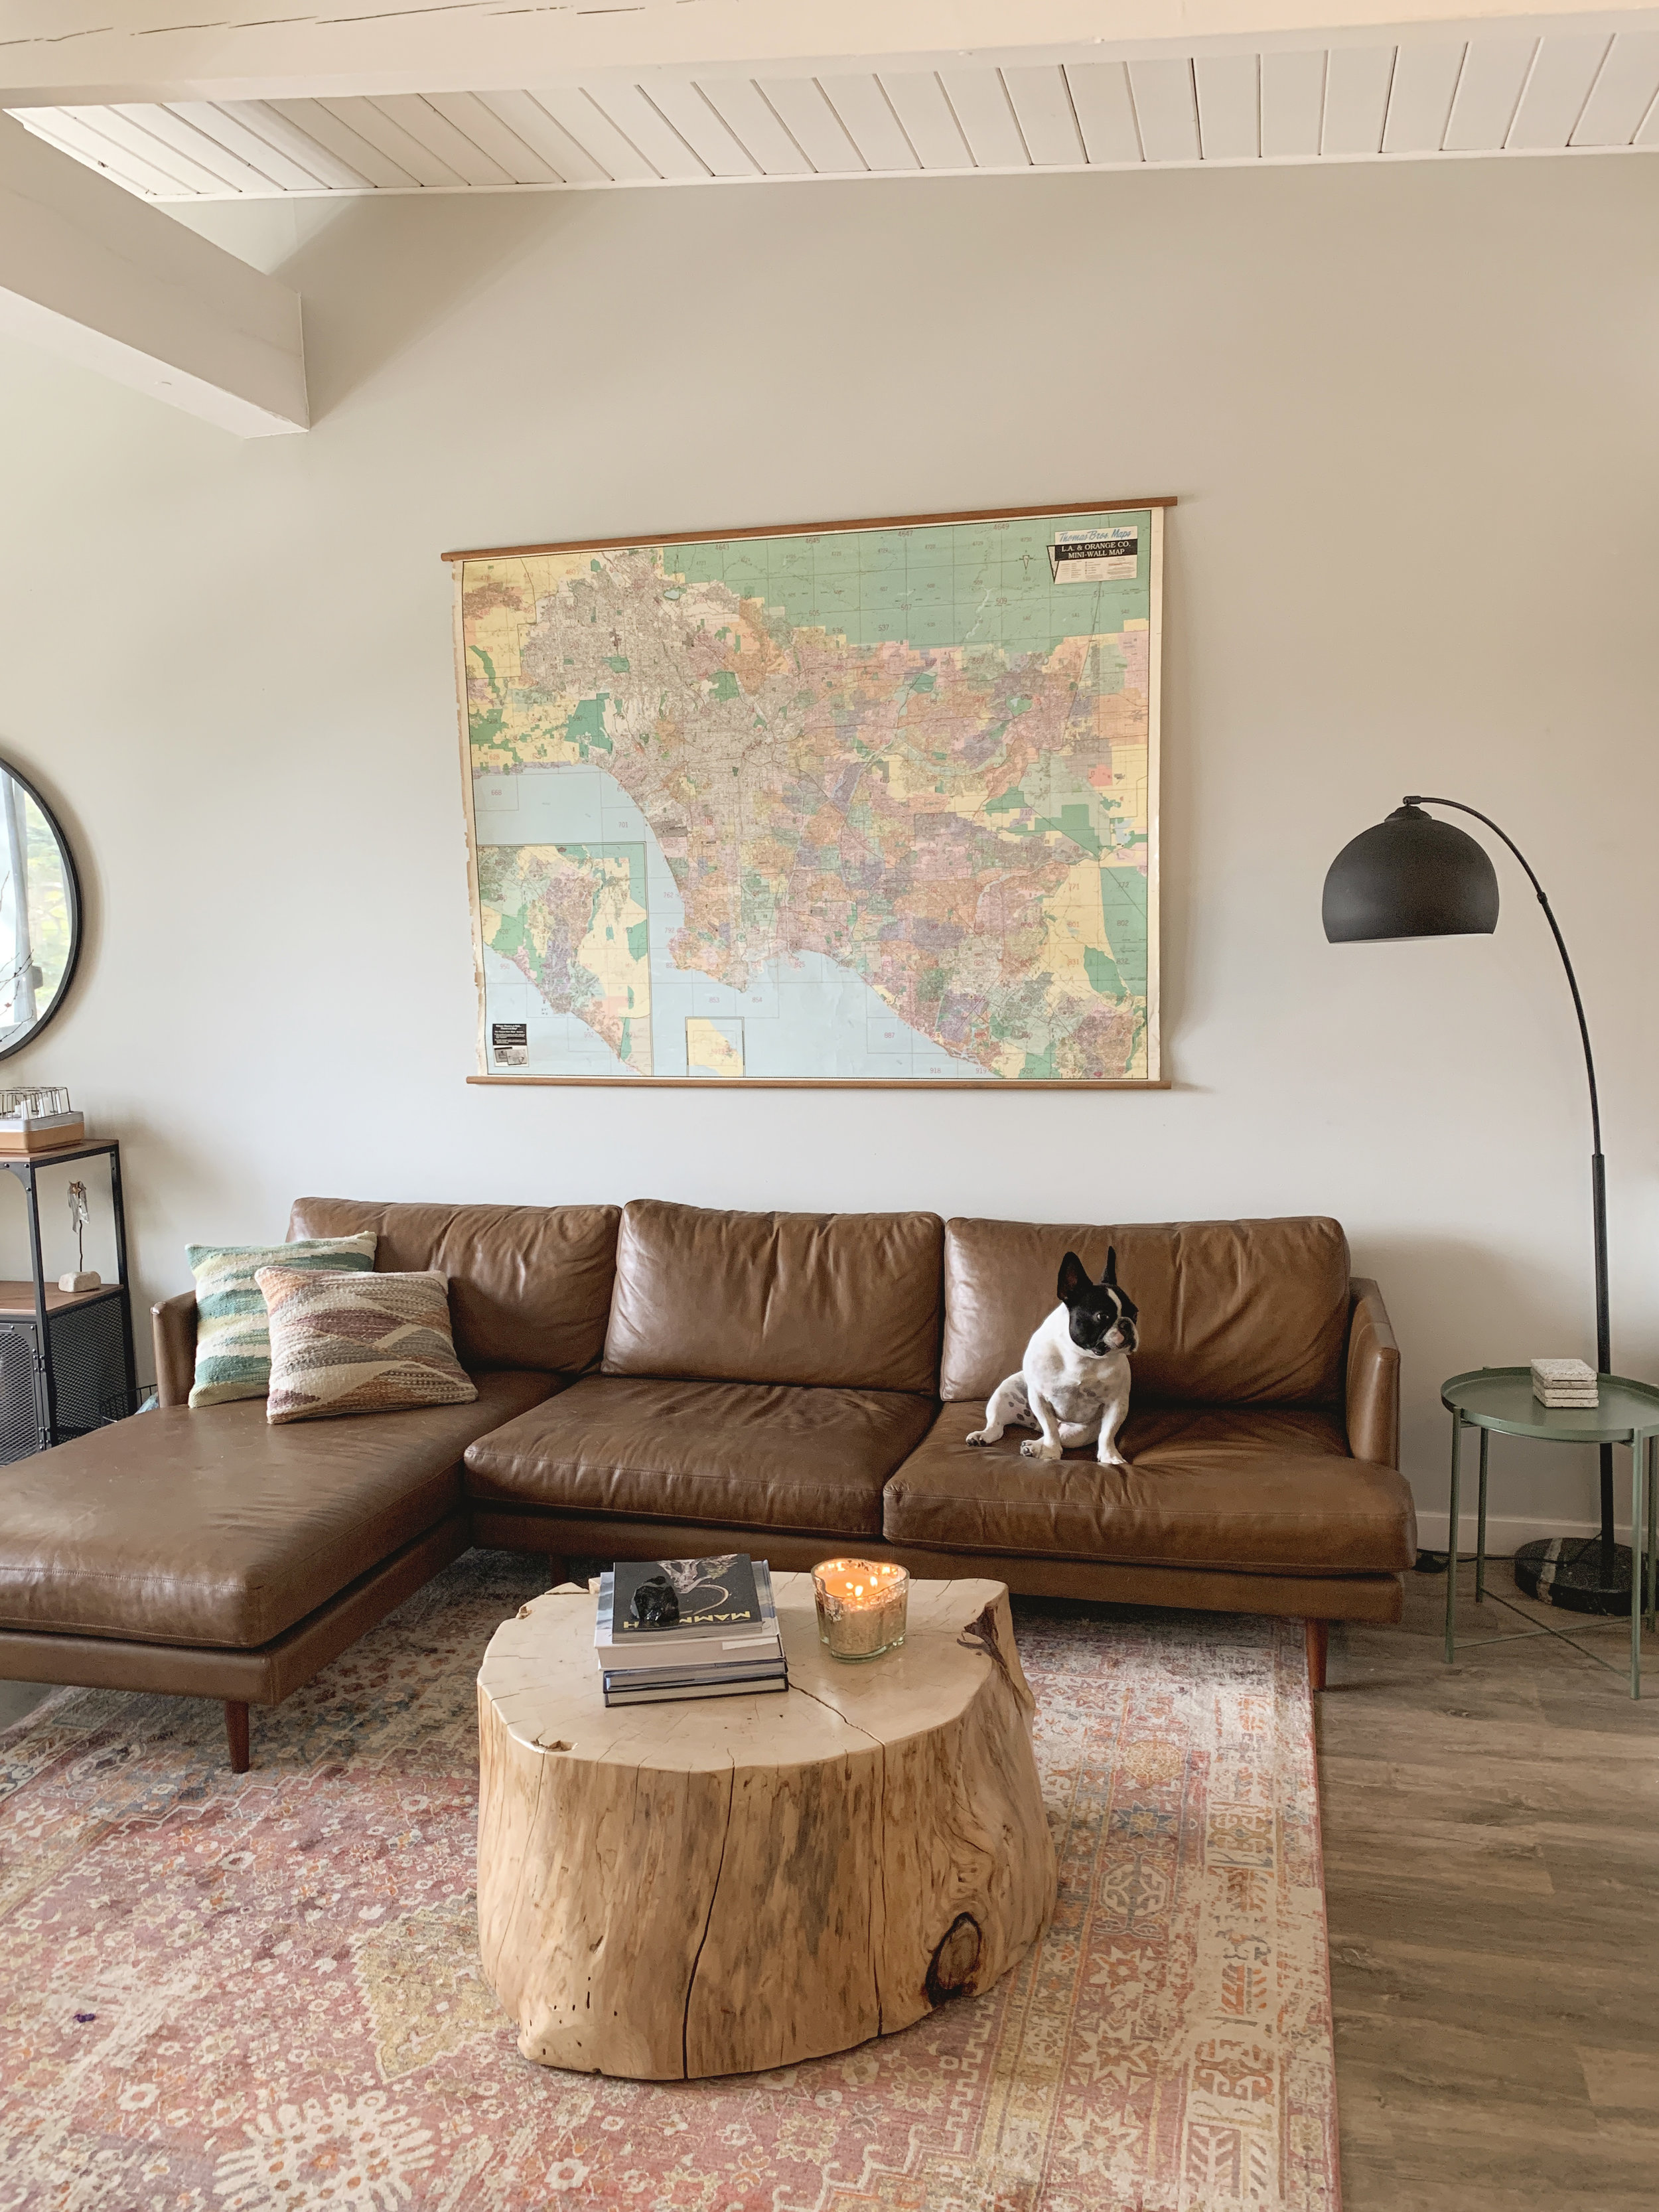
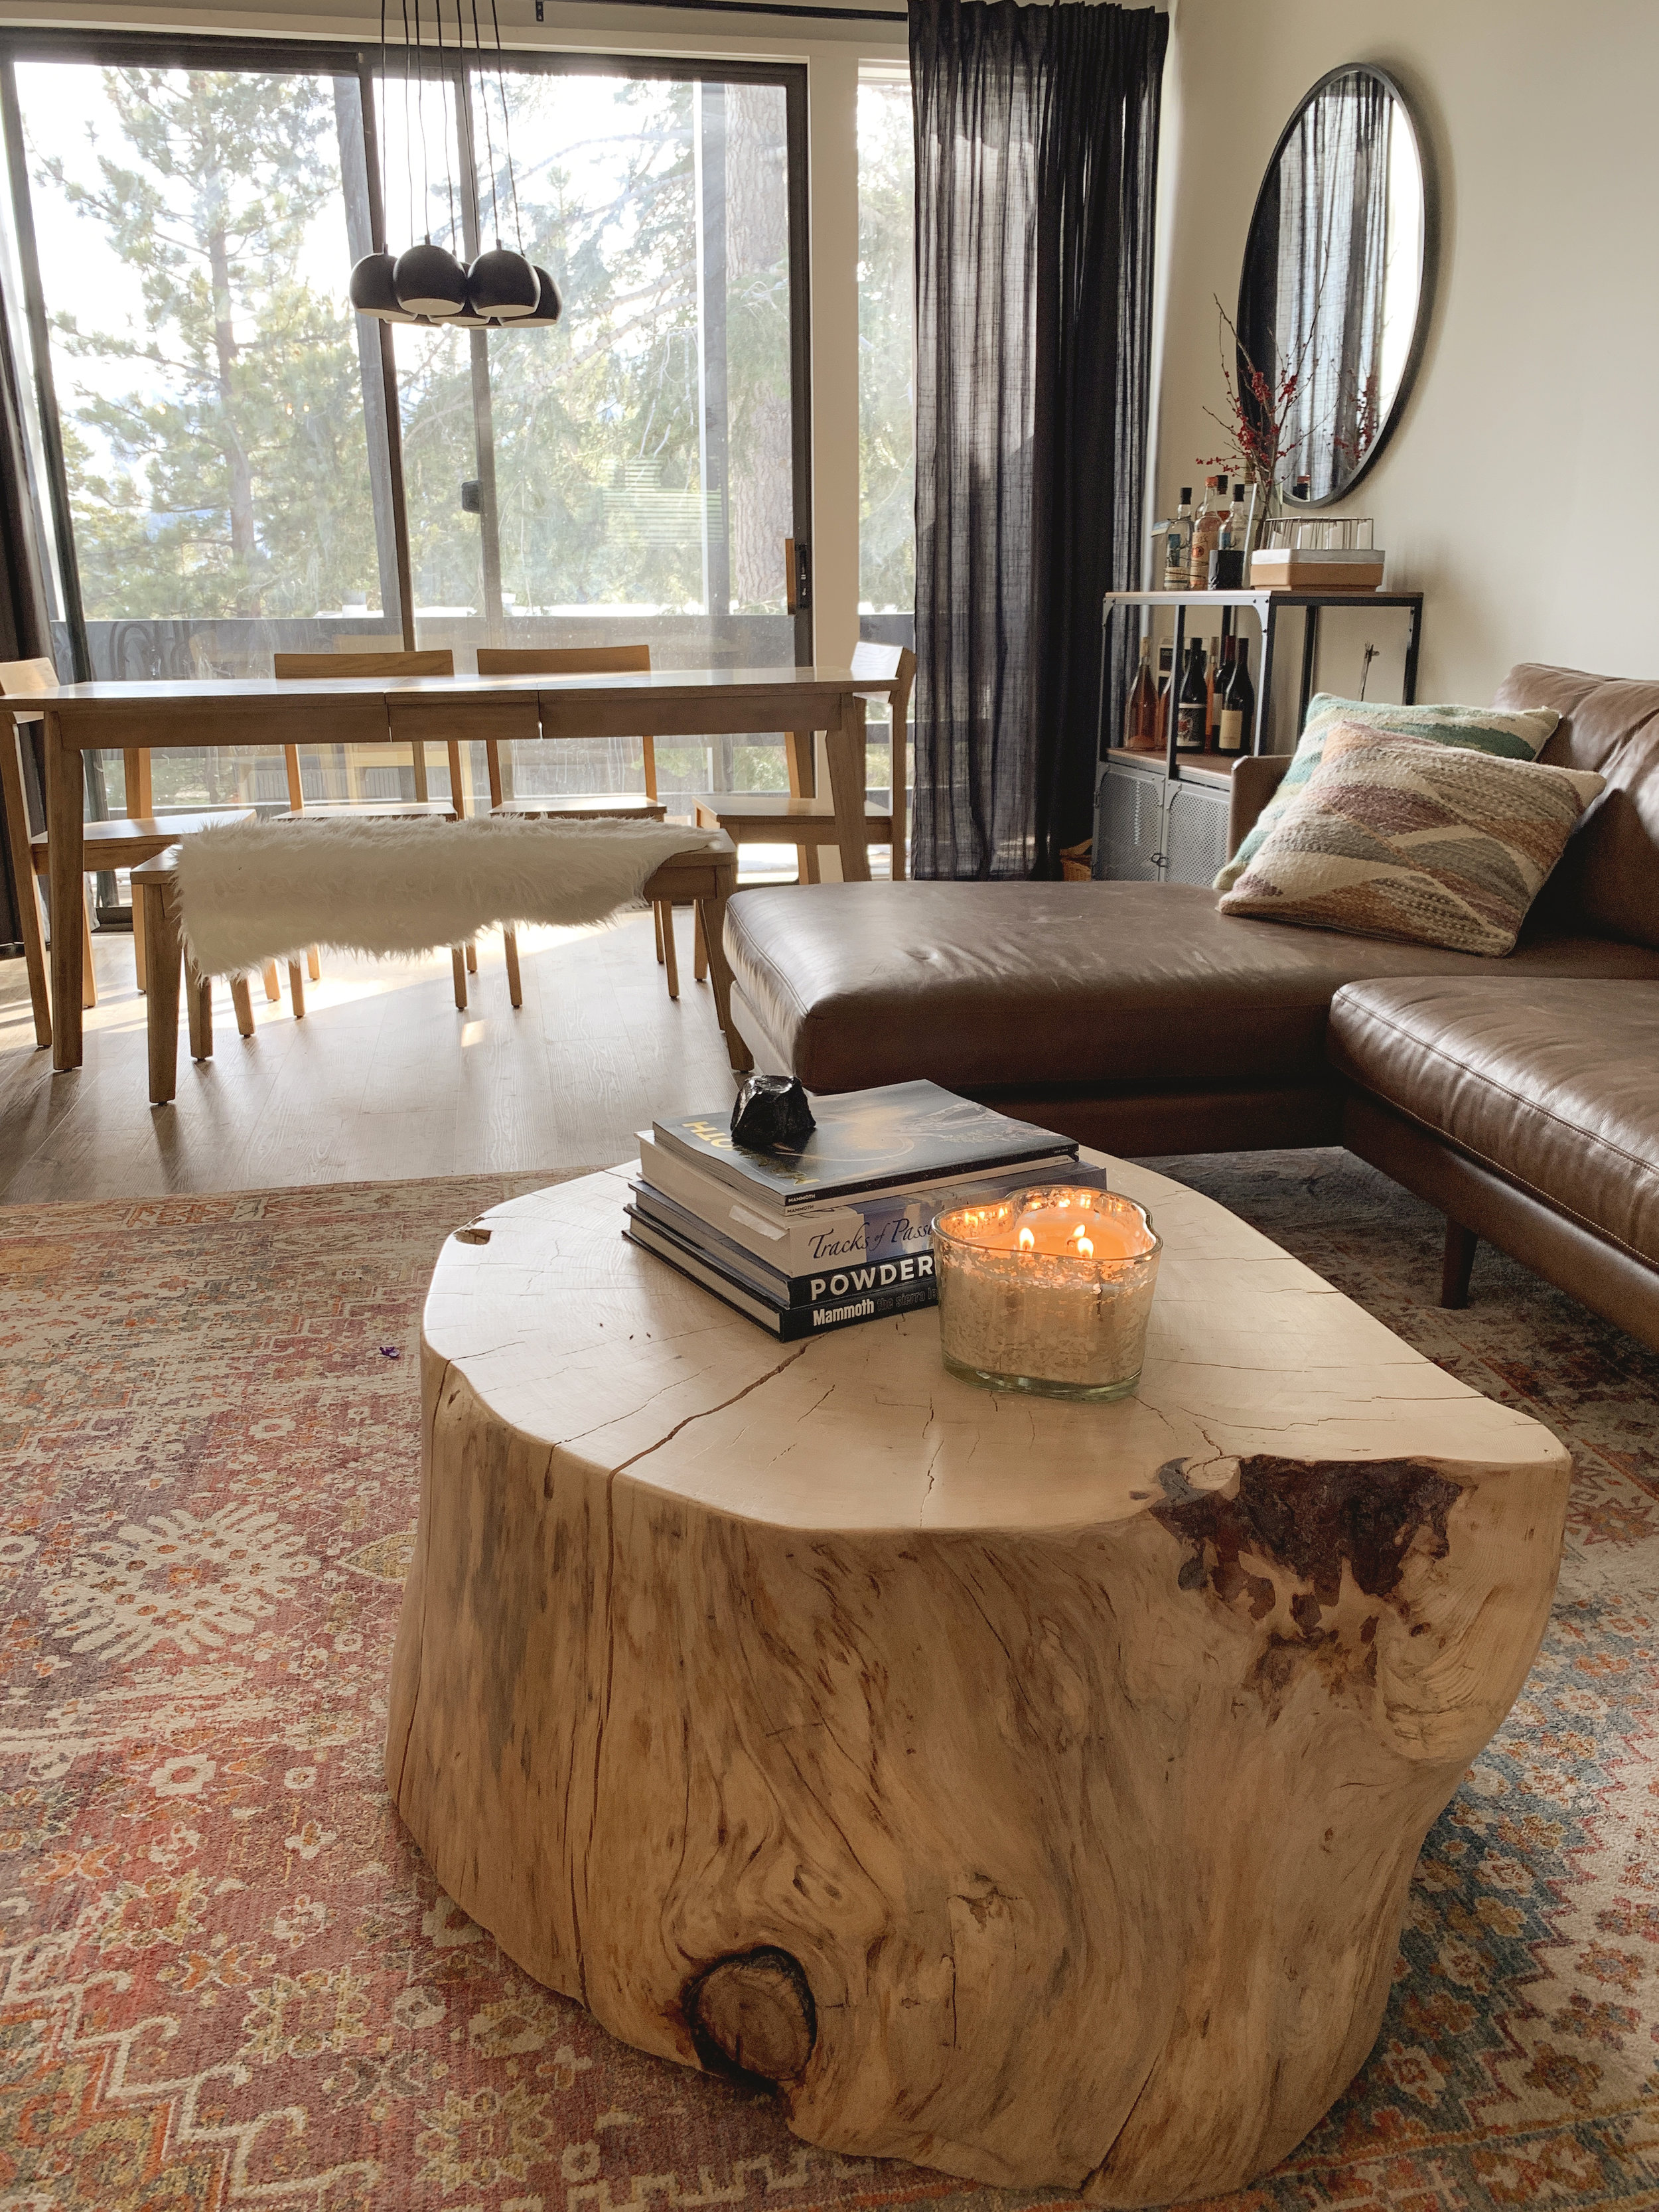
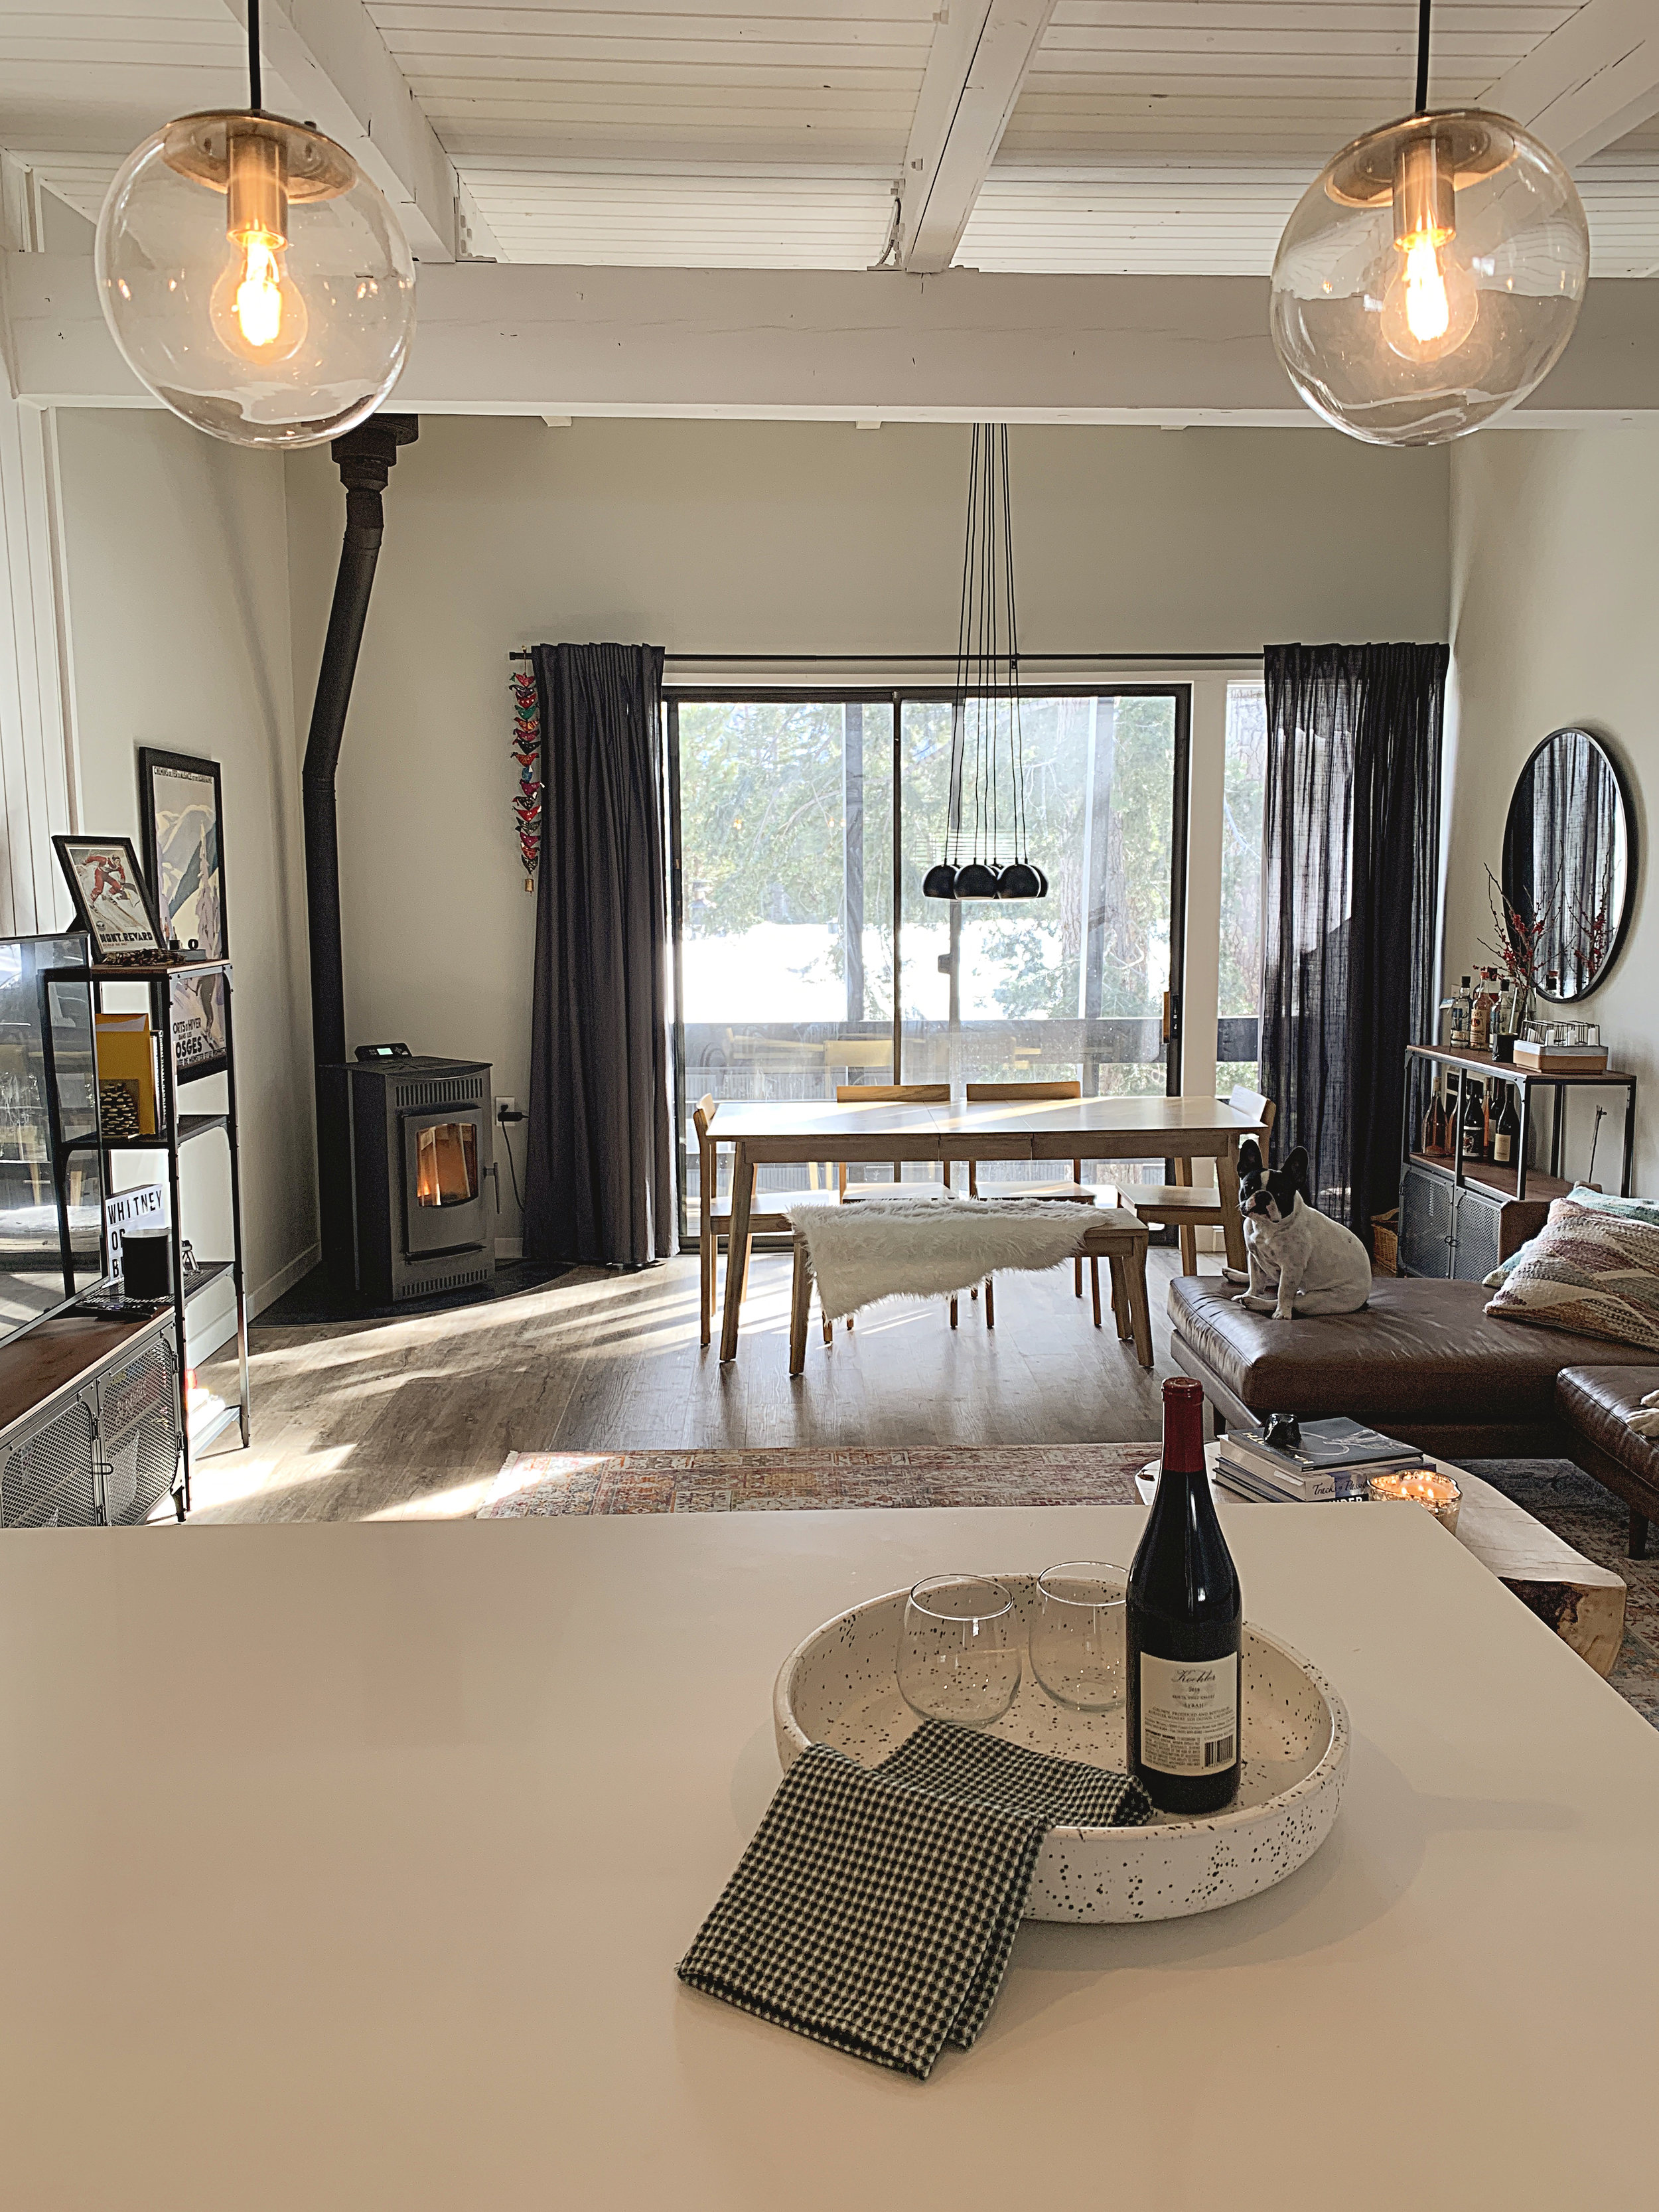
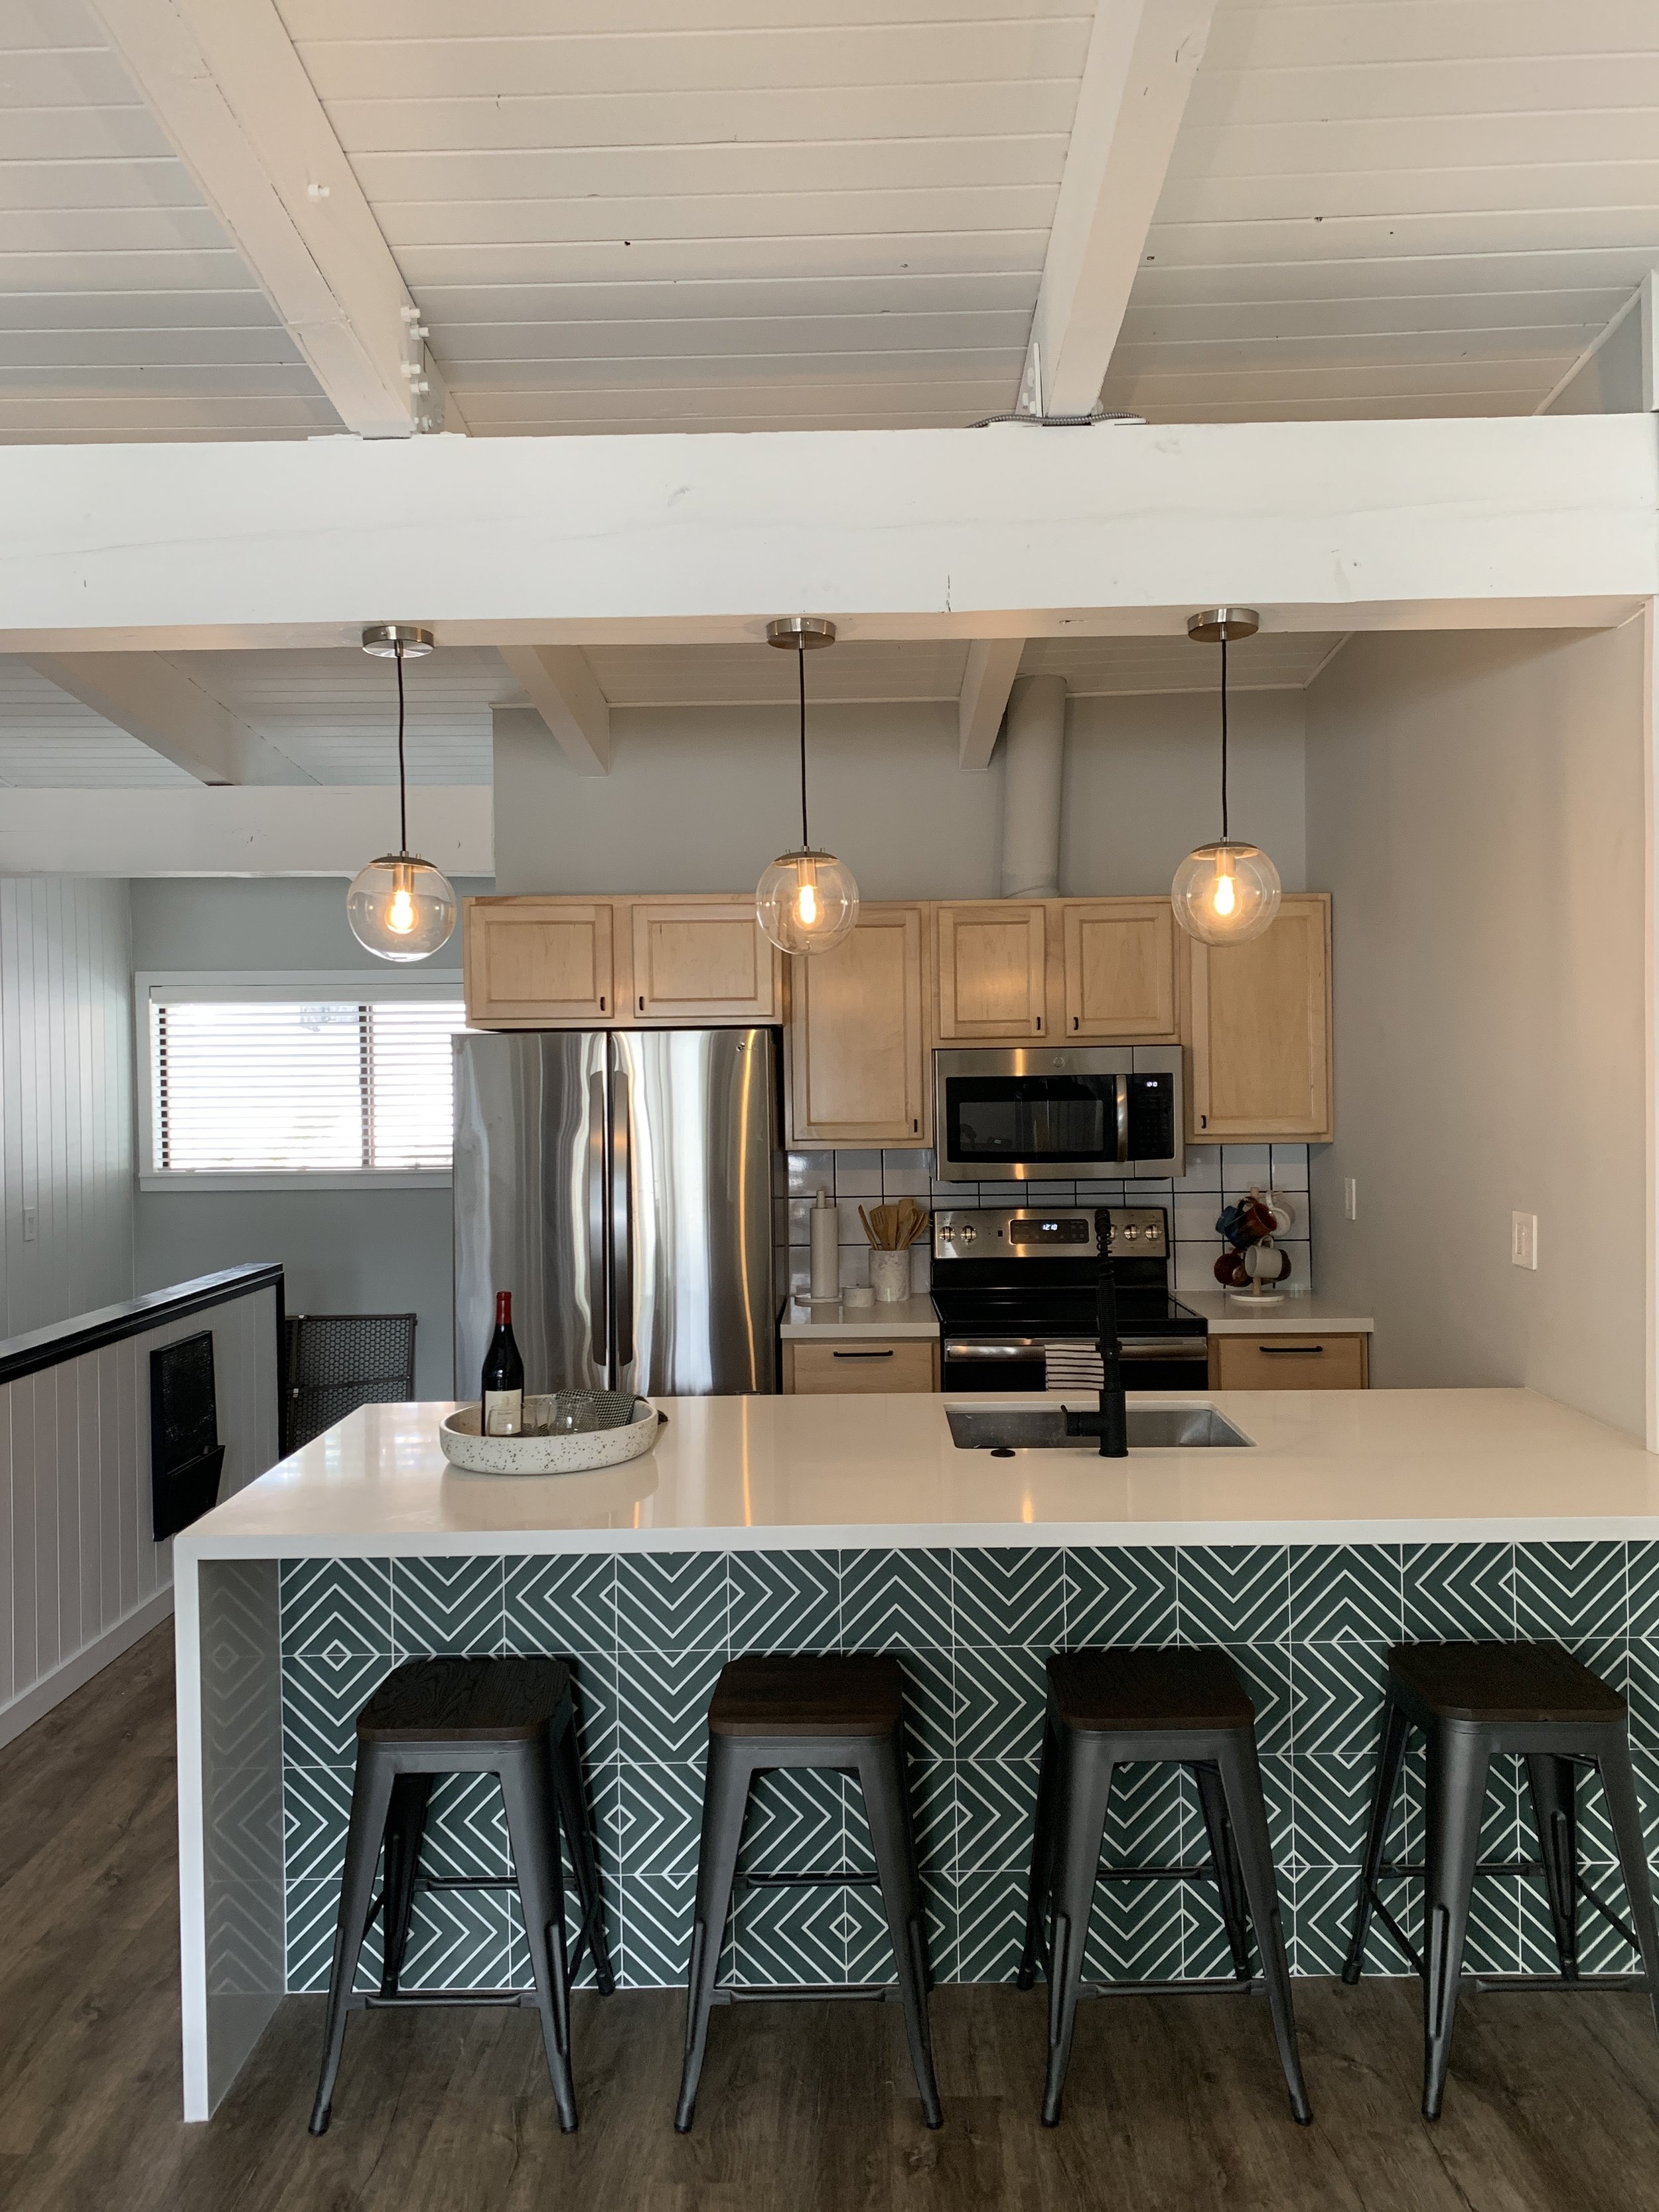
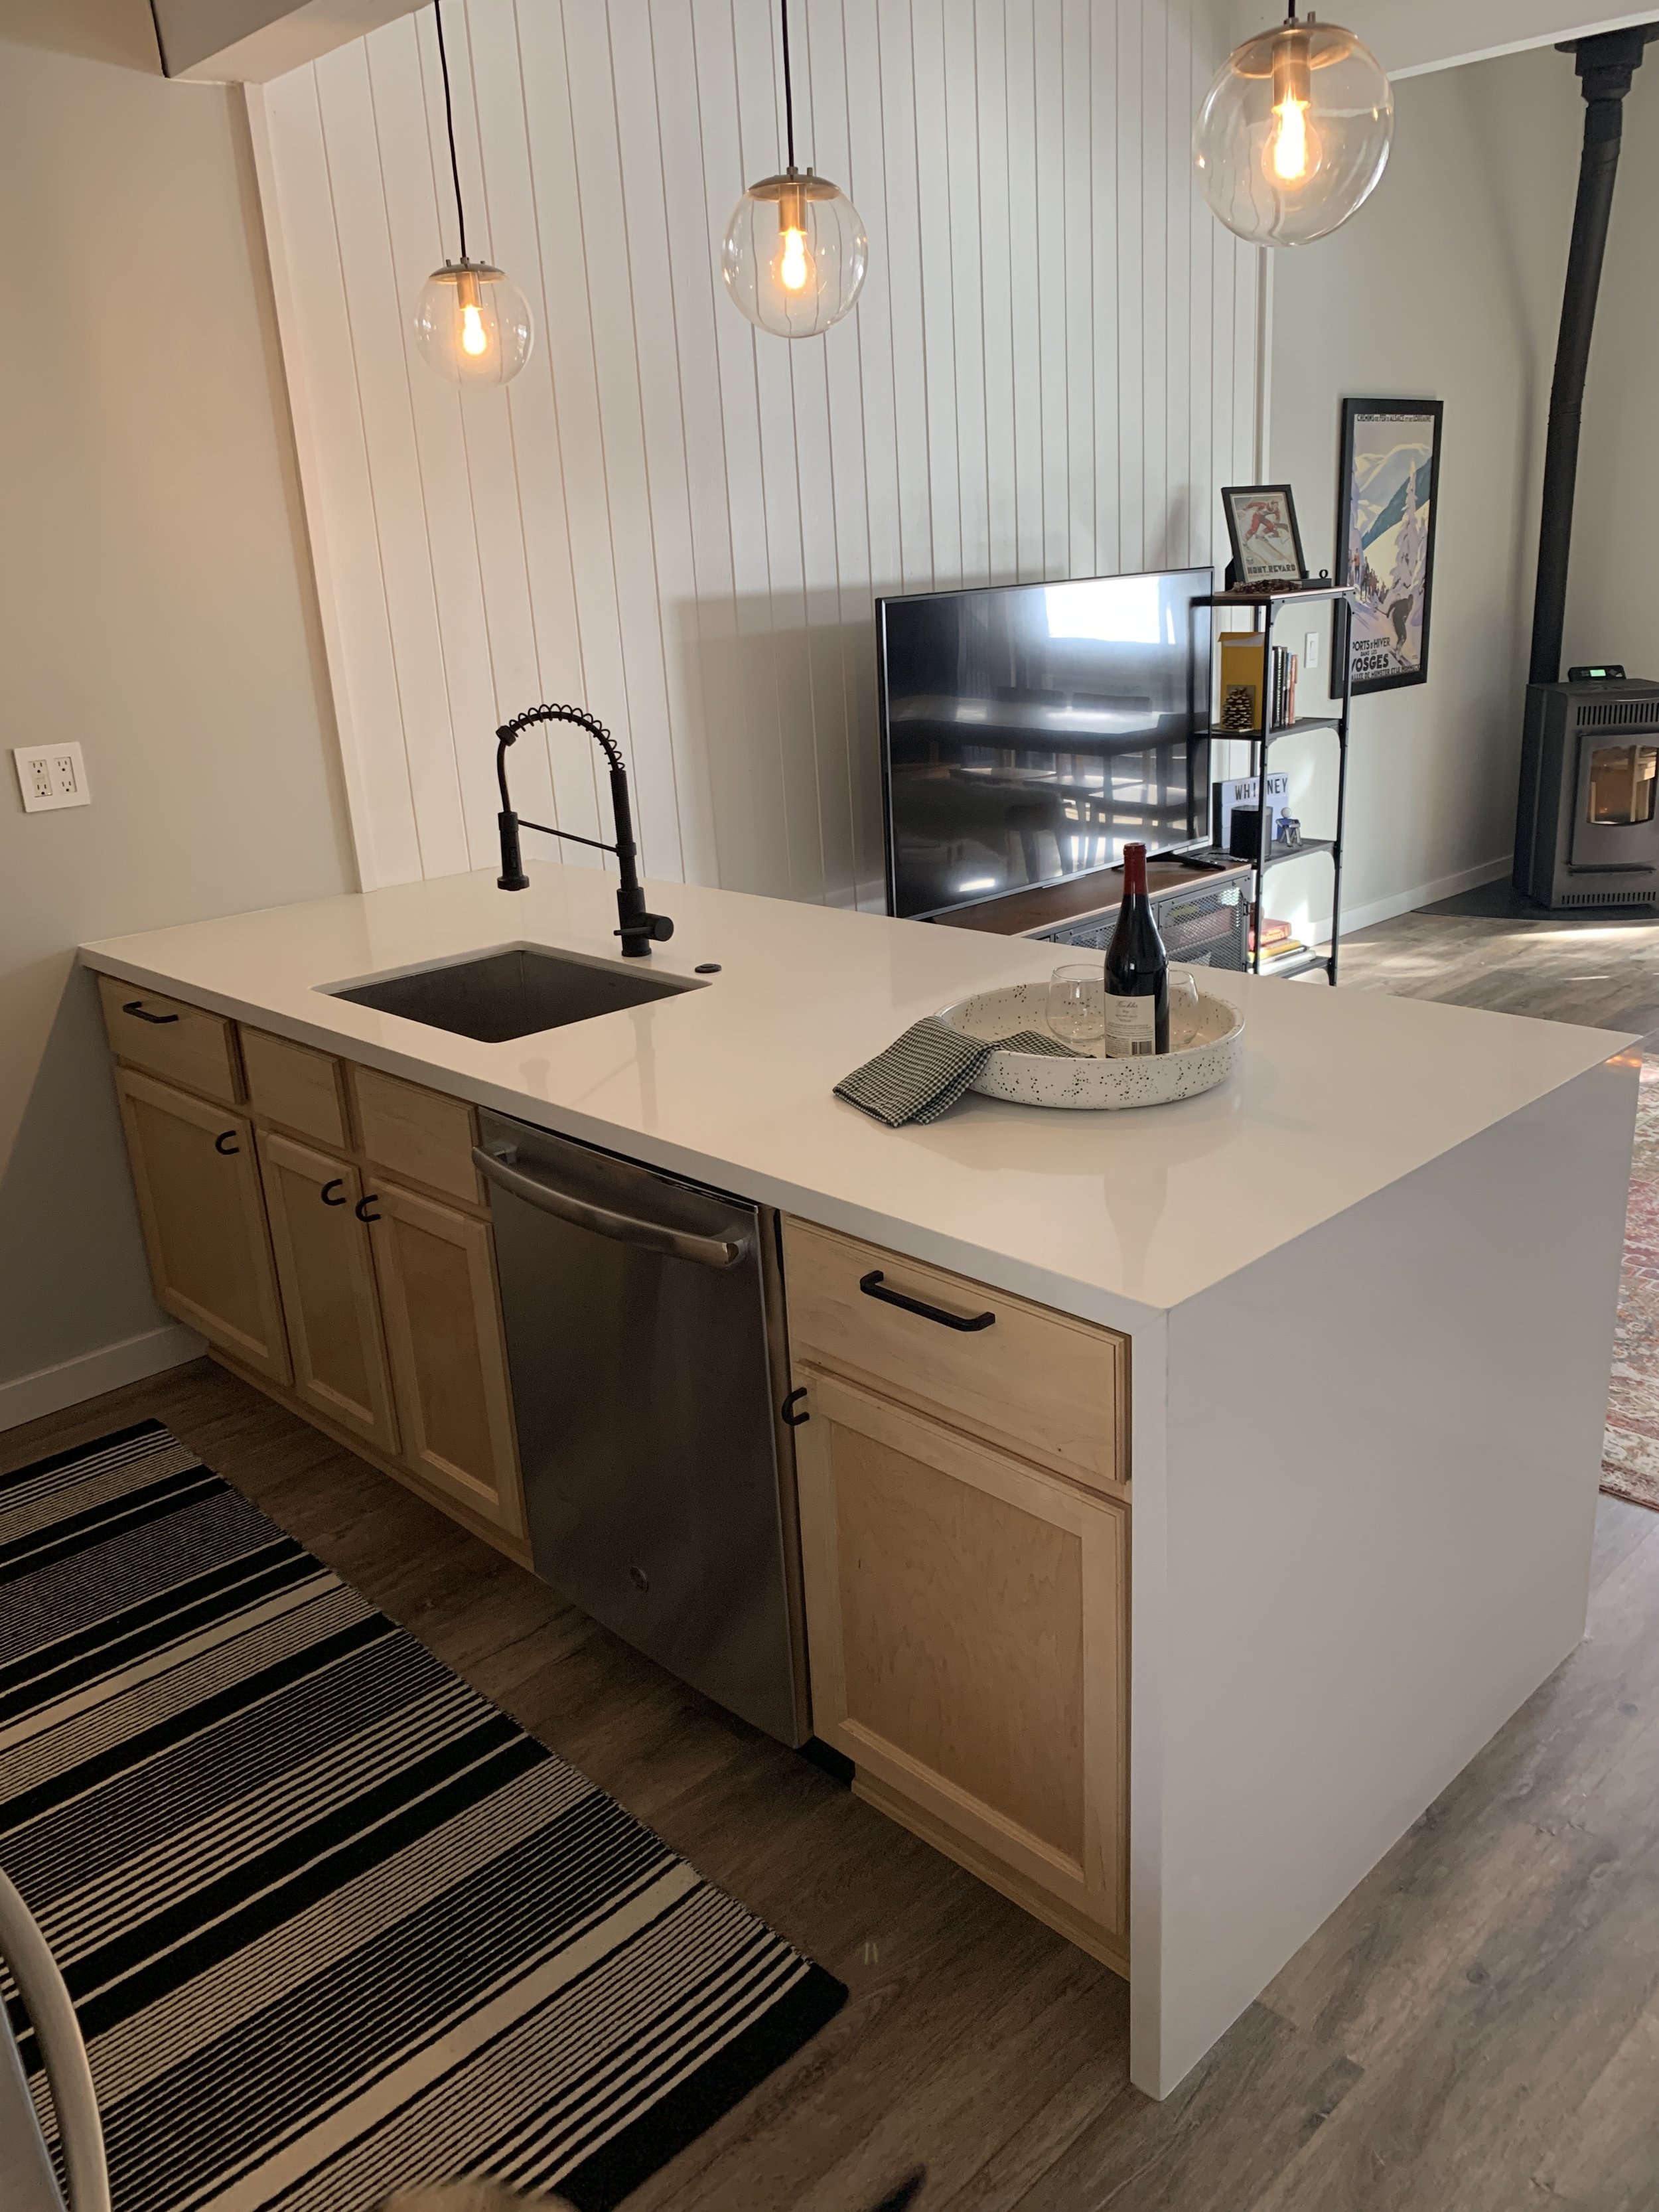
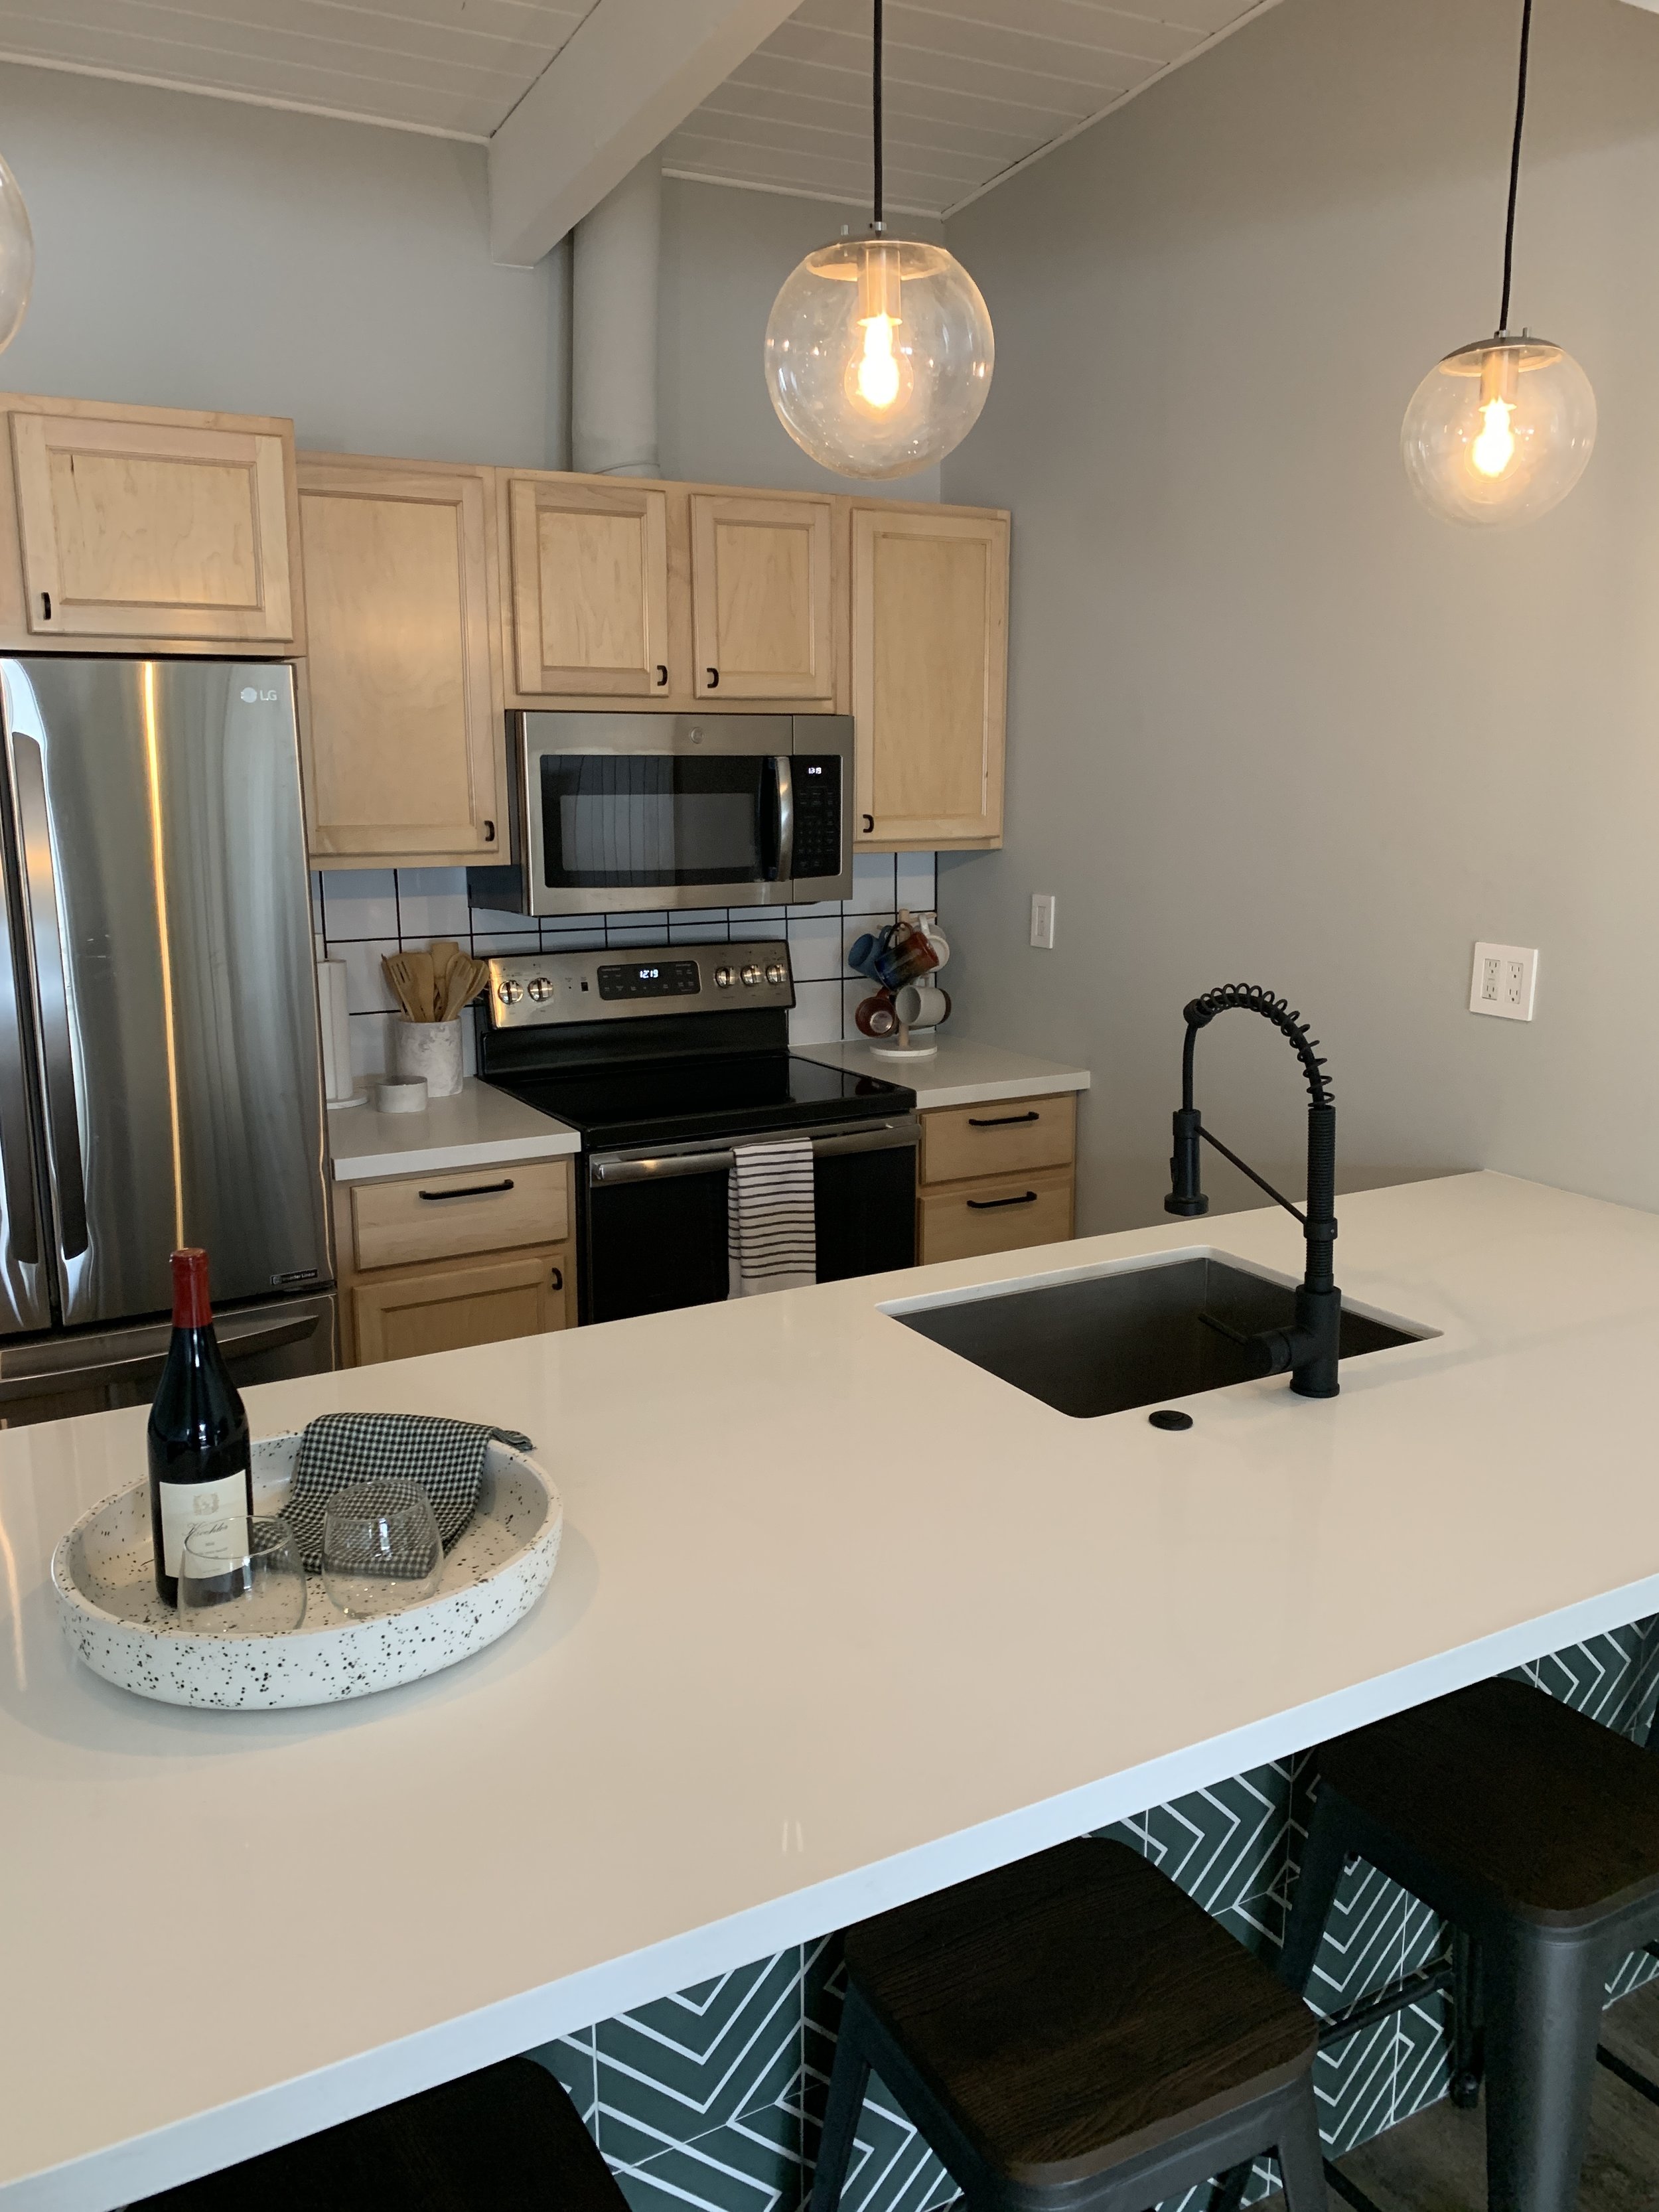
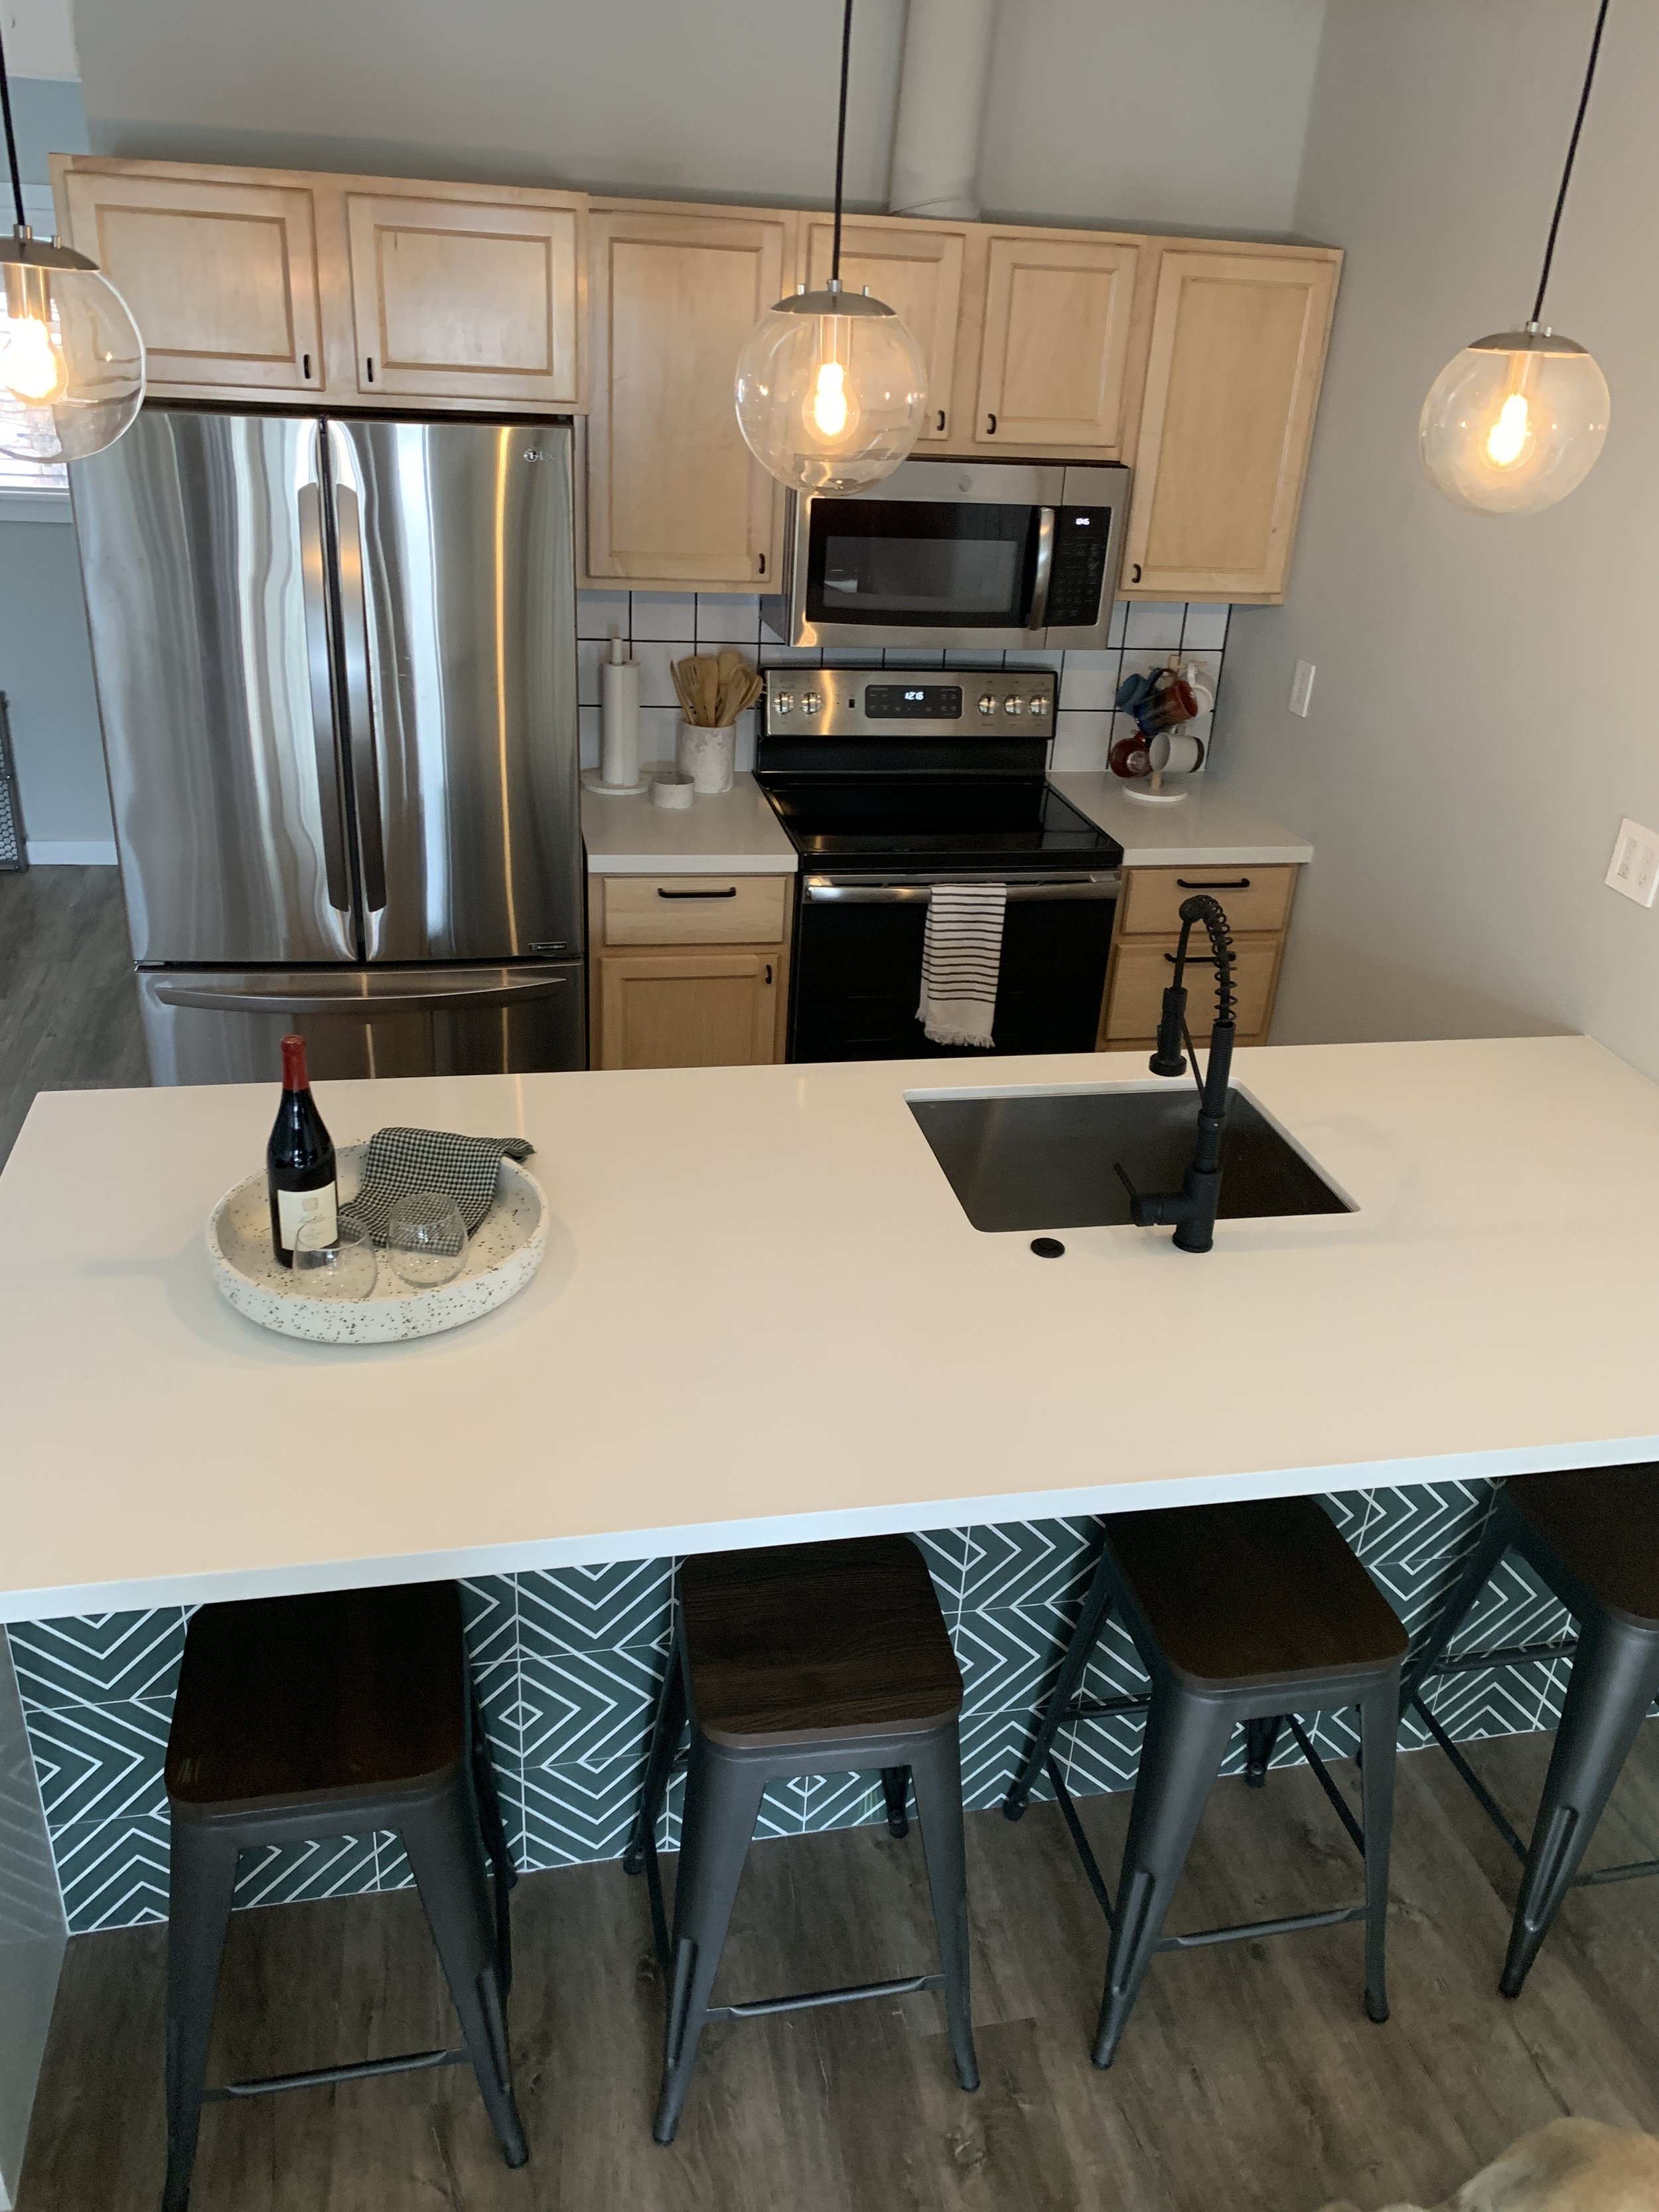
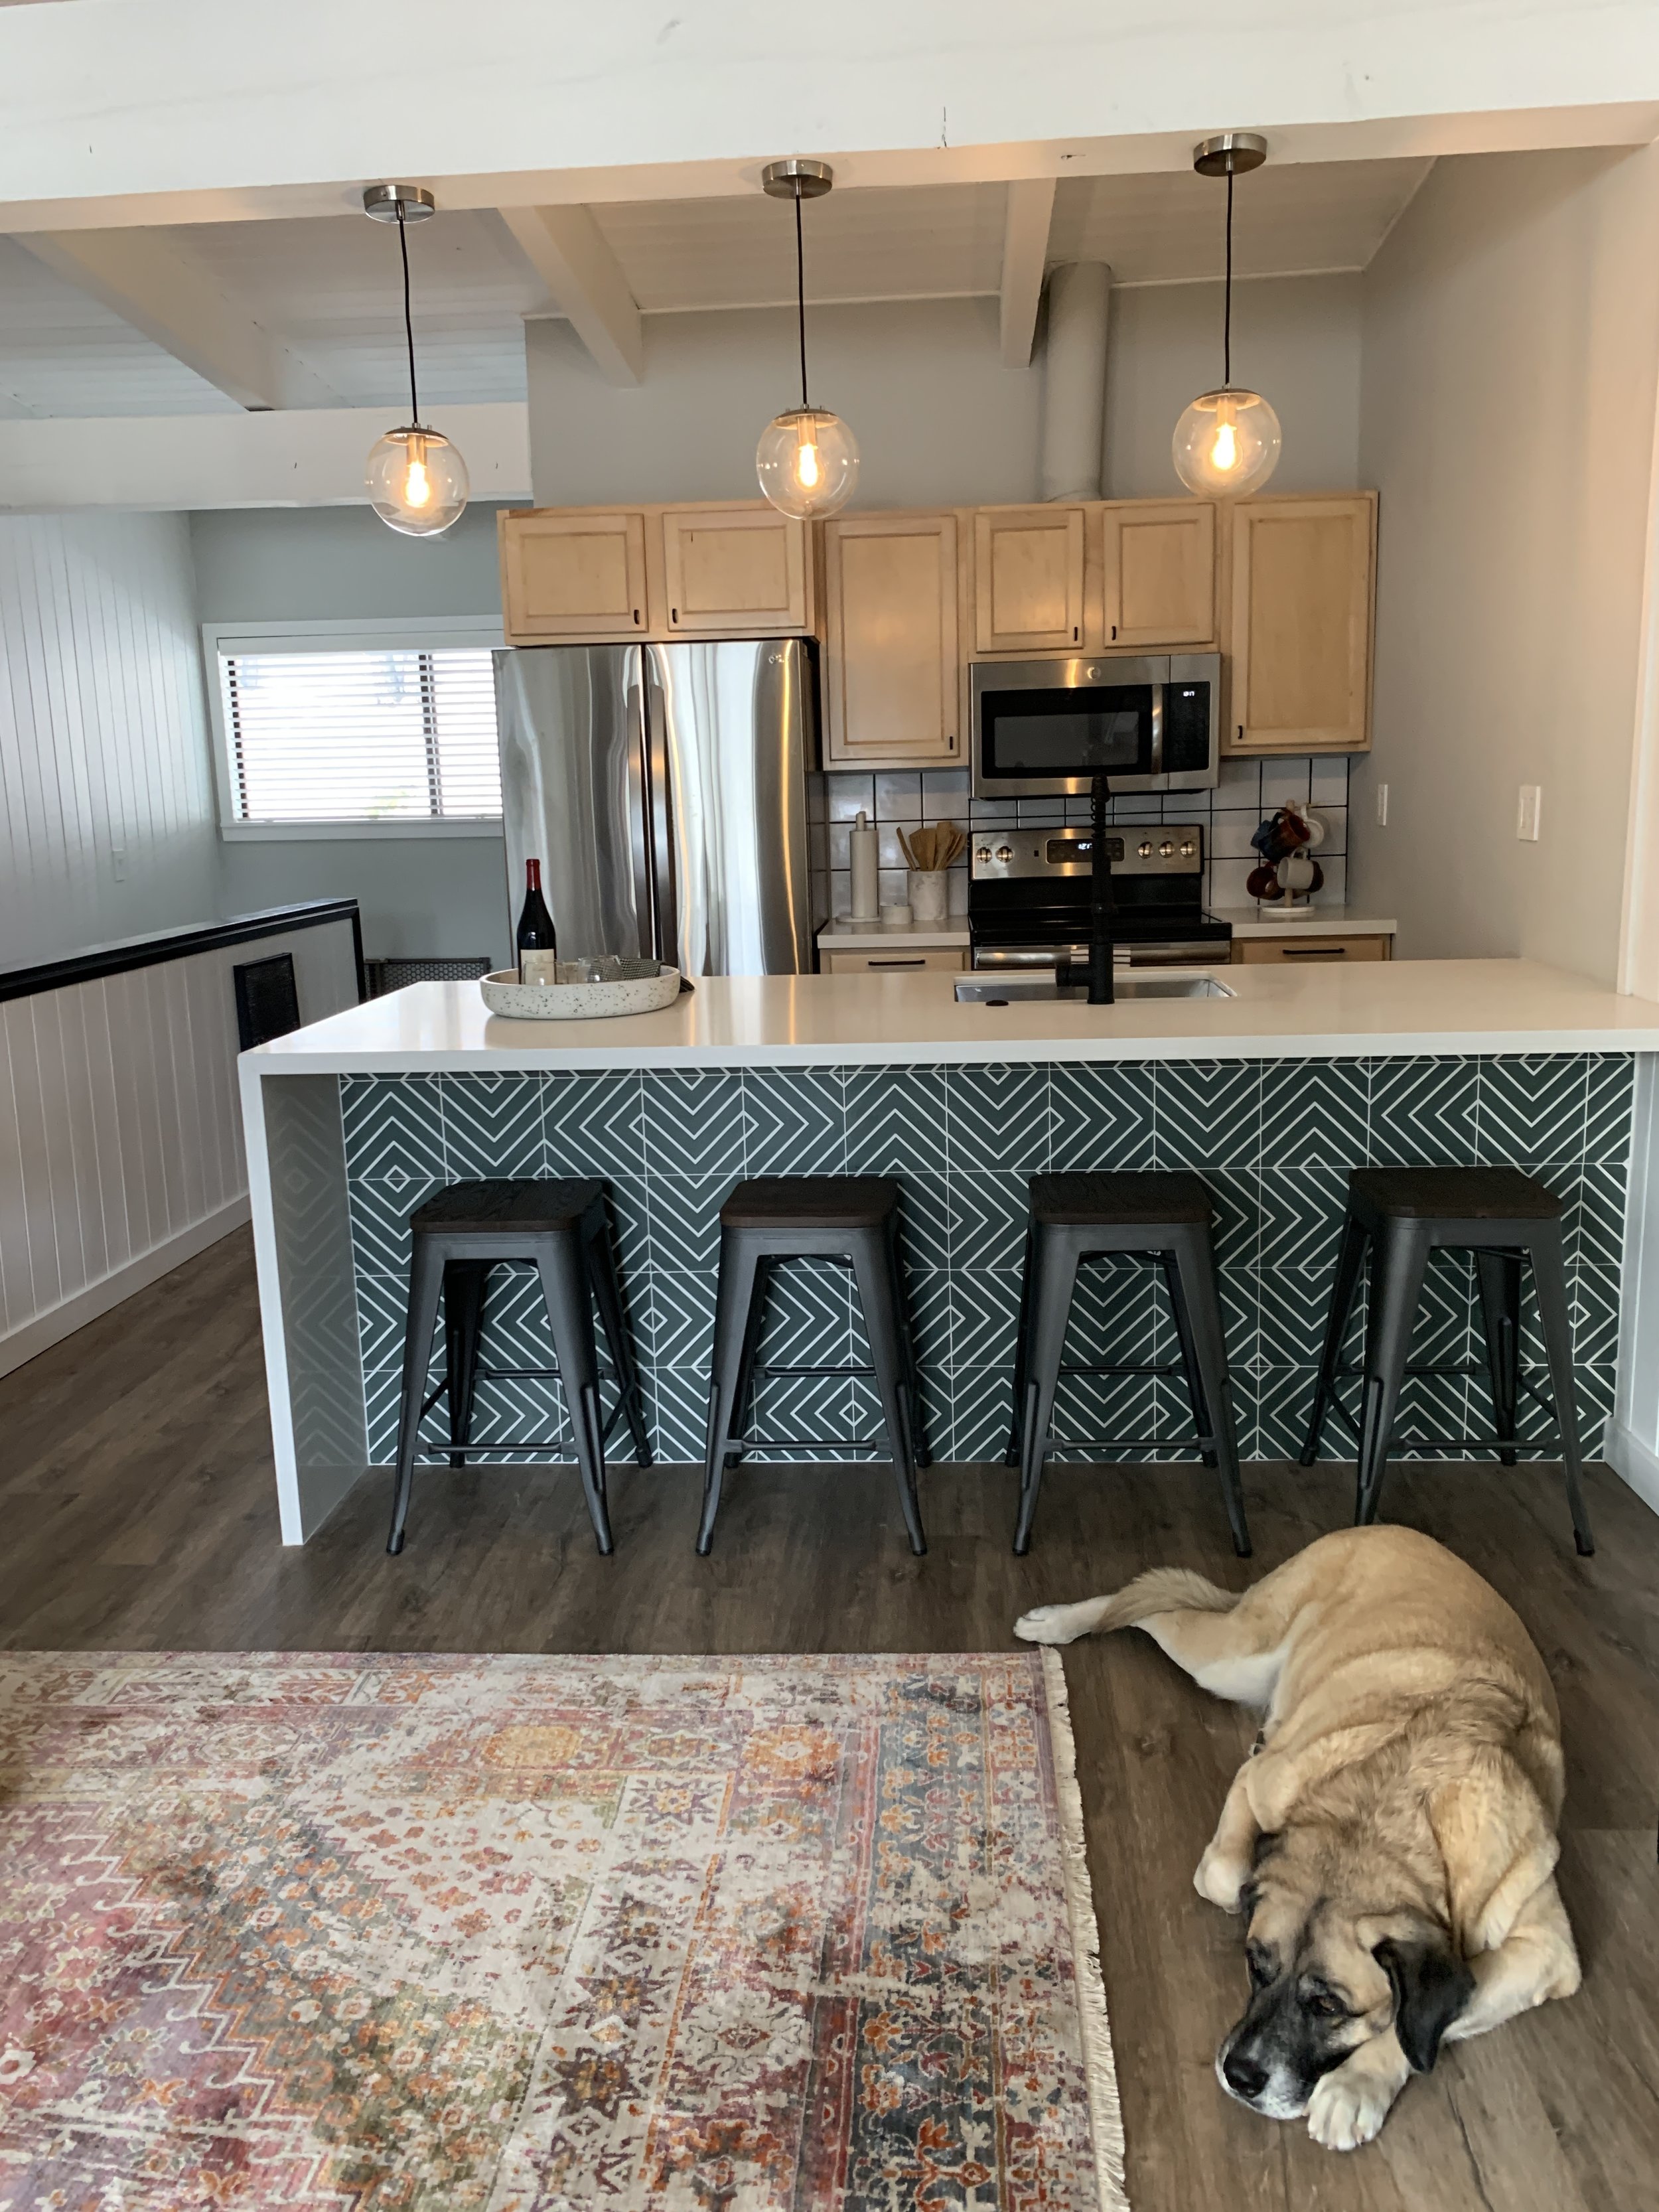
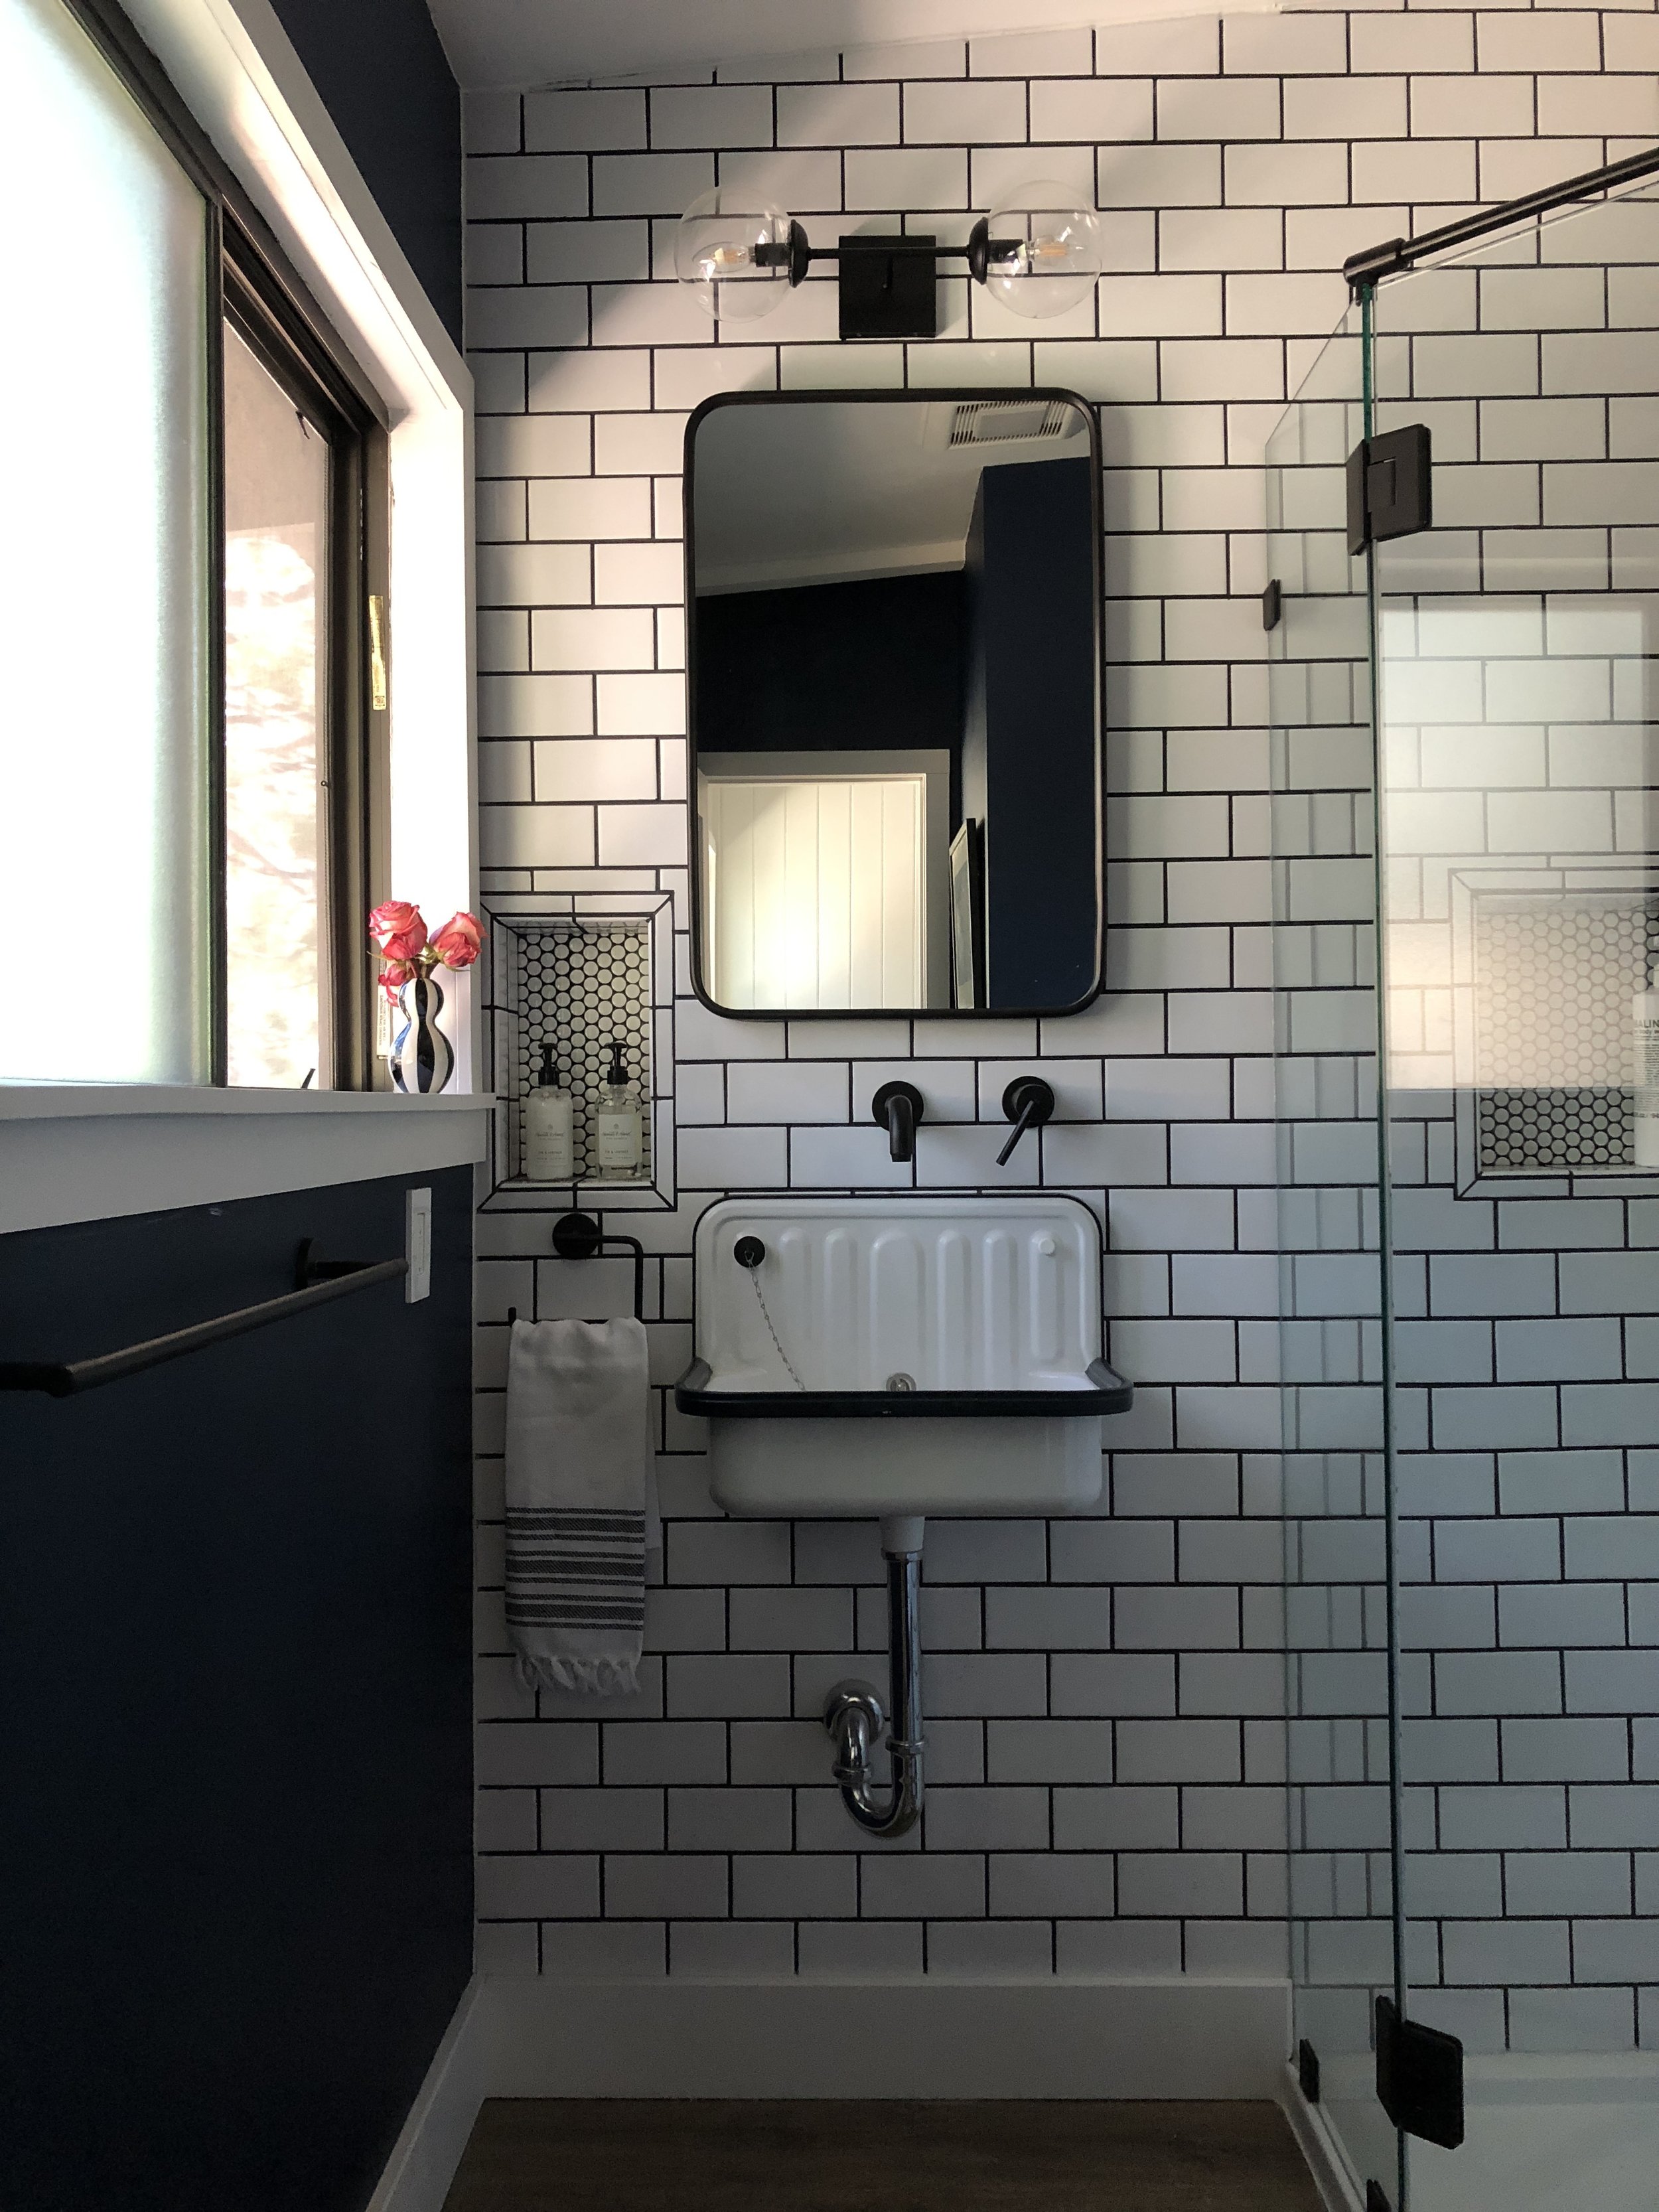
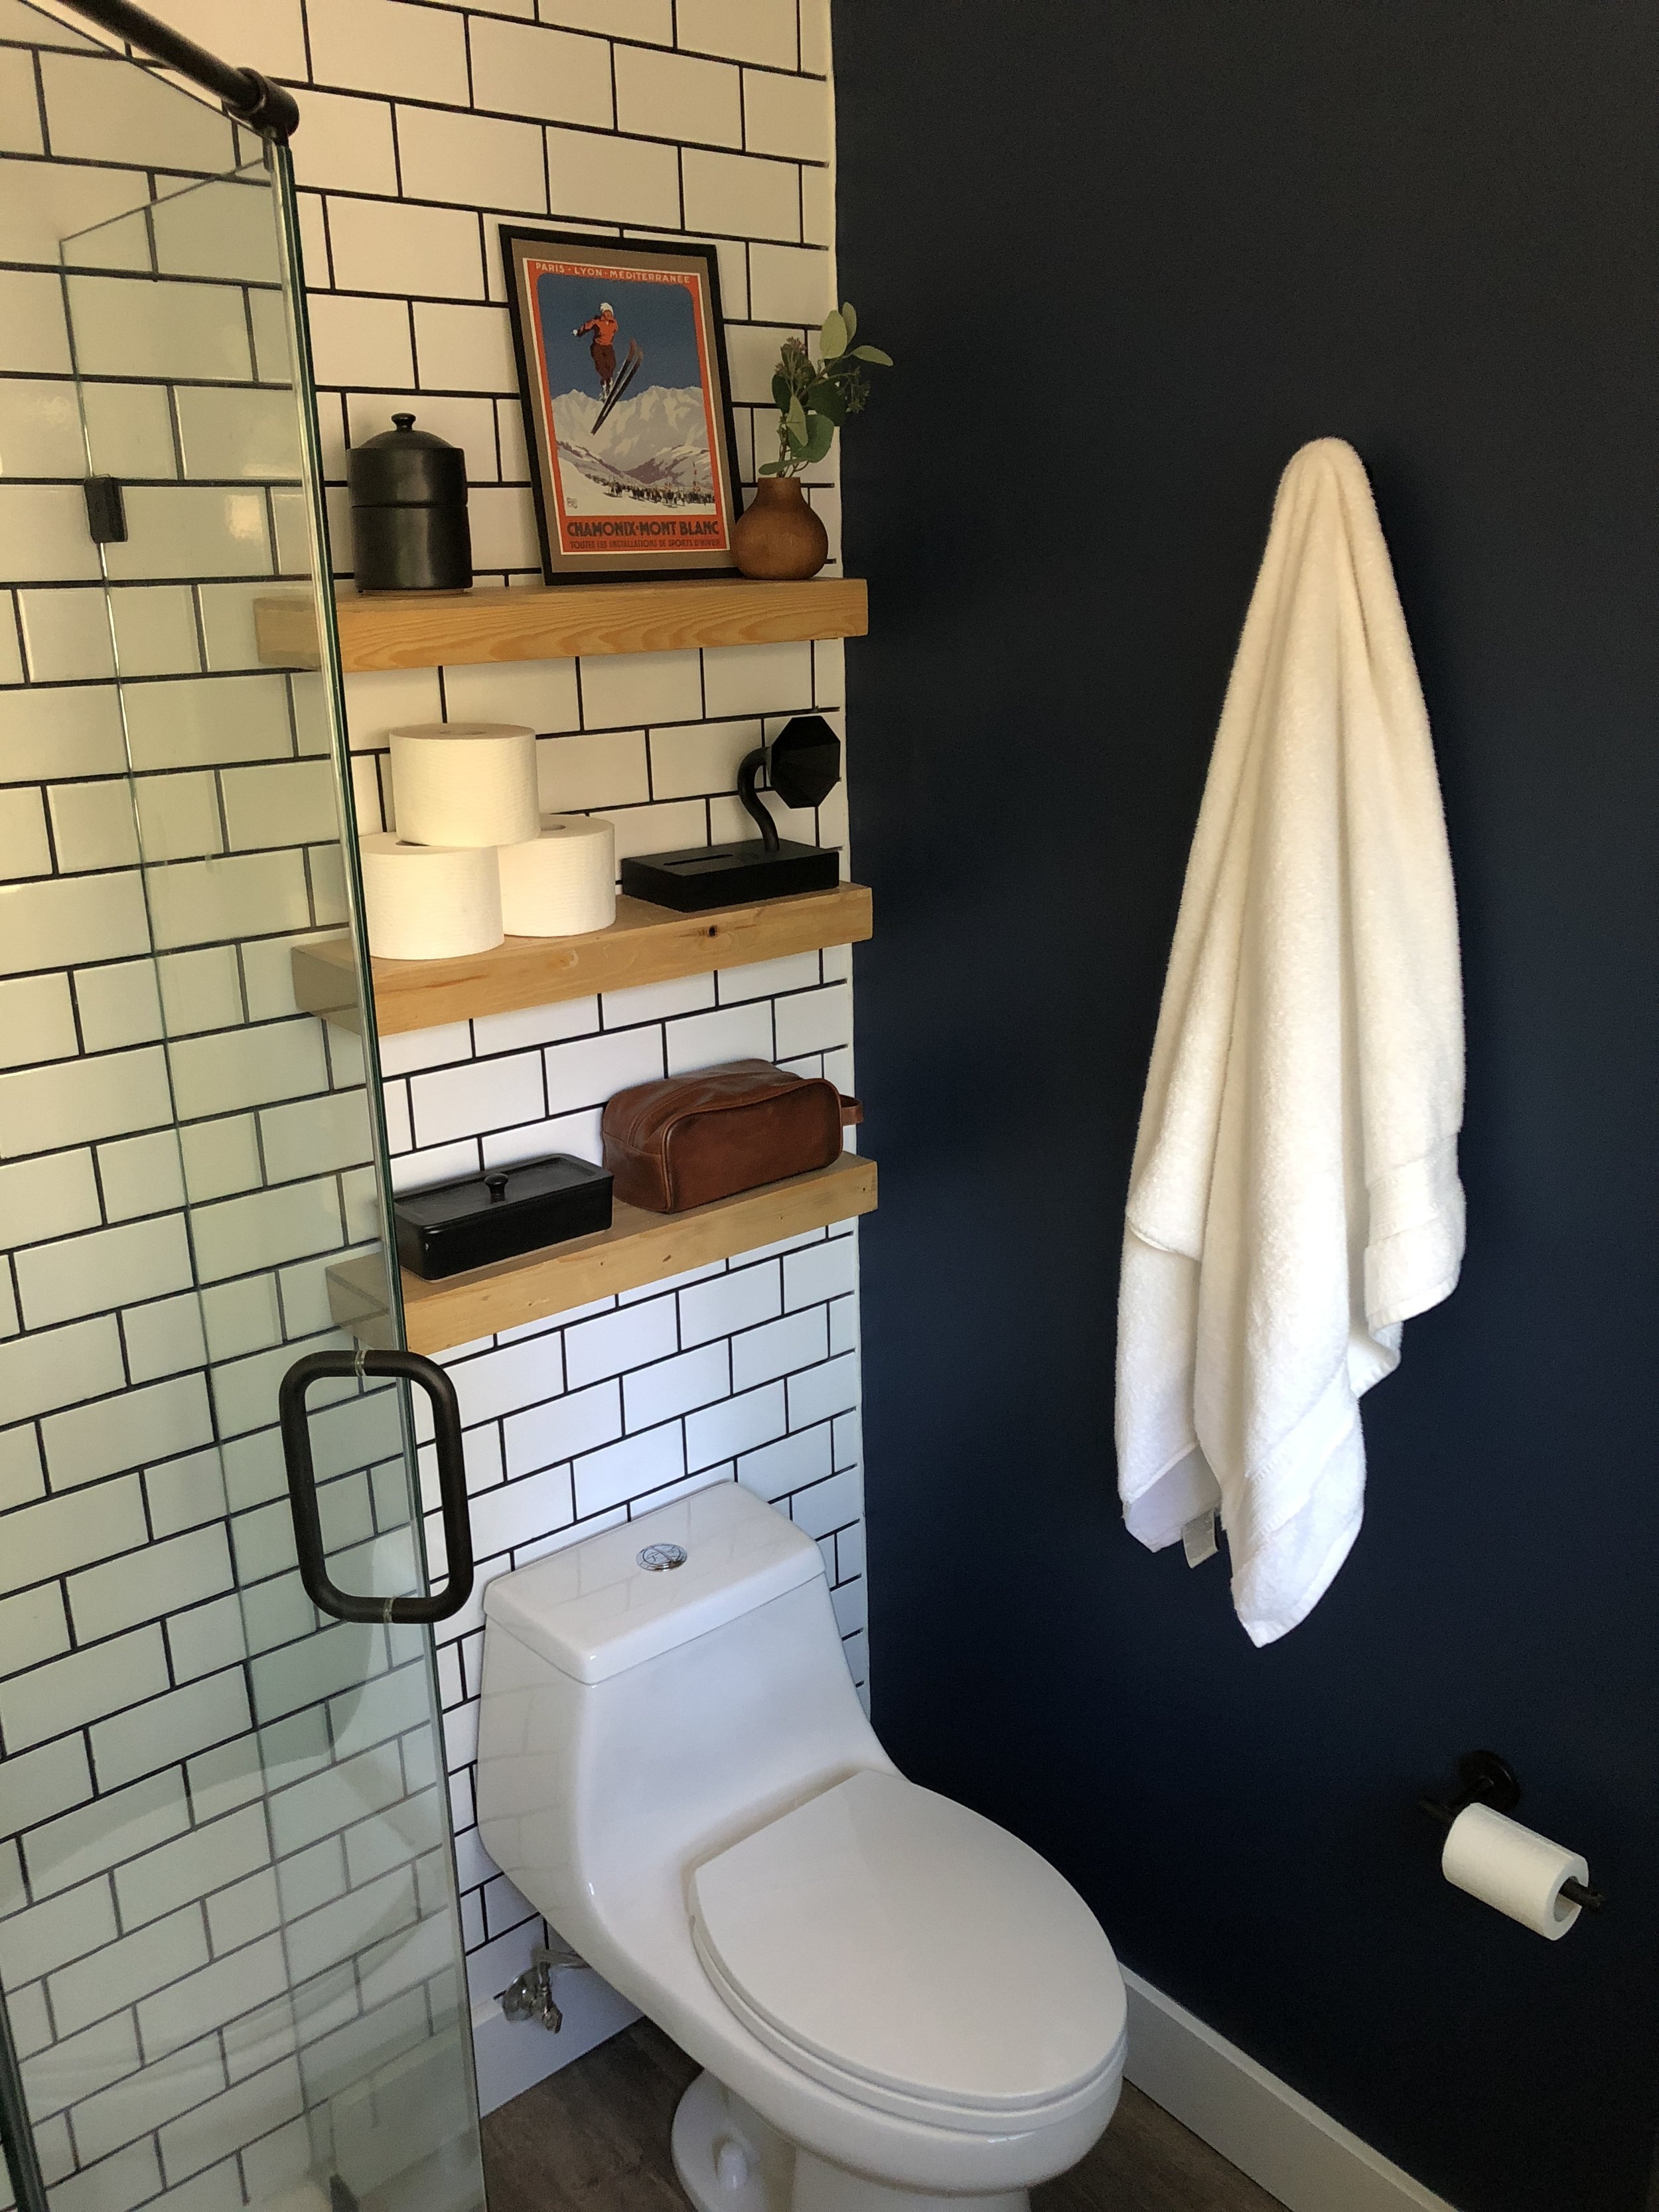
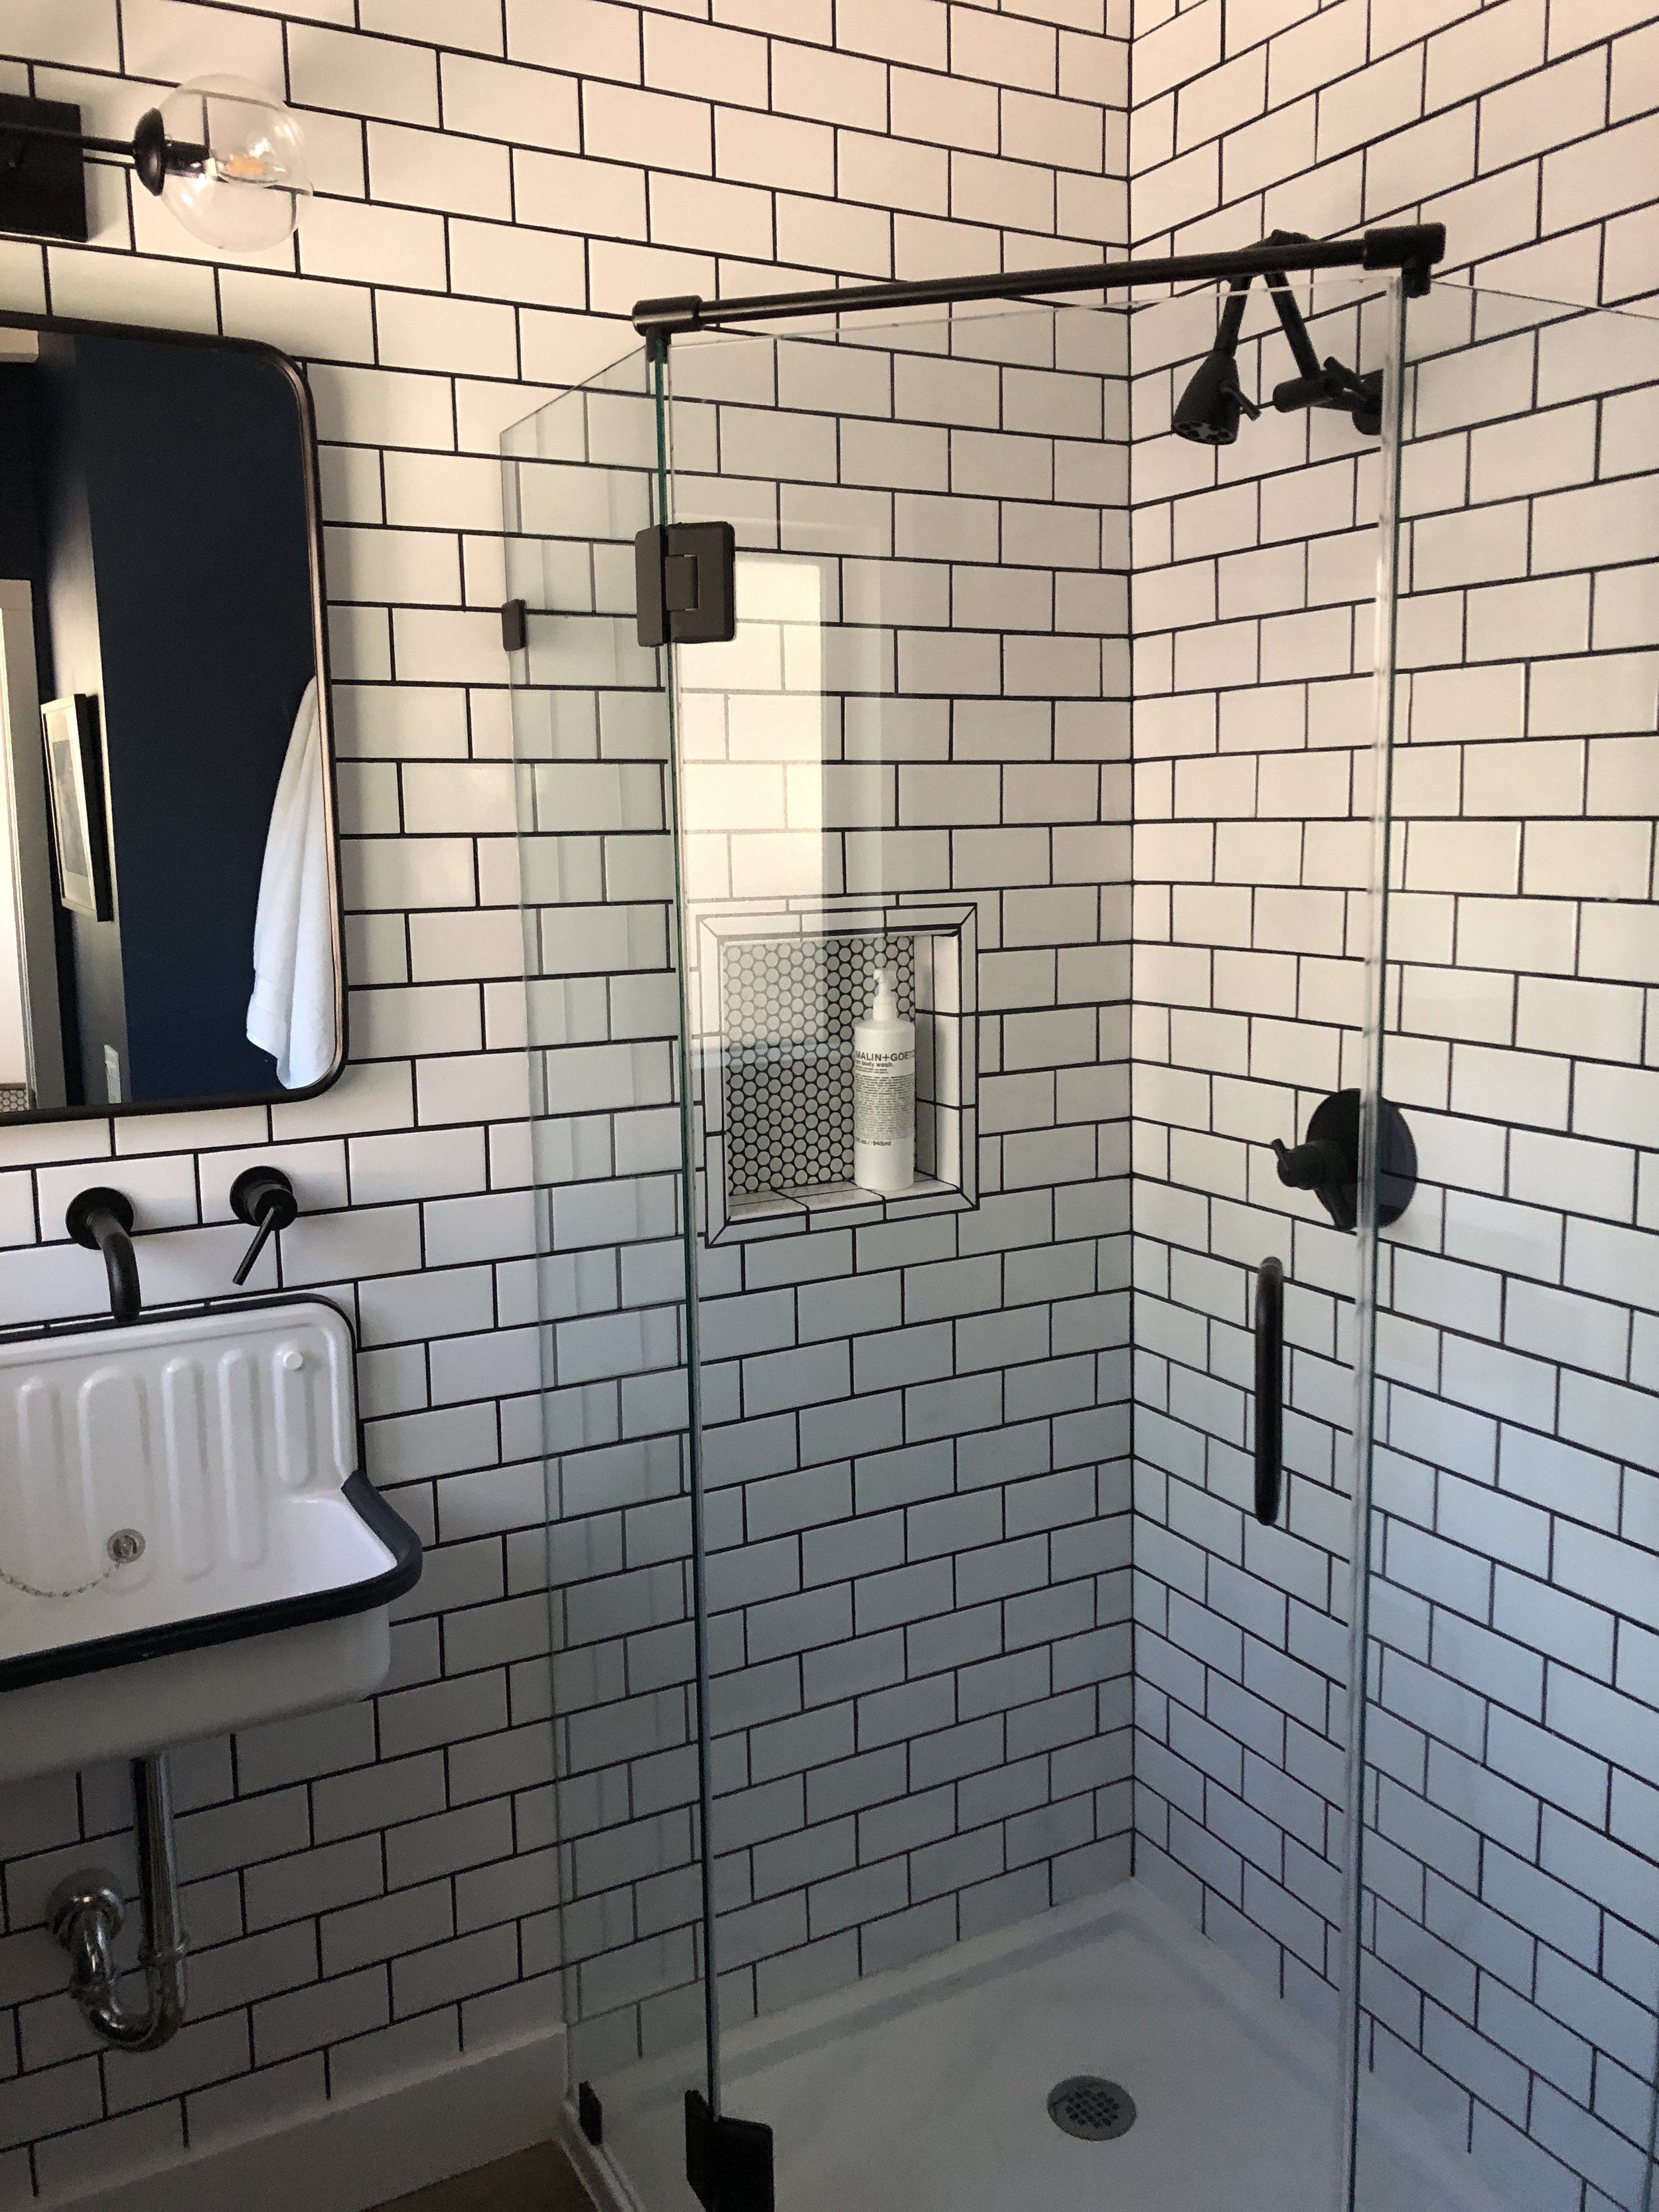
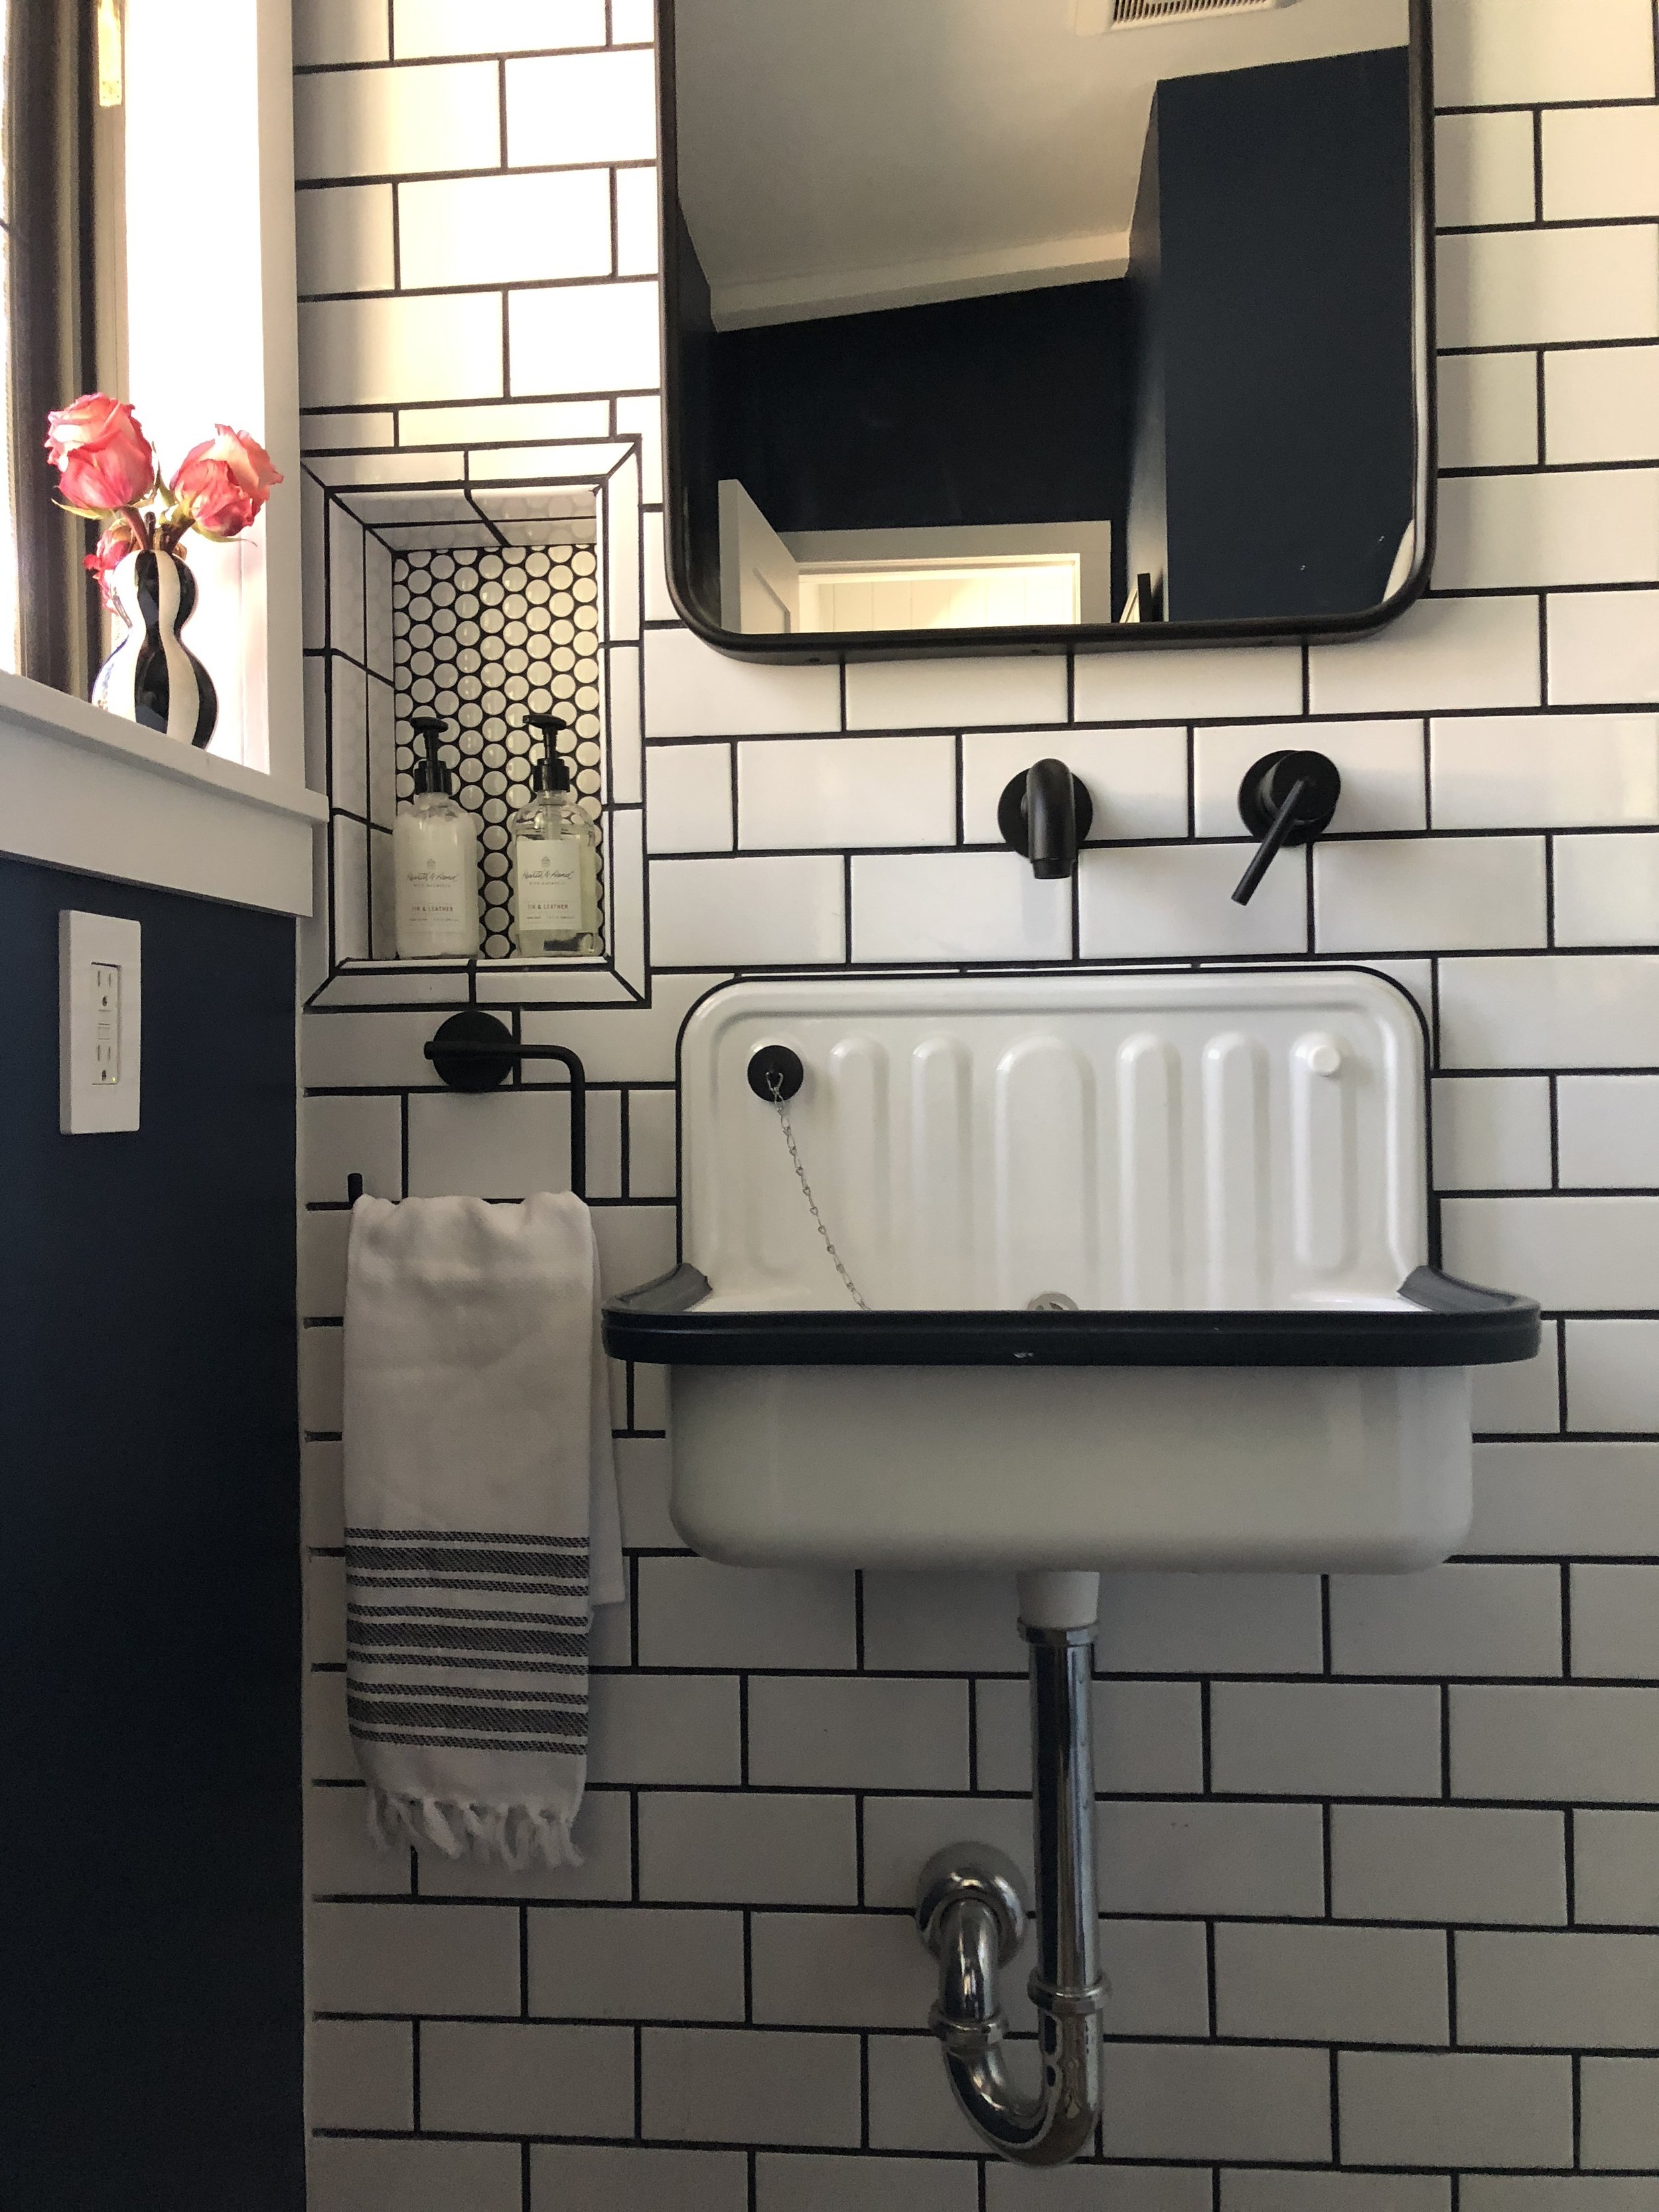
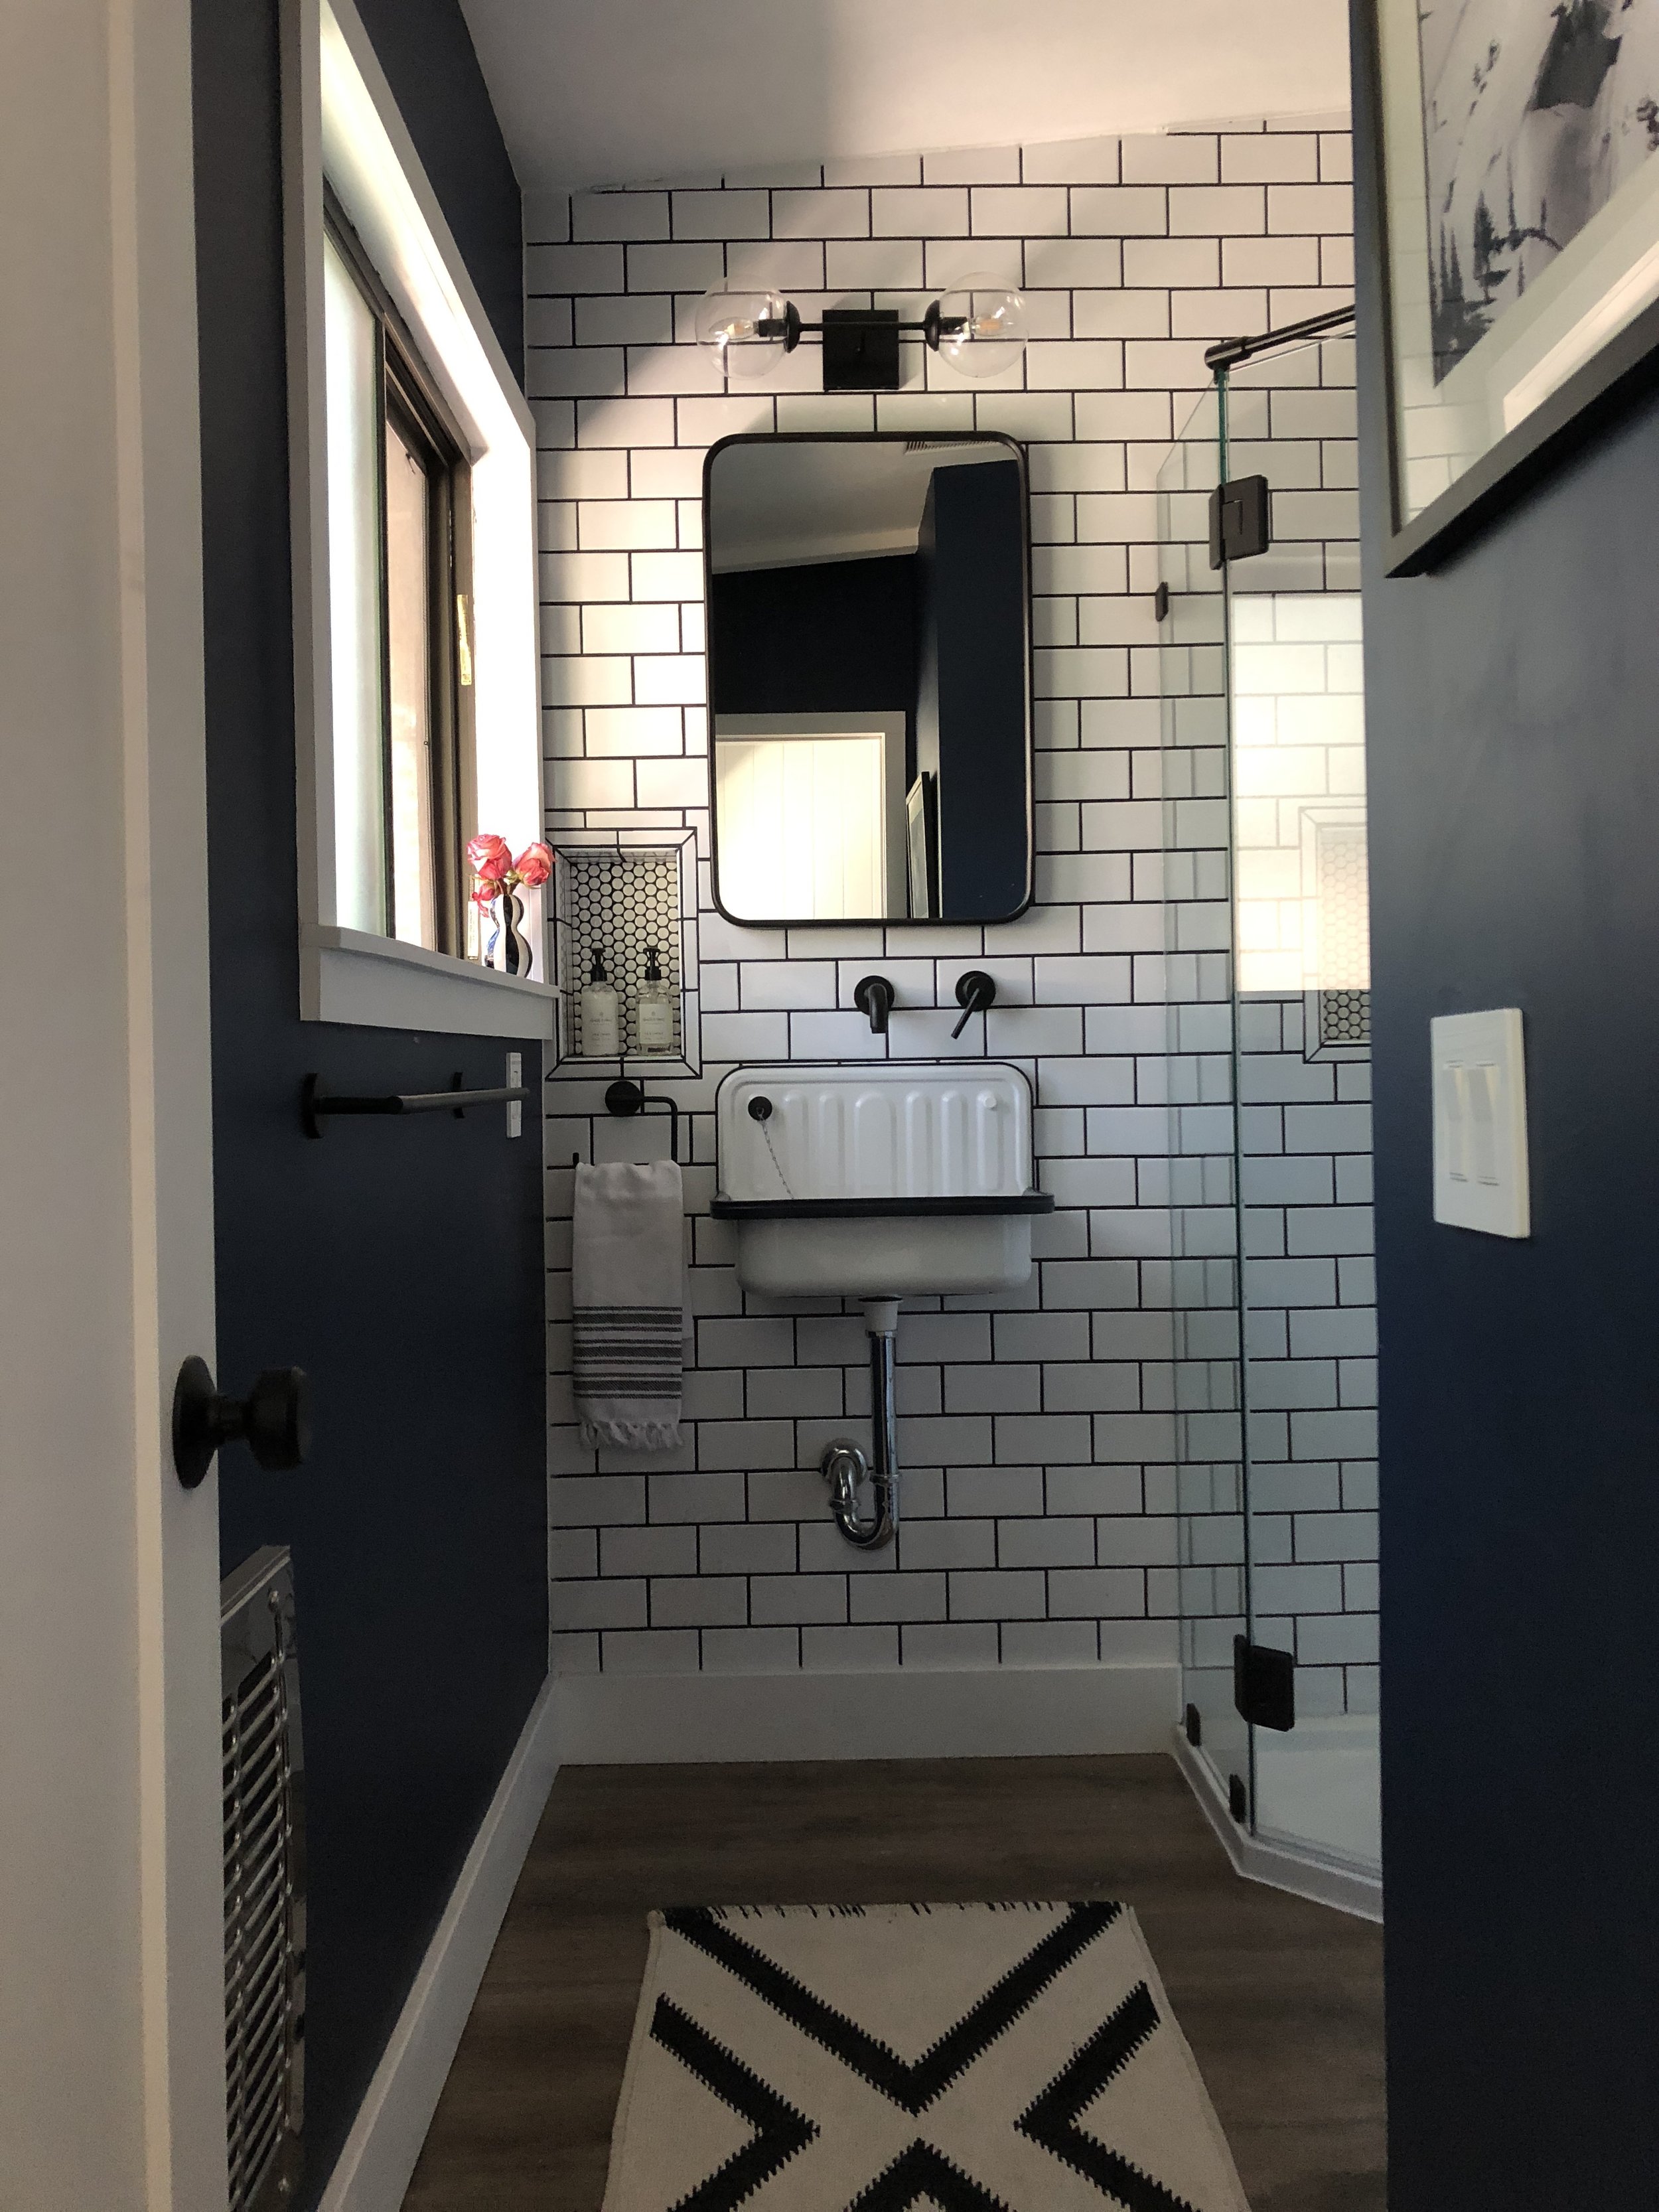
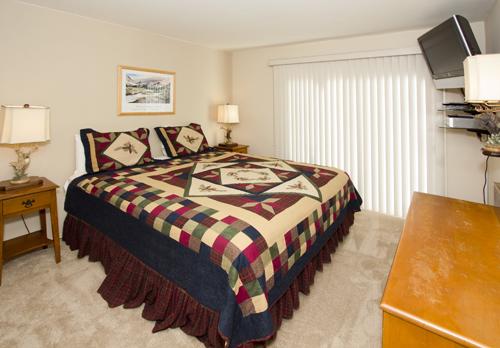
So, just like that…it’s over! Tomorrow is moving day, but since we sold the place furnished it really just means that tomorrow is the day that I cart the last few personal effects down to LA. Before I sign off, I wanted to share some more photos of the house, including some of the downstairs which I never got around to blogging. One of the lovely parts of selling a home is having professional photos taken, and our photographer did a particularly nice job. So, without further ado, I give you the final photos of The Mammoth Fixer. Enjoy!

TMF: The Living Room
 

One of my favorite things about TMF is the big, airy upper level with high ceilings and mountain views. I’ve already showed you most of this space, and today is the last post for this level before we move downstairs. I’m excited to share the living room because this is where we spend 95% of our waking hours… sometimes it’s an office, sometimes an entertaining space, or - more often than not during this very snowy winter - just a place to cozy up with a hot drink and a fire. I give you: LIVING ROOM.

I suppose now might be a good time to mention the fact that there will be dogs in some (most) of my photos, but you know what? Never mind. Too little too late, I say. You’ve made it this far and if you haven’t yet noticed the omnipresent pups you should really work on your observation skills. For anyone who cares, the big one is Eleanor and the little munchkin is Fergus, and they are awesome. Fergus was born and raised in Los Angeles and as such has aspirations of being a star. He demands a lot of attention so he sits in front of the camera at every chance (hand to my heart I don’t pose him in these photos, he just sits in front of me wherever I focus my attention). Eleanor, on the other hand, being a woman of a certain age, is almost always sleepy so if you see her in a shot it’s because she is a confident 115 pounds and I didn’t have the energy to move her to the other side of the room. I digress…

To get us back on track, here’s a photo of the living room when I first got my hands on it:

It’s low res but trust me, you’re not missing anything in the details.

It’s low res but trust me, you’re not missing anything in the details.

Ick. It’s hard to know what bugs me most here (the stage) but a list of contenders would include:

  • Tube TV circa 1999 sitting on a matching faux-modern stand from…Staples? Your guess is as good as mine.

  • That upholstery

  • Wolf/antler lamps (These bug me on multiple levels. Firstly, WOLVES DO NOT HAVE ANTLERS so immediately these are bizarre. Secondly, they are mass-produced out of cheap plastic and two identical lamps in this style is just more than anyone should be expected to take. Thirdly, they were manufactured in 2003 (there was a sticker) so they don’t even have vintage cred. THANK U, NEXT)

  • Bar-height dining table crammed between the kitchen counter and TV. On carpet.

  • Stranger carpet (that is, carpet that has known many strangers)

  • Vertical Blinds

  • Loveseat placement, blocking the beautiful deck and view

  • Crusty old pine panelling, badly in need of some TLC

  • The 35 sq ft stage on which sat a clunky old wood burning stove

It all had to go! So go it did. Furniture was all sold/donated thanks to the wonders of the internet, and we jumped into demolition with gusto - and with the help of some dear friends. First to go: the stage, which was BUILT INTO THE DANG WALL and TILED with ancient, stubborn mortar. It took some elbow grease, but eventually it was gone.

Evidence:

Attacking this thing with the help of my friend Jeremy.

Attacking this thing with the help of my friend Jeremy.

And eventually, after demo, drywall repair, and painting, that corner looked like this:

IMG_5849.JPG

So satisfying. I mean, I know it looks like a mess, but at least it’s a place with a flat floor and potential. This makes me happy.

The full list of projects for this room included:

  • Drywall patching and repair

  • Paint ceiling and walls

  • Seal gaps and patch panelling

  • Paint panelling

  • Install new pellet stove

  • Install new flooring

  • Rough-in electrical for new light fixtures (a job for an electrician, obviously)

  • Install new lighting

  • Make coffee table (more on that below)

  • Decorate

Not such a crazy list, as renovations go. Because it’s a large room, all of these things took quite a bit of time to complete, but we were lucky in that we didn’t encounter anything insane, surprise-wise.

The most time consuming project was definitely painting - specifically the ceiling. If you learn nothing else from this blog, please learn this: if you’re painting a ceiling in a post and beam building, do yourself a favor and BUY (or rent) A PAINT SPRAYER. I learned this lesson a tad too late, but it still saved me hours of backbreaking work.

Flooring was a snap (little joke for those in the know), due largely to the fact that my amazing brother-in-law flew to CA to help with this task. Between him, Peter, and me, we knocked out the entire upper floor in one (excruciatingly long) day.

The last project I’ll go into here is this coffee table:

TMF_LR5.jpg

We spent a ton of time talking about what kind of coffee table we wanted for this space, and it was Peter who eventually had the idea to have a table made out of a stump. We did some shopping around, and as it turns out, most tables in this style (or at least all the ones we liked) were SUPER expensive. I wasn’t interested in paying $1500 for a coffee table so I decided instead to make one. Seems simple enough, right? I wish. After a couple of weeks of calling tree services and lumber yards, I eventually found a local millwork/woodshop that has a massive lumber yard full of wood from the Eastern Sierras. One Saturday morning we visited the shop, picked out our stump (a Jeffrey Pine from the forest around Mammoth Lakes), had it milled down (one side was flattened by a massive saw on a conveyer belt), and carted it home. It took a few days of chiseling, power sanding, hand sanding, and sealing, but we eventually got there. This thing weighs at LEAST 200 pounds and it was a harrowing adventure getting it up the stairs, so it will likely stay in the house longer than we do.

As for the rest of the decor and finishes, details are below!

TMF_LIVING.jpg

Cluster Pendant: Wayfair

Mirror: Wayfair

Media Console & Bar: Ikea

Couch: Article

Floor Lamp: Wayfair

Rug: Houzz

Paint: Front Porch by Sherwin Williams

Floor: Mannington Adura Max in Aspen Lodge

 
Cameron Shepherd Comment
TMF: The Kitchen
 

Let’s all just pretend like it hasn’t been three months since my last post, shall we? Moving right along…

It’s time to talk about the kitchen. Like most of the other spaces in TMF, it’s small but mighty, and we had to pack a lot into a pretty limited footprint. Without further ado, I give you… KITCHEN:

Ain’t she a beaut?

As a reminder, this is the original kitchen in all of it’s dark and crowded glory:

Yikes.

Yikes.

You may remember from my first post that we sold the old, ugly kitchen online. You know what they say about one man’s trash… Bright and early on demo day, a crew of guys drove up to the condo, uninstalled the cabinets, lifted off the countertops, and carted the old appliances down the stairs and into a truck. By about 10am we were left with this: 

Glorious blank space.

Glorious blank space.

(Cut to like 2 months of kitchenless living, i.e. cold cuts and washing dishes in the bathroom sink.)

I’ve never designed or renovated a kitchen before, but thanks to a natural inclination to jump headfirst into projects (and what is probably an unhealthy amount of self confidence), this didn’t deter me in the slightest. I knew pretty quickly what I wanted this kitchen to look like - it helped that the space is so small, and we didn’t need to change the floor plan dramatically. My goals were simple: open the space up by getting rid of the upper run of cabinets on the far wall (more cabinet space would be nice, but this was a poor original design IMO due to the fact that it created weird unusable dead space underneath), bump the countertop out to create a proper breakfast bar, and brighten the whole thing up with light colors and clean, modern finishes and stainless appliances. 

The full list of projects was as follows: 

  • Paint

  • Move dishwasher hookups and drain to right side of sink (plumber)

  • Finish and install new cabinetry

  • Install new flooring

  • Install countertops (contractor)

  • Tile front of peninsula

  • Tile Backsplash

  • Install sink and plumbing fixtures (plumber)

  • Install appliances

The cabinets were far and away the most time consuming and labor-intensive part of this whole process. We initially planned to buy Ikea cabinetry with custom fronts by Semihandmade (spoiler alert, that name will come up again in a future post), but after pricing them out (and reading some harrowing tales of DIY Ikea kitchen installations online), we decided to go with prebuilt, unfinished cabinetry from HD Supply. This ended up saving us a bundle in assembly time and cold hard cash, but it meant I had quite a job on my hands. After the painstaking process of measuring, planning, configuring, and buying the cabinets, I faced the task of staining, sanding, and sealing these suckers. It took the better part of two weeks and every last drop of patience I had (admittedly a limited supply), but I think they turned out great.

Installation was a whole new saga, and it’s not a job I’d recommend anyone embark on without another pair of helping hands…lesson learned. It took me a full day to do it by myself, but I eventually got these things leveled, plumbed, and mounted. 

Flooring came next (shout out to my amazing brother-in-law Dustin who came to help with this backbreaking task), and then countertops. From the get-go I knew that I wanted white quartz, and I had my heart set on a waterfall edge…finding someone to fabricate and install said waterfall edge in Mammoth Lakes was nearly impossible. Completely impossible, in fact, as I had to hire someone from Reno, NV in the end. A local hardware store *did* kindly offer to bring someone up from LA for the low low price of $10,000 (good one, guys), but alas I had to turn them down. We LOVE our big, clean, white countertops, and even though it’s a tiny kitchen, it feels like we have lots of room for food prep, baking, and general entertaining. 

Far and away, my favorite element of this kitchen is the cement tile from Riad Tile on the front of the peninsula. This was such a labor of love (cement tile is HEAVY and installing it required a lot of time and patience), and it brings in a much needed splash of color and pattern. 

A quick note about Riad Tile: the first shipment of tile got ANNIHILATED by the freight shipper, and I was left with only about 25% of my order that was usable. It was carnage:

TILE_CARNAGE.JPG

BUT, credit where credit is due: Riad has fabulous customer service. They re-packed and re-shipped my entire order (in styrofoam this time) in no time. The project was slightly delayed but no real harm was done. I’d order from them again in a minute.

One more shot of the final product for good measure:

RIAD_TILE.JPG

And just like that, that’s a wrap on the kitchen! Full details and links are below for all of the finishes. Next up: the living room.

KITCHEN_BLOG_1.jpg

Pendant Lights: Wayfair

Rug: Ikea

Faucet: Wayfair

Sink: Wayfair

Bar Stools: Wayfair

Cement Tile: Riad Tile

Backsplash Tile: Floor & Decor

Floor: Mannington Adura Max in Aspen Lodge

 
Cameron ShepherdComment
TMF: The Upstairs Bathroom
 

Ok so I know that it's been way too long since my last post and THAT'S NO WAY TO RUN A BLOG, SIR but things have been busy so cut me some slack.

For real though, this fixer business is no joke, and when you add in a day job (boo) and a vacation (YAY) the writing of this thing ends up on the back burner. But you didn't come here to read excuses, you came here (presumably) to read about our super cute new bathroom! Or maybe you stumbled upon this post and strangers' renovated bathrooms are really your thing so you’re sticking around. Either way, here are some pretty photos for your trouble:

There she is, folks, the itty bitty bathroom of my dreams.

This bathroom, tiny though she may be, was the source of many sleepless hours. From the demolition (YOU try using a Sawzall on a shared condo wall while trying not to cut into the neighbors bathroom and also avoiding plumbing and electric - it’s super stressful) to the tiling (never tiled anything before, y'all), there were a lot of things to consider, and a lot of, shall we say, "teaching moments." And before any of that even started, I had to make some serious decisions about finishes. 

My initial inspiration for this bathroom was this sink I stumbled upon on Pinterest:

Corian Sink via This Old House

Corian Sink via This Old House

Trés chic, non? I thought so too, until I finally tracked this sucker down (it’s a Corian product) and got a quote from a fabricator: $3,400 for this puppy. AMERICAN DOLLARS.  I can promise that I will never buy a sink that costs more than, say, a used Prius, so this was out for me. BUT I was not to be deterred, and eventually found and fell in love with the Alape Bucket Sink from Rejuvenation. It was around this beauty that I designed this bathroom.

The space itself is really is quite small, and I didn’t see any need to change the floor plan from the original. However, every last finish had to be changed, so we had no choice but to rip this baby down to the studs. ICYMI (or in case you needed a reminder), this is what we were working with:

Screen Shot 2018-07-19 at 9.17.57 PM.png

And this is what it looked like after I spent a few hours with a hammer, pry bar, and Sawzall:

I truly cannot communicate to you how enjoyable it was to rip out that heinous, uncentered medicine cabinet and 1990’s vanity light. It was glorious.

After demo was done the real fun began, and the list of projects for this little room was not a short one. It included:

  • Dropping the ceiling in order to accommodate an exhaust fan

  • Installing said fan and venting out the side of the house

  • New shower base (plumber)

  • Tiling two full walls

  • Mounting new sink over tile

  • New flooring

  • Custom shower surround (glass guy)

  • New plumbing fixtures throughout (plumber)

  • New vanity lighting

  • Casing & adding a sill to the window

  • Installing new toilet (plumber)

  • Decor!

By far the most challenging/time consuming job in this room was the wall tile. In a truly Cameron-style move, I chose this large, complicated job for my first ever tiling project. I learned a ton and it took me about 3x as long as I thought it would, but that’s probably a subject for a future post. Many of the other finishes were easy enough to choose…Lowe’s sells exactly one shower base that fits this small space, so that choice was made for me (shout out to my lovely neighbor Linda who recently renovated her own bathroom and did this research so I didn’t have to), the flooring is the same throughout the whole condo, and the local glass guy gave us one option for the shower enclosure. The rest of the details are below!

UPSTAIRS_BATH_BLOG_1.jpg
IMG_7788_EDIT.jpg
 
Cameron ShepherdComment
Planning pt. 1: Inspiration & Layout
 

No one loves a mood board more than I do. I make them for every client, whether they want one or not. I made one for my wedding, despite the fact that my husband most certainly did not want one. (And it was gorgeous, thank you very much.) I have made mood boards for the sheer pleasure of looking at groups of beautiful, related objects. So it should go without saying that my very first step in planning The Mammoth Fixer (which shall henceforth be referred to as TMF, because blog) was creating a mood board that encapsulated my design aesthetic for this project. Being a relatively small space, it was important from the start that the whole condo felt cohesive...this goes for most spaces, irrelevant of size, but with a larger home you can get away with more when it comes to varying finishes and colors. 

A note about mood boards: these things, IMO, are meant to serve as general design inspiration, not holy gospel. For Compulsive List-Making Virgos like myself, there may be a tendency to view a mood board as a to do list that must be strictly adhered to under punishment of total self-loathing. Calm down. Mood boards are excellent tools, but only if you remember what they are for: namely, they provide a snapshot of the general look and feel you're aiming for in your design. If, once your project is all said and done, your IRL choices would fit well next to the images on your mood board, it has done its job in guiding your decision making. 

Also, mood boards provide an excellent touch-back for those moments when you're completely overwhelmed by the sheer number of decisions that must be made and you can't so much as choose a rug pad without a second opinion. In these moments, I like to look back at the mood board, reacquaint myself with the master plan, and then remind myself that no one will ever see the dumb rug pad and if I don't hurry up and make a decision no one is ever going to see this beautiful, finished condo, either. 

So, without further ado, I give you TMF Mood Board:

Screen Shot 2018-08-15 at 6.05.10 PM.png

I'll go into more detail regarding specific finishes and decor later, but for now I just wanted to give you (my voracious readership) an idea of the look and feel I'm going for here. The main inspiration for this mood board came from modern Scandinavian design. Peter and I have had the pleasure of traveling through Scandinavia a couple times in recent years and the warmth and practicality with which the hotels, restaurants, and homes in that corner of the world are decorated really struck a chord with me. (Super unique, I know, liking Scandinavian Design. What is this, a condo for Danish people and Ikea shoppers? Whatever IT'S MY BLOG SO GET ON BOARD.*) This style felt especially appropriate for a place like Mammoth Lakes, which has such extreme winters. Bottom line: we needed a design that was both cozy (ex. warm wood tones, mixed textiles, lots of incandescent light) and practical (ex. durable flooring that can stand up to ski boots and melting snow). I also decided to use black metal accents throughout the house which help to keep the overall look cohesive and modern.

*Get it? Like mood board?

The second step in this planning process, while not as fun to look at, is just as necessary: drawing up a floor plan. Now, I'm no Joanna Gaines (yes I'm mad about it) and therefore do not have a 3D rendering specialist on staff. My floor plan is of the good old-fashioned 2D variety. 

The worst part of this whole process was taking measurements of every single wall, doorway, and structural feature in order to get an accurate plan down on the screen. To achieve this, I attended our home inspection...the only time (to my knowledge) at which you're guaranteed to have access to a home between an accepted offer and close of escrow. No, I could not be bothered to wait until we actually owned the place to start redecorating it. And no, the 4+ hour drive both ways did not deter me in the slightest. I can't be absolutely certain, but I think it's safe to say that home inspectors don't love it when buyers decide to hang out and watch them do their job. This consideration having failed to cross my mind however, I seized the opportunity to make a brand new friend(!) by following our inspector around and pelting him with questions about the condo for the two hours it took him to do his job. Like, the whole two hours. To his credit, he was very kind and very patient, considering the fact that he had a tape-measure-wielding maniac following him from room to room like some deranged puppy.

Anyway, I digress. Here's the floor plan:

TMF_FLOORPLAN.png

Simple pimple, right?  It's amazing how much a simple scale drawing can help you plan a space. We decided before buying TMF that we wouldn't be making any structural changes (i.e. we didn't rip out any walls), so we just needed to use the existing space to our greatest advantage. A quick overview:

  • Both bedrooms are pretty square, so that made it easy to decide on layouts. Initially, we planned to build custom toe-to-toe bunkbeds above the two queen beds in the guest room, but in the end decided that it was going to make the room too cave-like...with only one small window and standard 8' ceilings, it seemed smarter to air on the side of "less is more" in order to keep this room as light and bright as possible. 
  • Upstairs in the kitchen, we extended the countertops toward the living room by about 16" in order to make room for a proper breakfast bar. We also moved the dining area over to the other end of the room in order to open up the space. A big rug and a sectional help define the living area. Finally, tucked away in the corner is a new pellet stove and normal-sized hearth to replace the old fireplace monstrosity (see previous post). 

All of these things we figured out with a lot of help from this simple little drawing. Thanks, Floor Plan! 

That's probably enough planning talk for today. More next week! 

 
Introducing: The Mammoth Fixer
 

When people ask me "what do you do?" I generally respond with a simple "I'm a freelance graphic designer. DON'T YOU KNOW WHO I AM?" Or something really friendly and approachable like that. 

These days, however, that answer only tells about half the story. Yes, I'm a graphic designer. Yes, you should probably know who I am. But as of April of this year, I've also been playing the roles of interior designer, general contractor, day laborer, carpenter, and general handyman for an exciting new project that I'm calling The Mammoth Fixer. 

A bit of back story...

In April of this year, Peter (my husband - DON'T YOU KNOW WHO HE IS, EITHER?) and I decided to buy our own little slice of heaven in the form of a badly outdated condo in one of our favorite places on earth, Mammoth Lakes, California. Mammoth is a sweet little community in the Eastern Sierra Nevada, about 5 hours north of LA and just south of Yosemite National Park. We fell in love with the town for many reasons (initially because it's home to Mammoth Mountain, a most excellent ski resort), but I'll talk more about that in a future post - please stop trying to change the subject. For now, suffice it to say that Mammoth provides an excellent escape from the hustle and bustle of Los Angeles, and we can't wait to turn this little condo in the woods into our own mountain retreat. 

Here she is in all of her Winter Glory. Built in 1966, Tyrolean Village was the 2nd condo complex in all of Mammoth Lakes. Also, how great is the name Tyrolean Village?!

Here she is in all of her Winter Glory. Built in 1966, Tyrolean Village was the 2nd condo complex in all of Mammoth Lakes. Also, how great is the name Tyrolean Village?!

As the child of Serial Home Renovators and a long-time HGTV addict, closing escrow on the Time Capsule (as we've come to refer to it) was literally a dream come true for me. As soon as I laid eyes on this beauty I just couldn't wait to tear it apart. You know, in the most loving way possible. We saw a number of other condos before we made a decision to buy, but this unit just screamed POTENTIAL before we even walked in the door. The midcentury lines of the exterior, the large south-facing windows, the high upstairs ceilings with exposed beams, and even the wood panelling (SO MUCH WOOD PANELLING) were all calling my name and begging for my attention like some needy child. And, while I would have no patience for such a child, I was more than ready to answer this old condo's siren song (is this mixing metaphors? Probably.). Luckily for me, I married a man who also saw the potential in this outdated den full of carpet and old people smell. He also trusted me to realize this potential, and immediately jumped into this project with both feet. Bless his heart. 

The Condo (as we first saw it)

I have SO MUCH to say about this project, our plans for it, and the work we're already doing, but for now I'll just share a few photos from the original real estate listings. As it turns out, I'm really bad at taking "before" photos (my natural inclination is just to dive into a project and take photos once it's nice and pretty, just like Instagram intended), so these are the only photos we have that show what this place looked like before we started tearing everything apart. 

Upstairs: looking into the kitchen from living area. Carpet everywhere. Heavy, outdated furniture that, luckily for us, CAME WITH THE HOUSE. Antlers everywhere (can you spot the two examples in this photo?) 

Upstairs: looking into the kitchen from living area. Carpet everywhere. Heavy, outdated furniture that, luckily for us, CAME WITH THE HOUSE. Antlers everywhere (can you spot the two examples in this photo?) 

A closer look at the kitchen. White appliances, wood cabinetry with a braided (?) detail, strange cabinet layout, ugly granite. Good space, but desperately in need of an update. 

A closer look at the kitchen. White appliances, wood cabinetry with a braided (?) detail, strange cabinet layout, ugly granite. Good space, but desperately in need of an update. 

Living area from kitchen. Look at all of that gorgeous panelling! I intend to make it more gorgeous. Beautiful large windows hidden behind unfortunate vertical blinds. Take a look a that platform the stove is sitting on...

Living area from kitchen. Look at all of that gorgeous panelling! I intend to make it more gorgeous. Beautiful large windows hidden behind unfortunate vertical blinds. Take a look a that platform the stove is sitting on...

A closer look at that perplexing monstrosity we came to refer to as "The Stage." This thing was (yes, *was*) taking up like 35 square feet of prime living room space. One can only assume this was built because the original owners were prone to hosti…

A closer look at that perplexing monstrosity we came to refer to as "The Stage." This thing was (yes, *was*) taking up like 35 square feet of prime living room space. One can only assume this was built because the original owners were prone to hosting rambunctious karaoke parties and needed a stage on which to perform. Also, it was original to the house, which meant it was built right into the wall. More on that later. 

Bathroom 1 of 2. Nothing, not even that lace valance, makes me more angry than the uncentered medicine cabinet and light fixture. It all must go. 

Bathroom 1 of 2. Nothing, not even that lace valance, makes me more angry than the uncentered medicine cabinet and light fixture. It all must go. 

Staircase. How much panelling can one little condo handle? (Hint: this is probably just about enough)

Staircase. How much panelling can one little condo handle? (Hint: this is probably just about enough)

Full living space. Glorious upholstery. Yet more antlers.

Full living space. Glorious upholstery. Yet more antlers.

Bedroom 1 of 2. Yes, there are three lamps, and yes, they all feature more antlers.

Bedroom 1 of 2. Yes, there are three lamps, and yes, they all feature more antlers.

Bedroom 2 of 2. It's a big enough space, but it was being used strangely. No antlers here, which frankly feels like an oversight at this point. 

Bedroom 2 of 2. It's a big enough space, but it was being used strangely. No antlers here, which frankly feels like an oversight at this point. 

Blogging is exhausting and I have no idea where to quit, so I think that'll do it for now. Up next: my plan to update all of these spaces. Coming at you sometime next week!