TMF: The Kitchen
Let’s all just pretend like it hasn’t been three months since my last post, shall we? Moving right along…
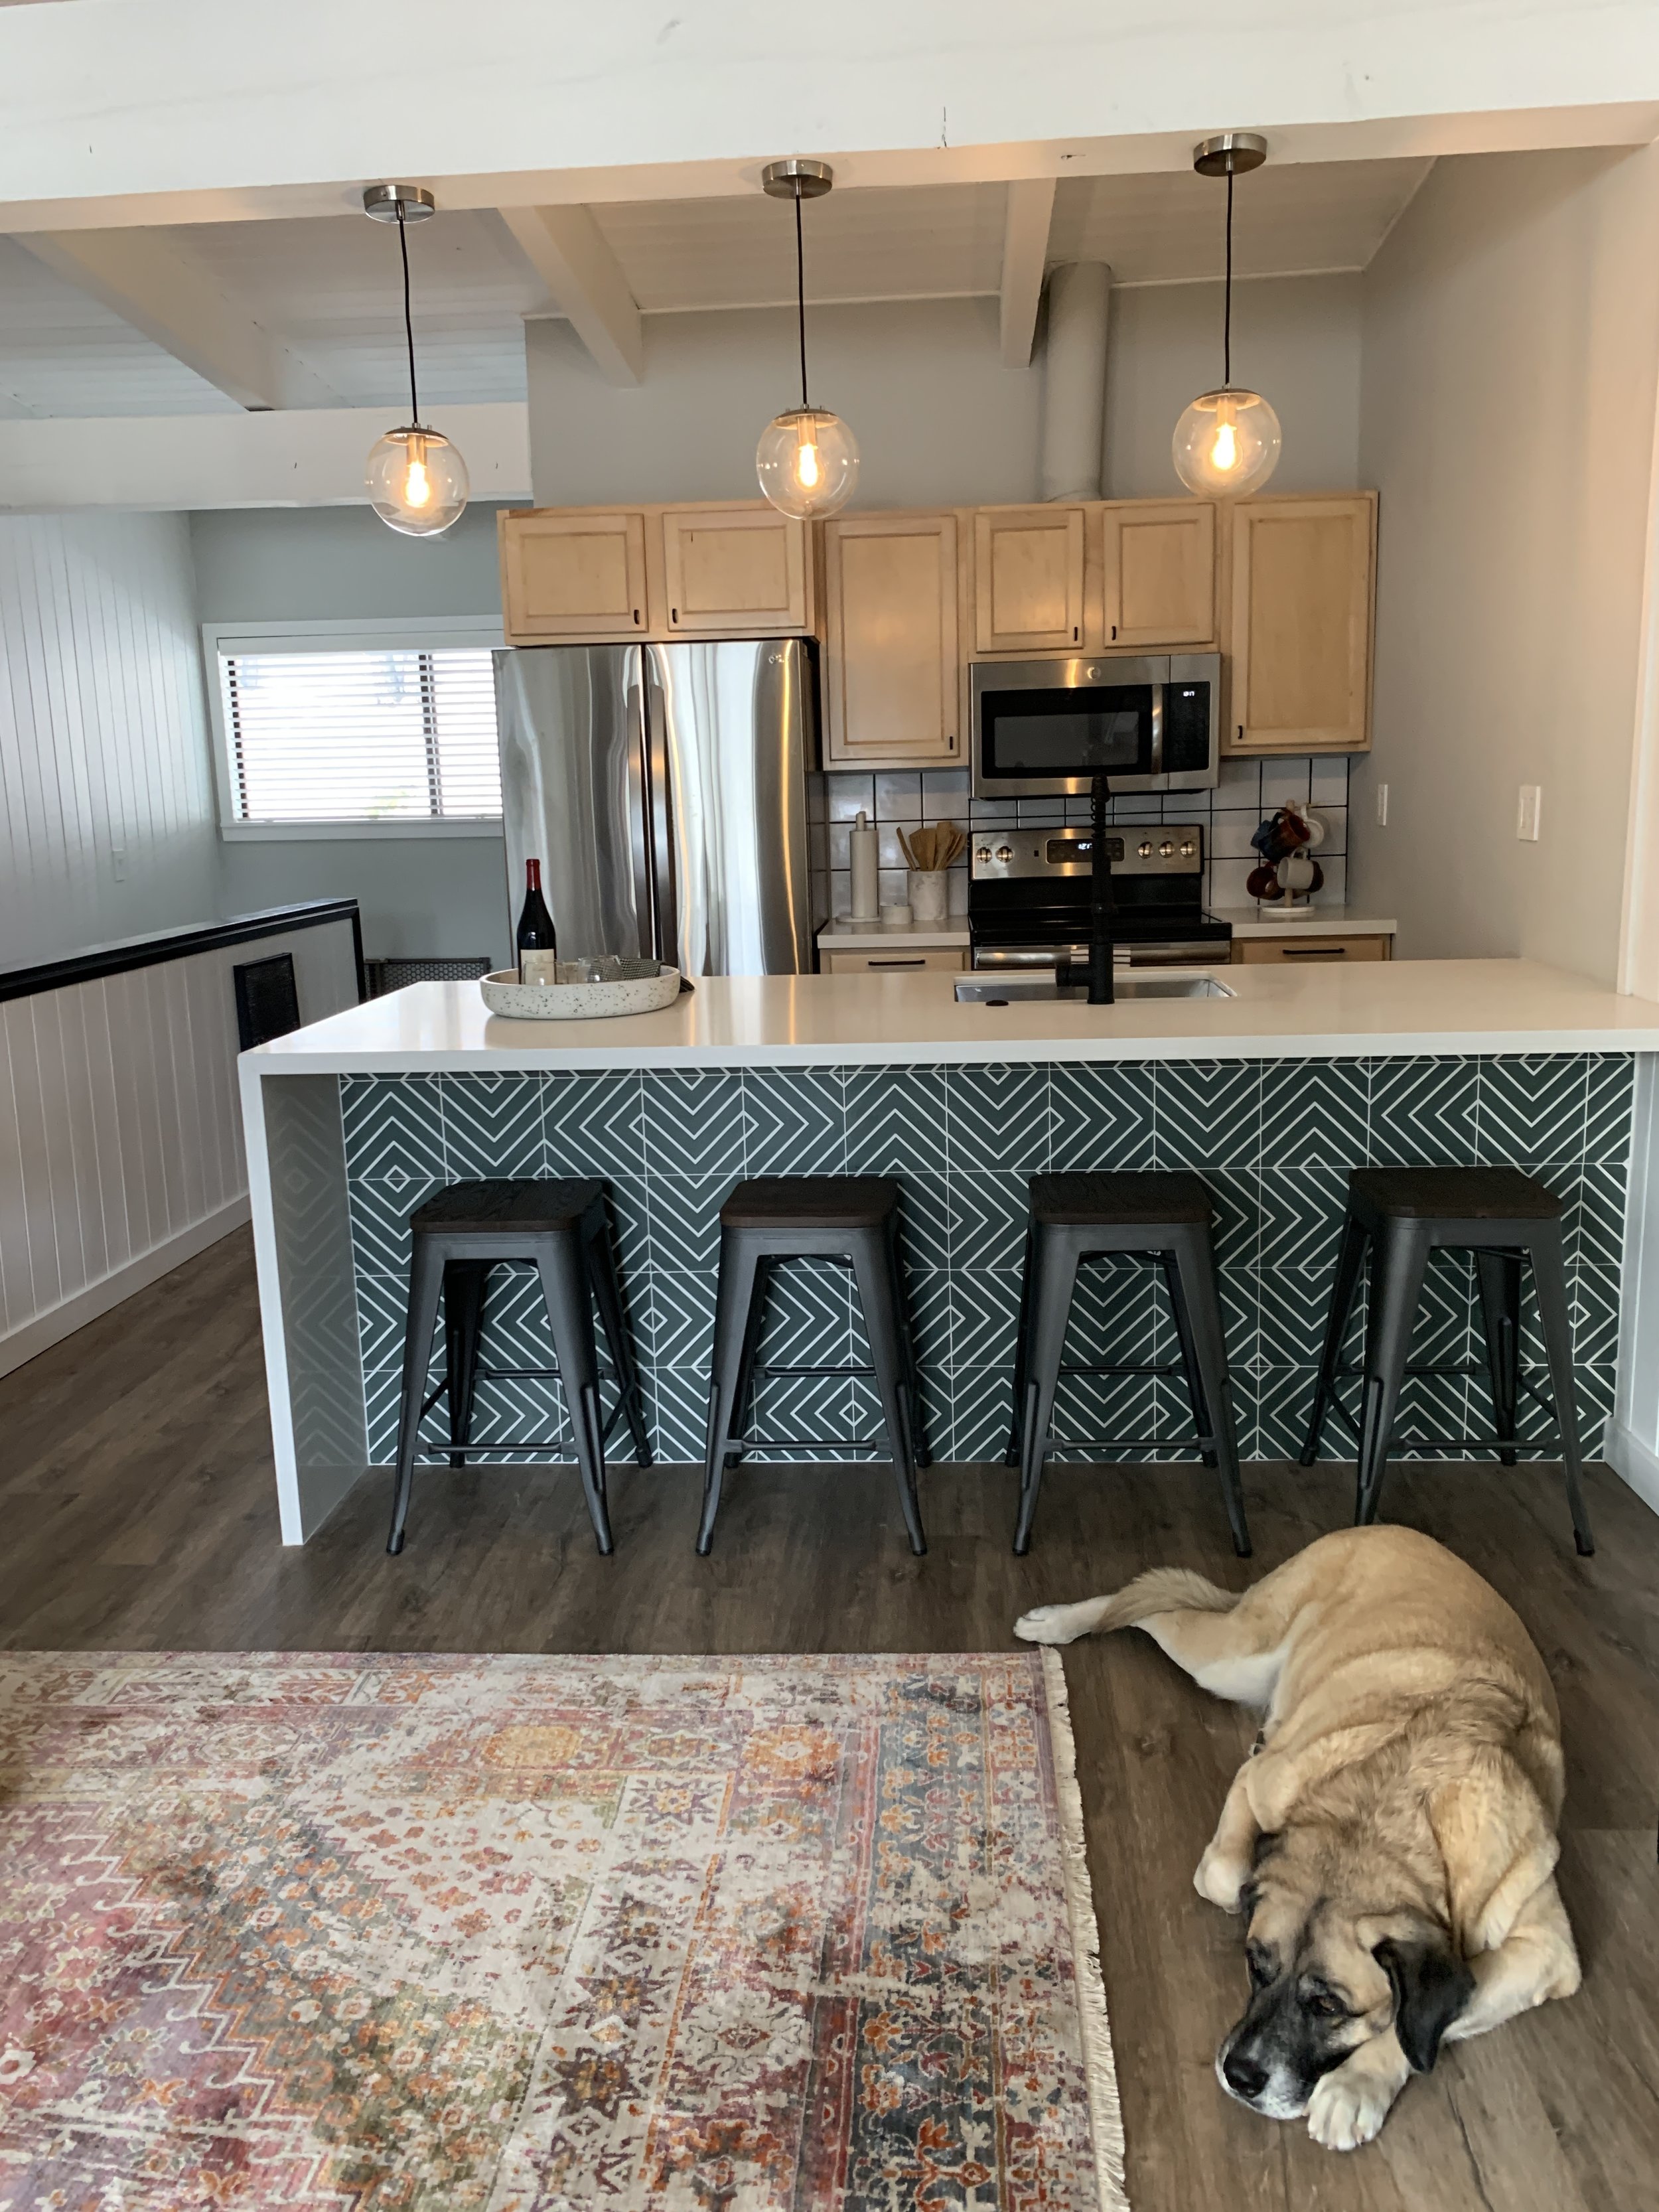
It’s time to talk about the kitchen. Like most of the other spaces in TMF, it’s small but mighty, and we had to pack a lot into a pretty limited footprint. Without further ado, I give you… KITCHEN:
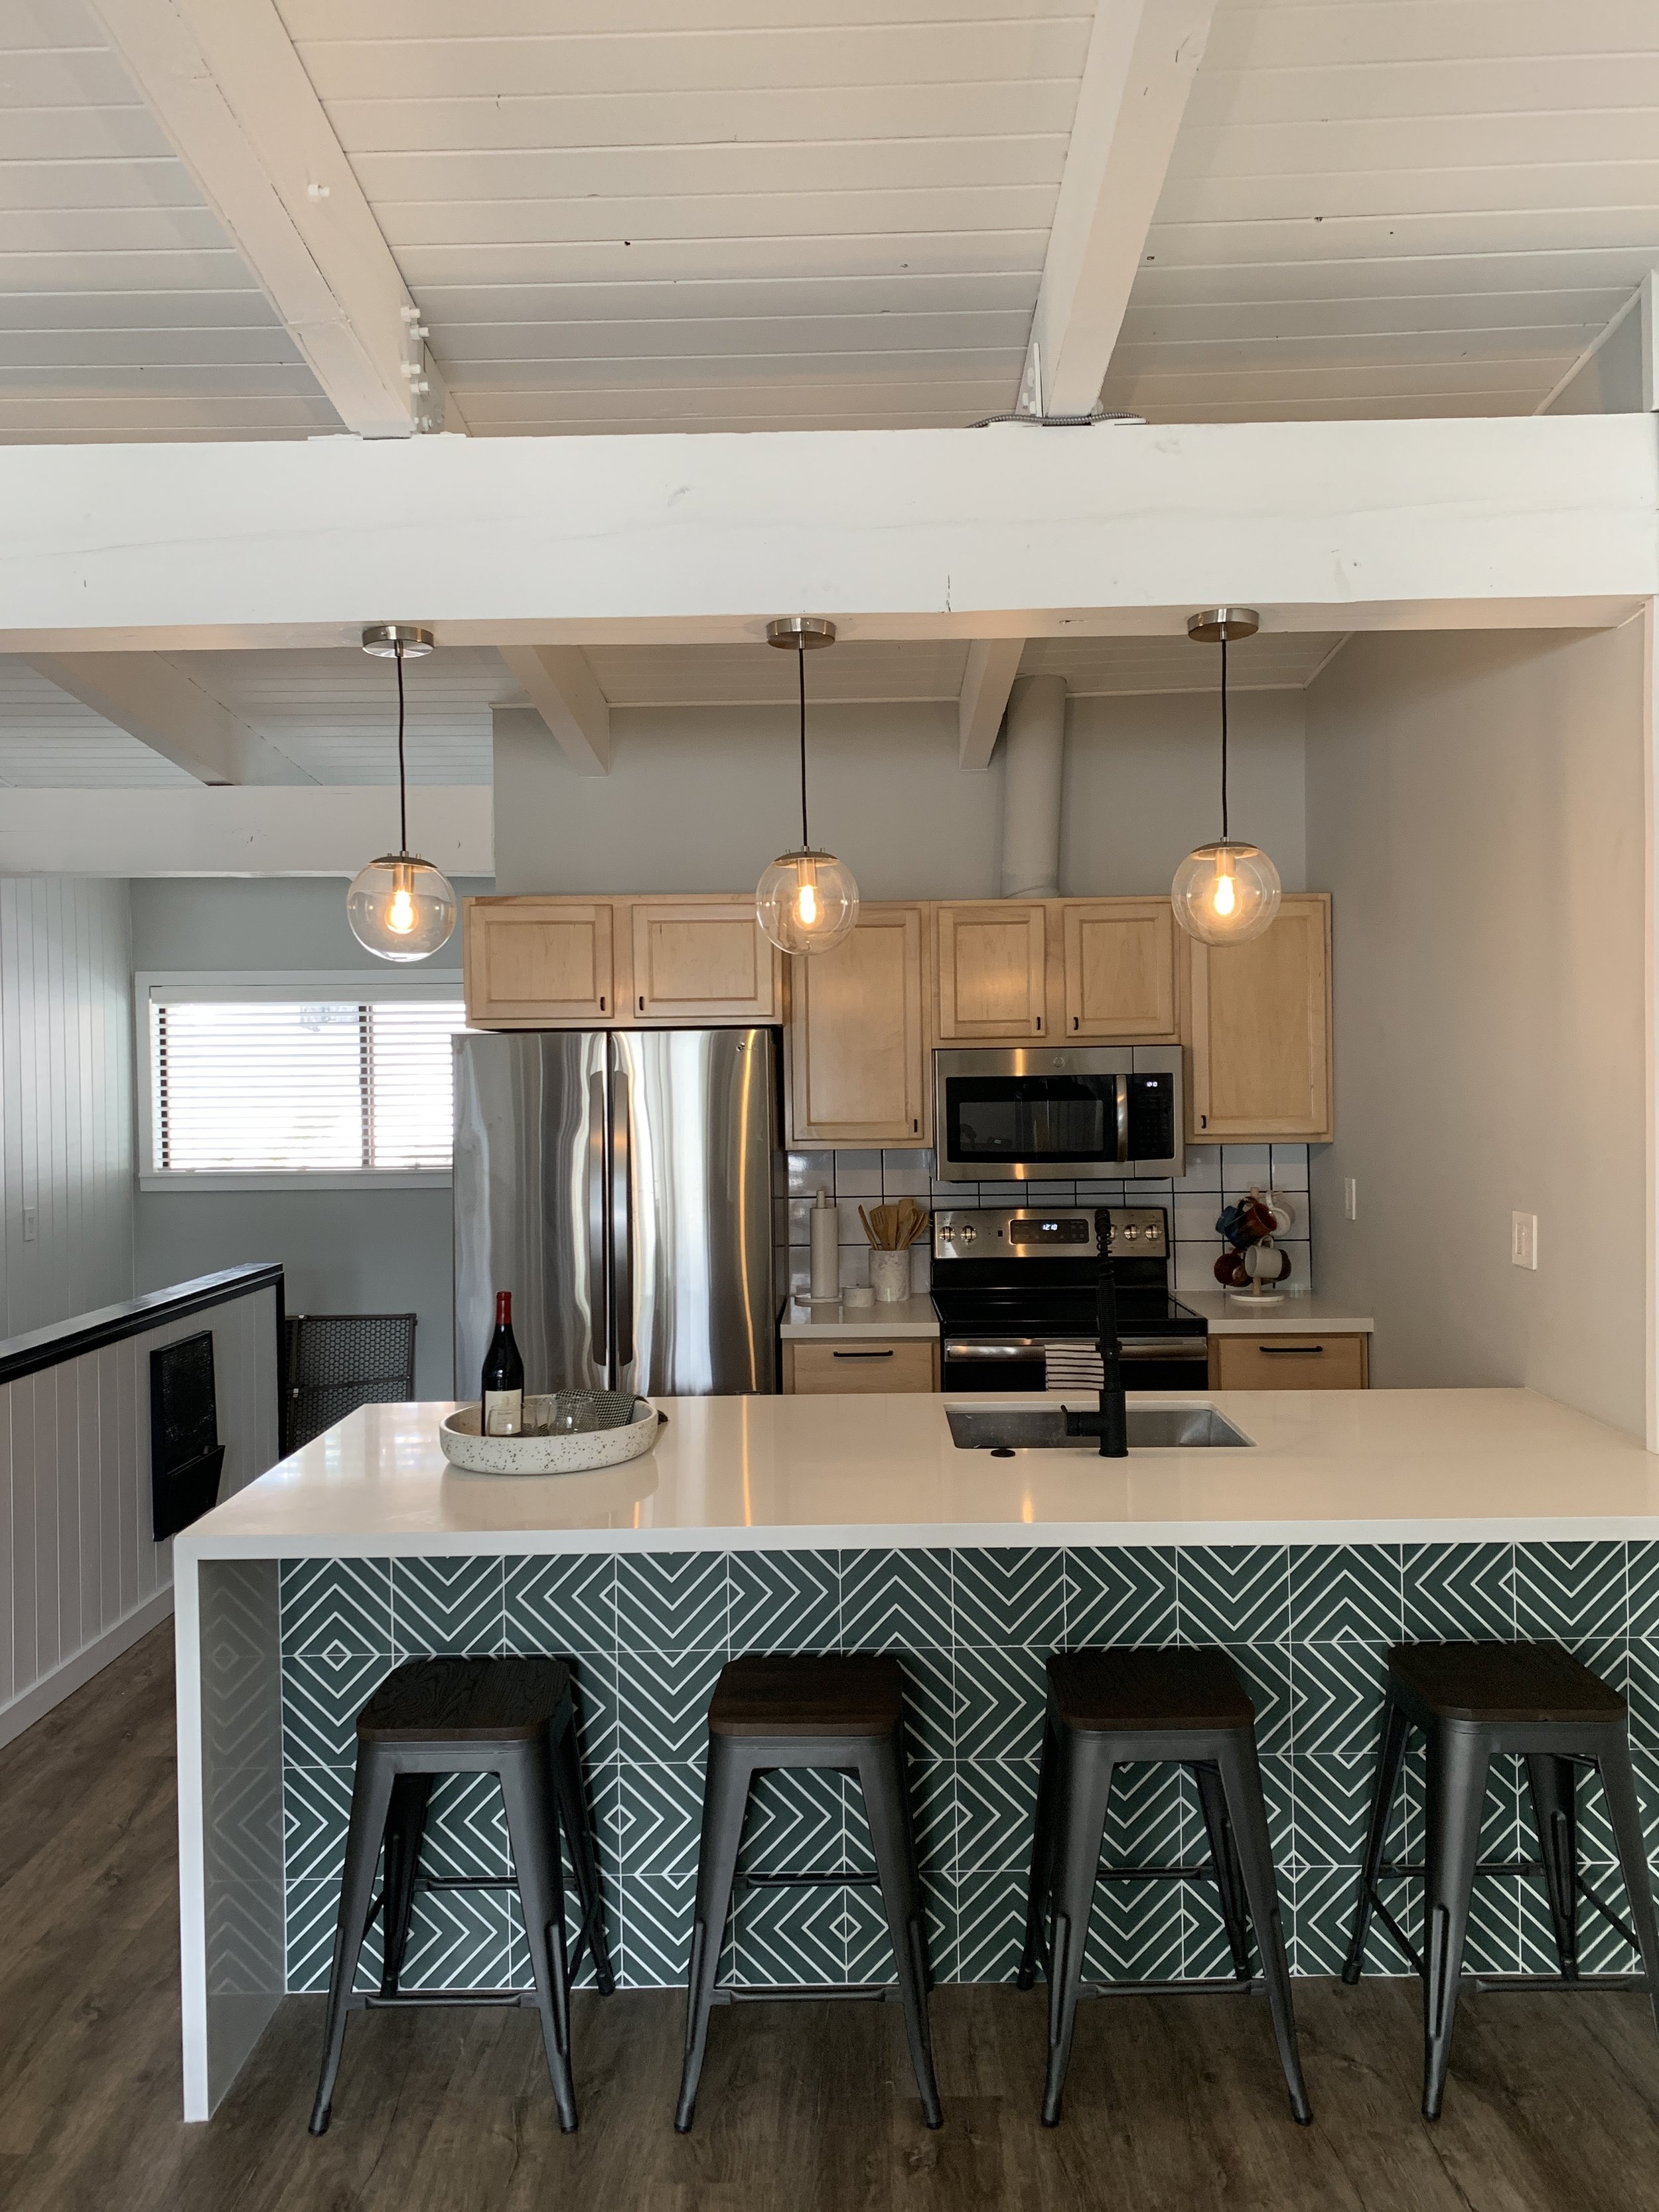
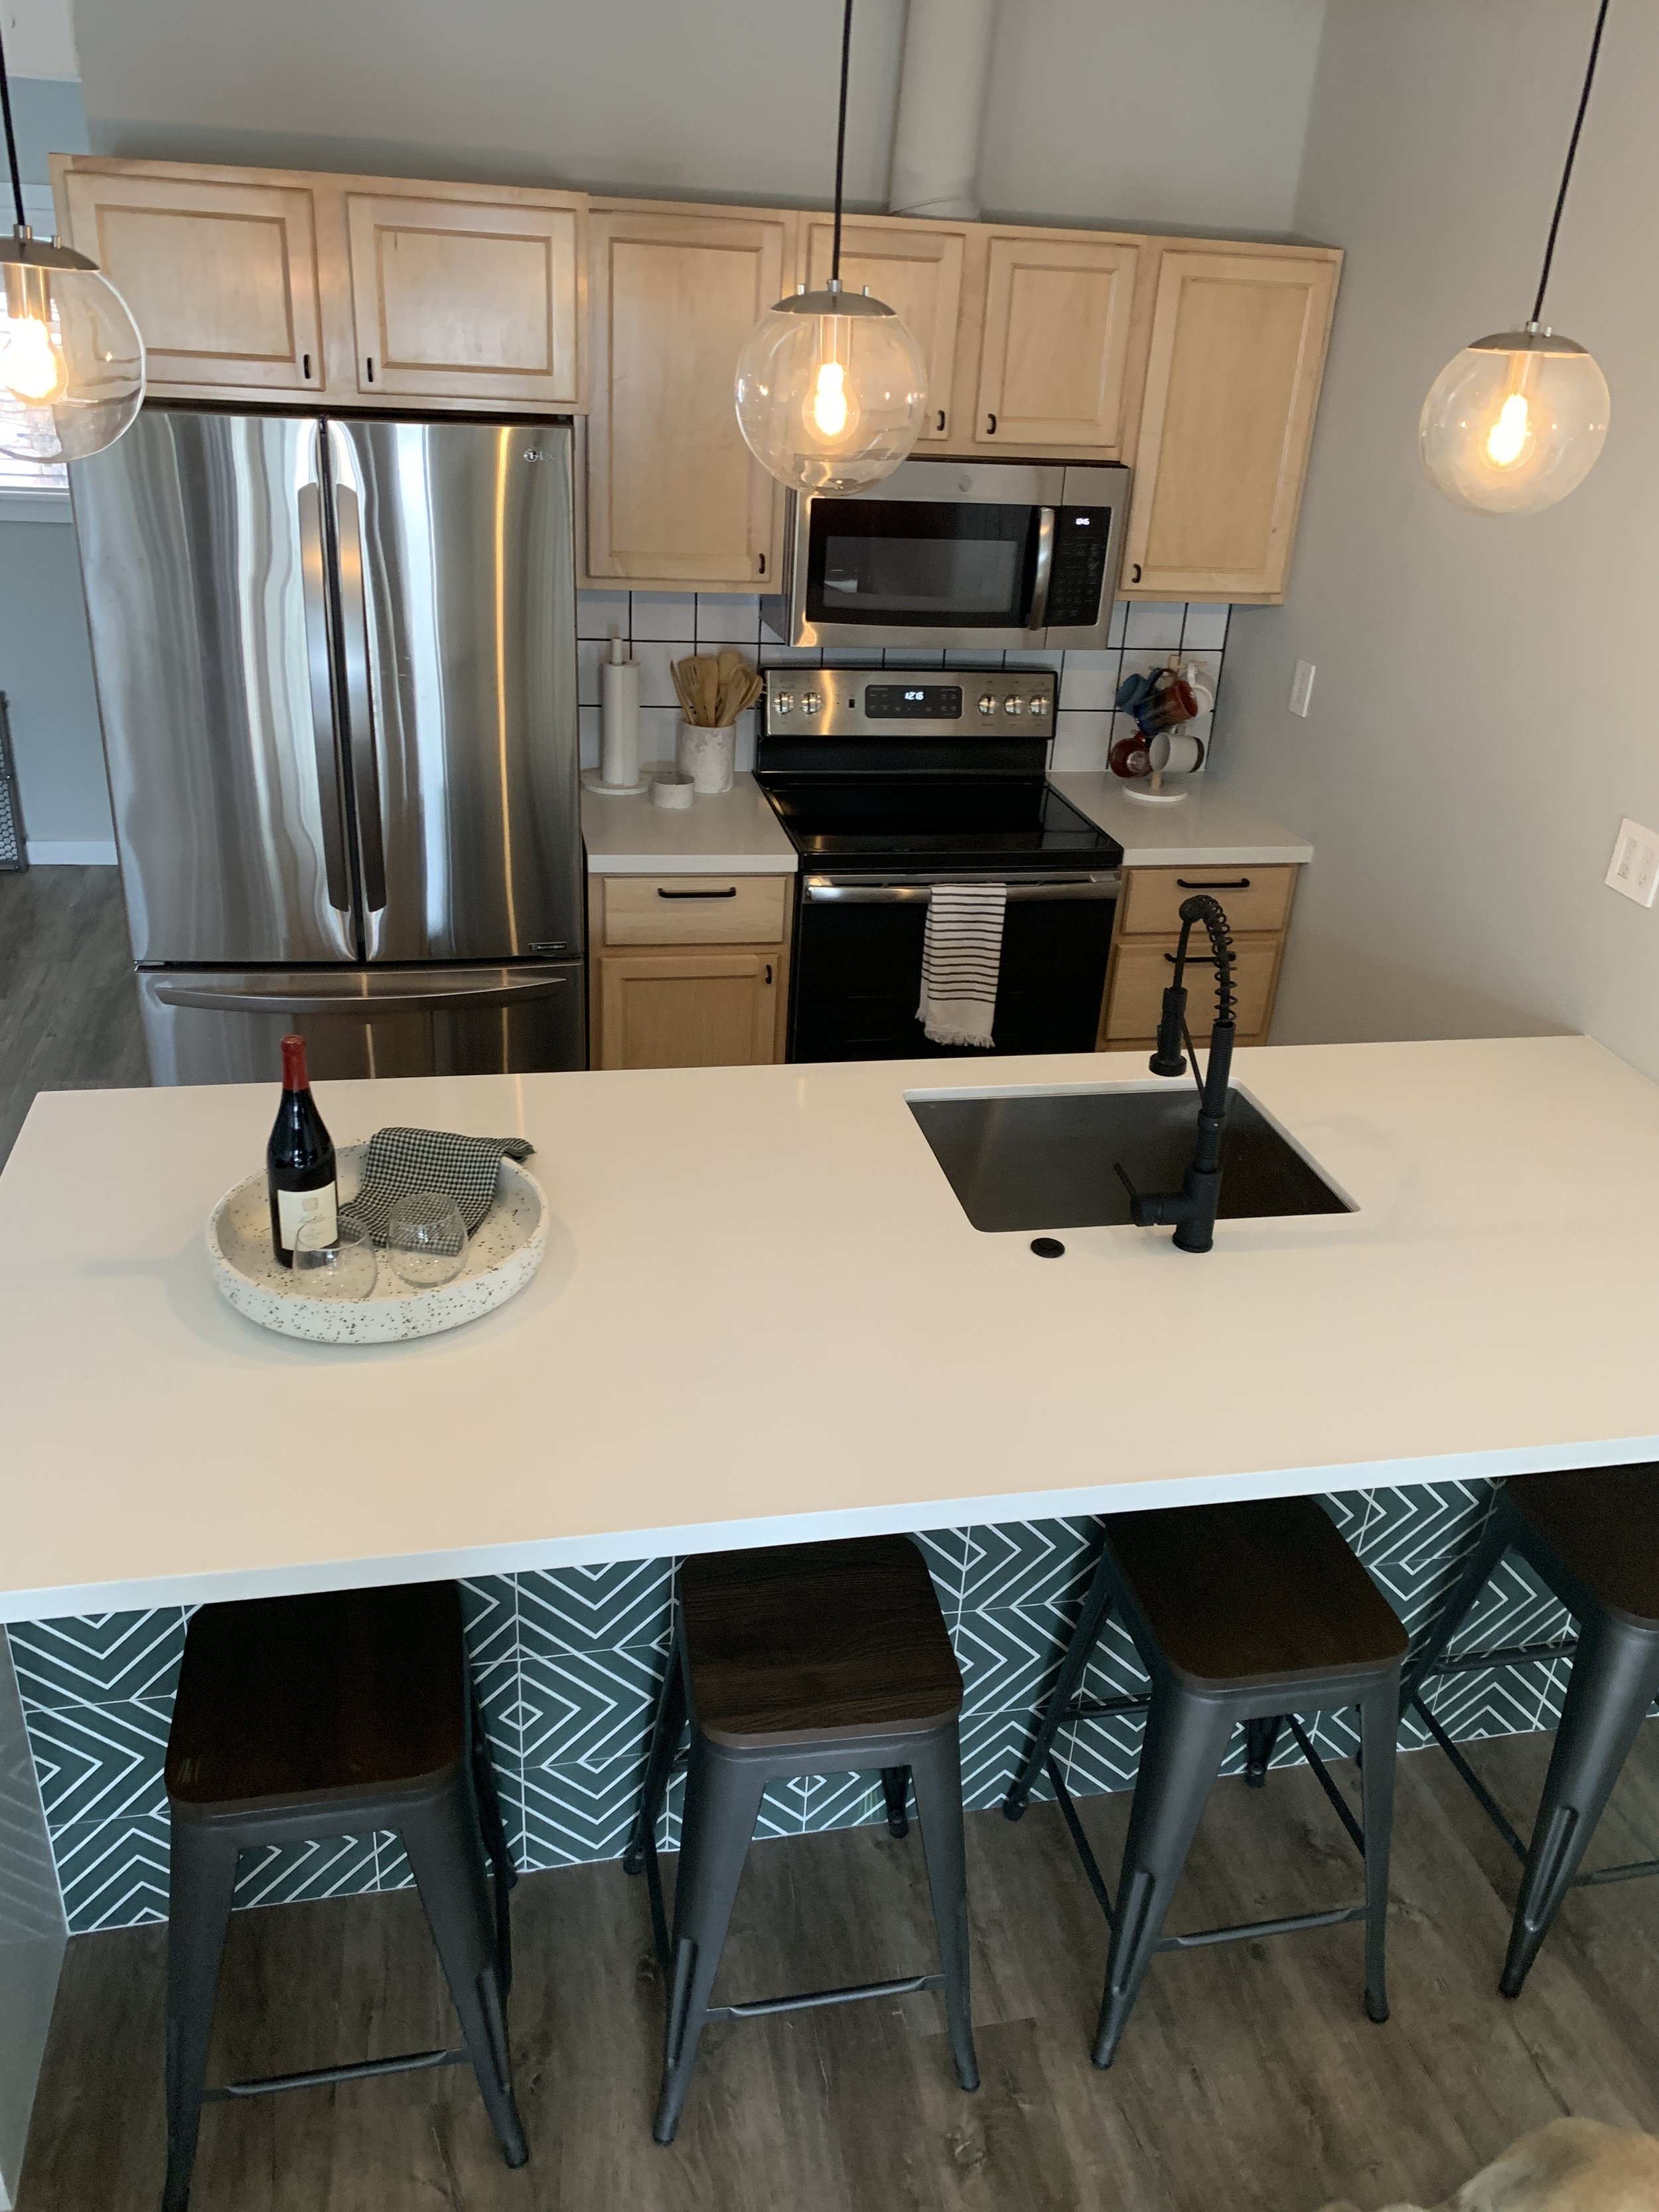
Ain’t she a beaut?
As a reminder, this is the original kitchen in all of it’s dark and crowded glory:

Yikes.
You may remember from my first post that we sold the old, ugly kitchen online. You know what they say about one man’s trash… Bright and early on demo day, a crew of guys drove up to the condo, uninstalled the cabinets, lifted off the countertops, and carted the old appliances down the stairs and into a truck. By about 10am we were left with this:

Glorious blank space.
(Cut to like 2 months of kitchenless living, i.e. cold cuts and washing dishes in the bathroom sink.)
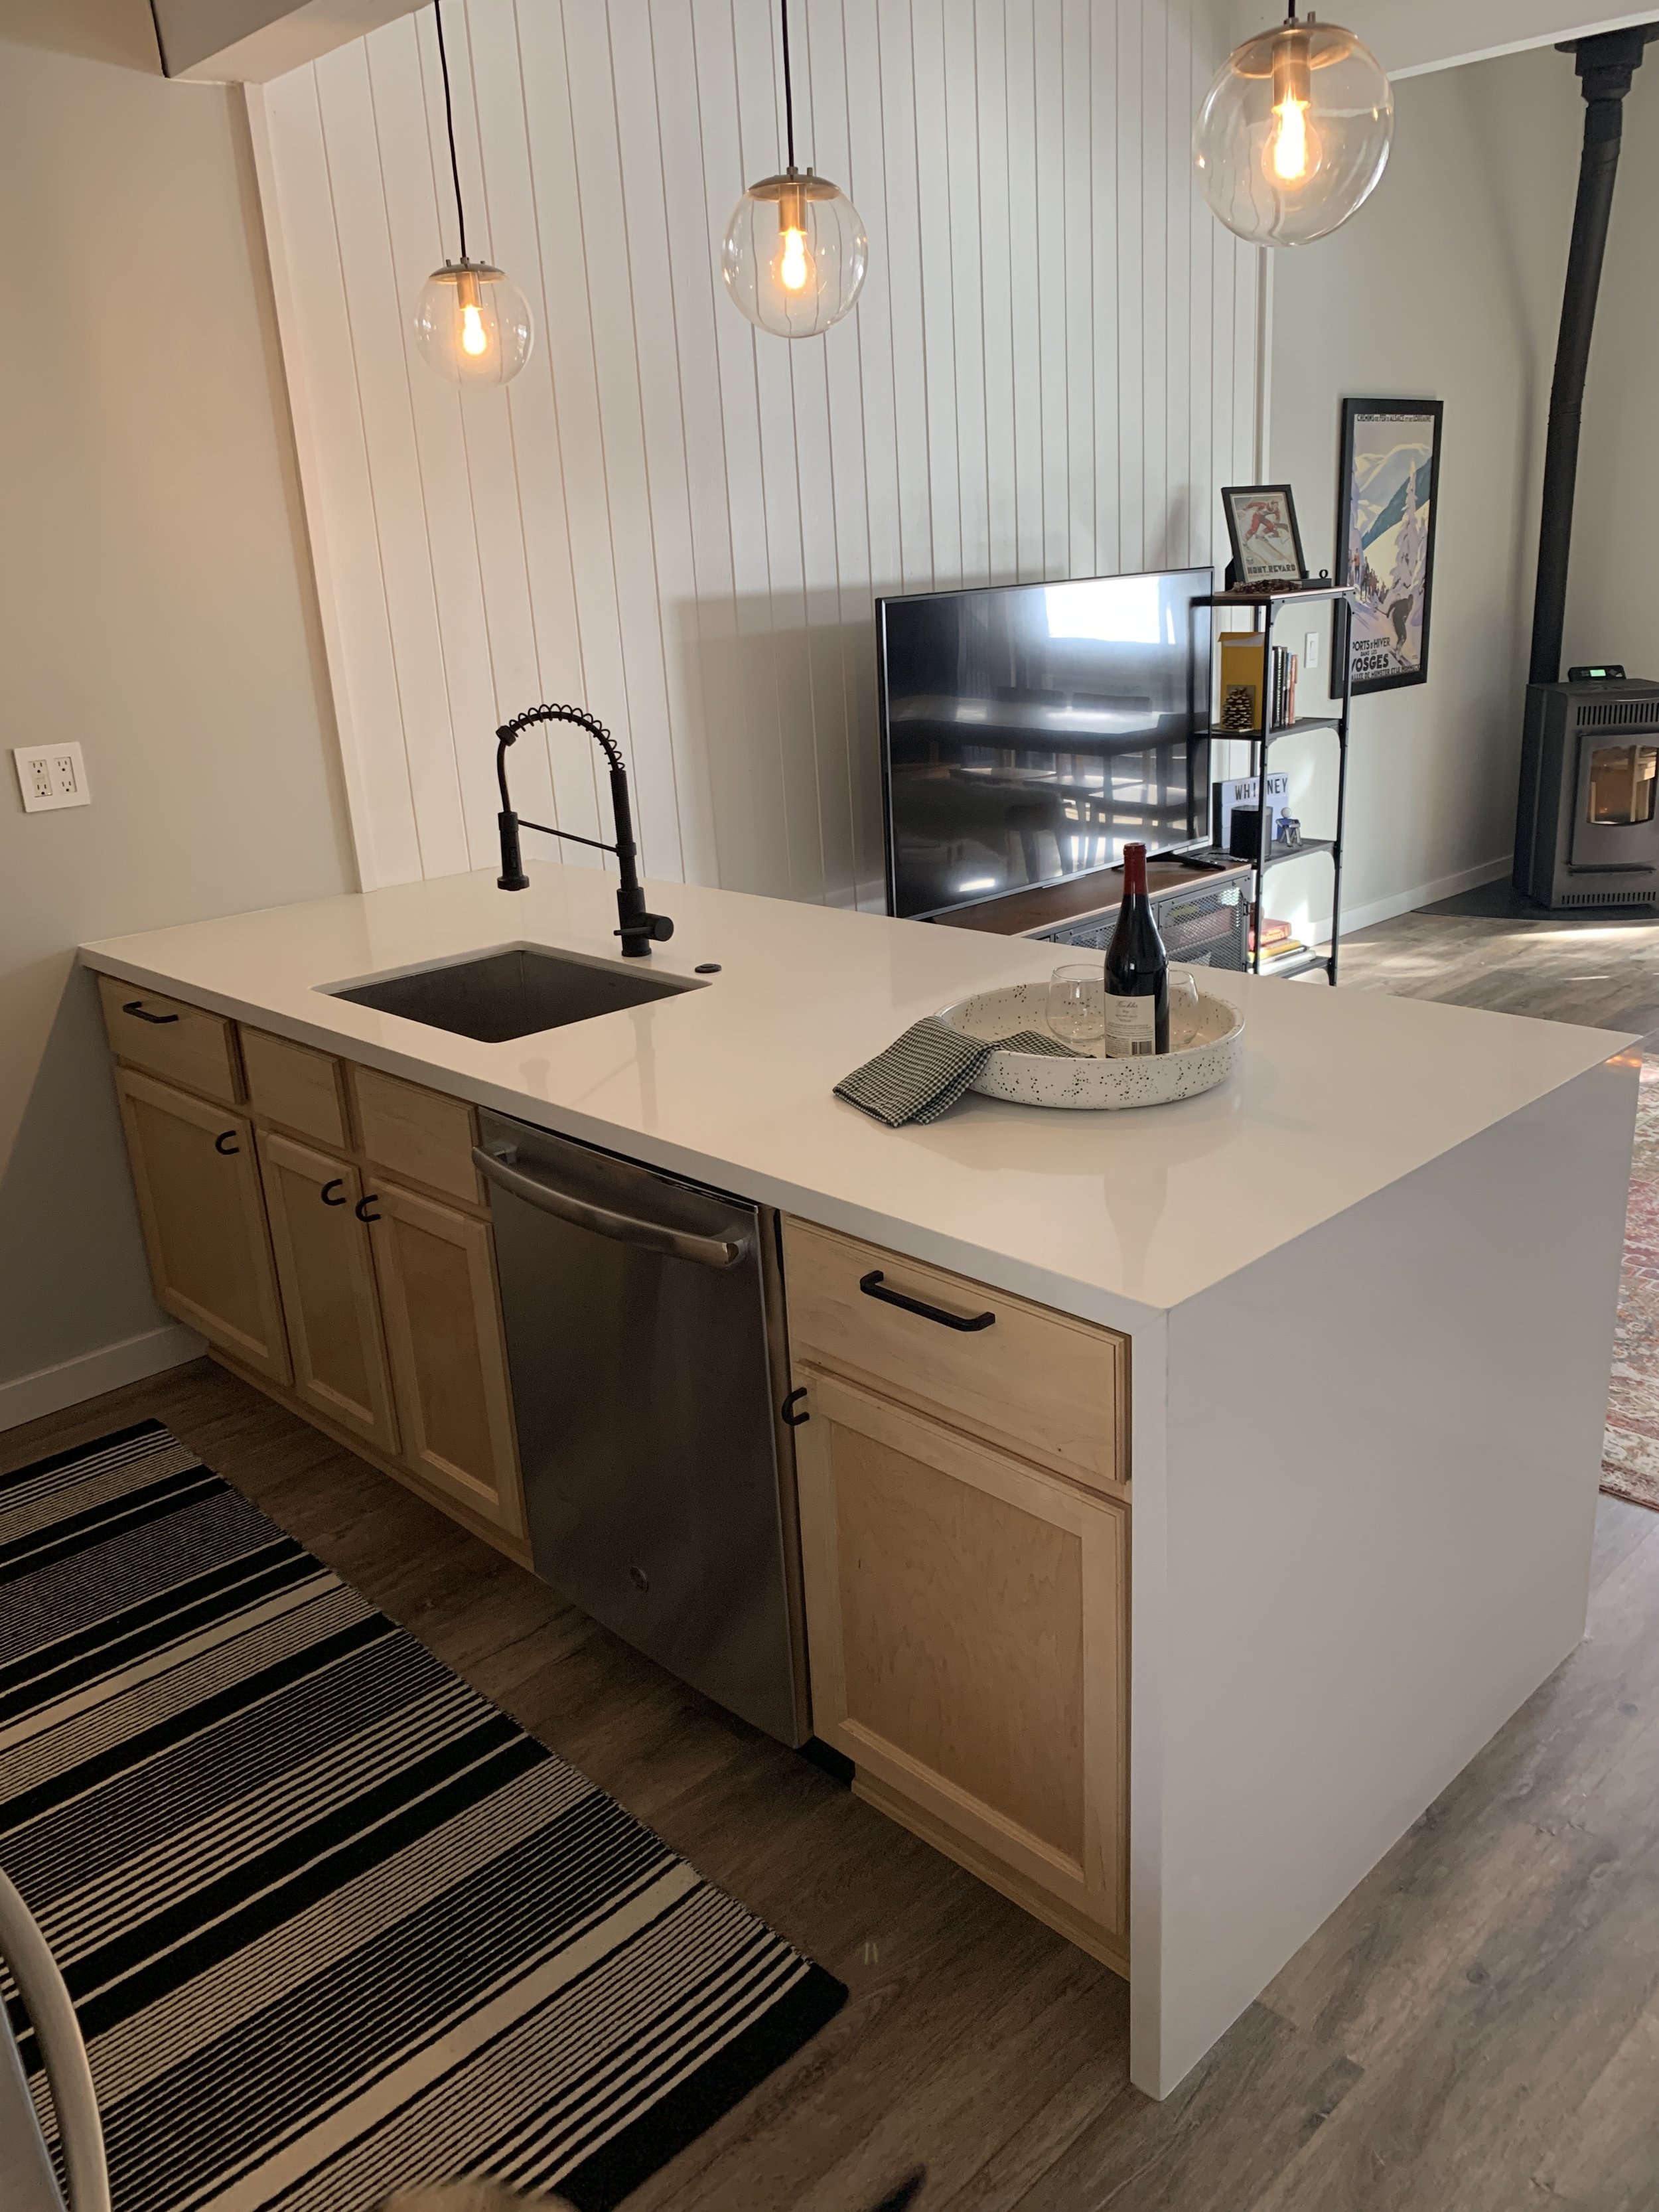
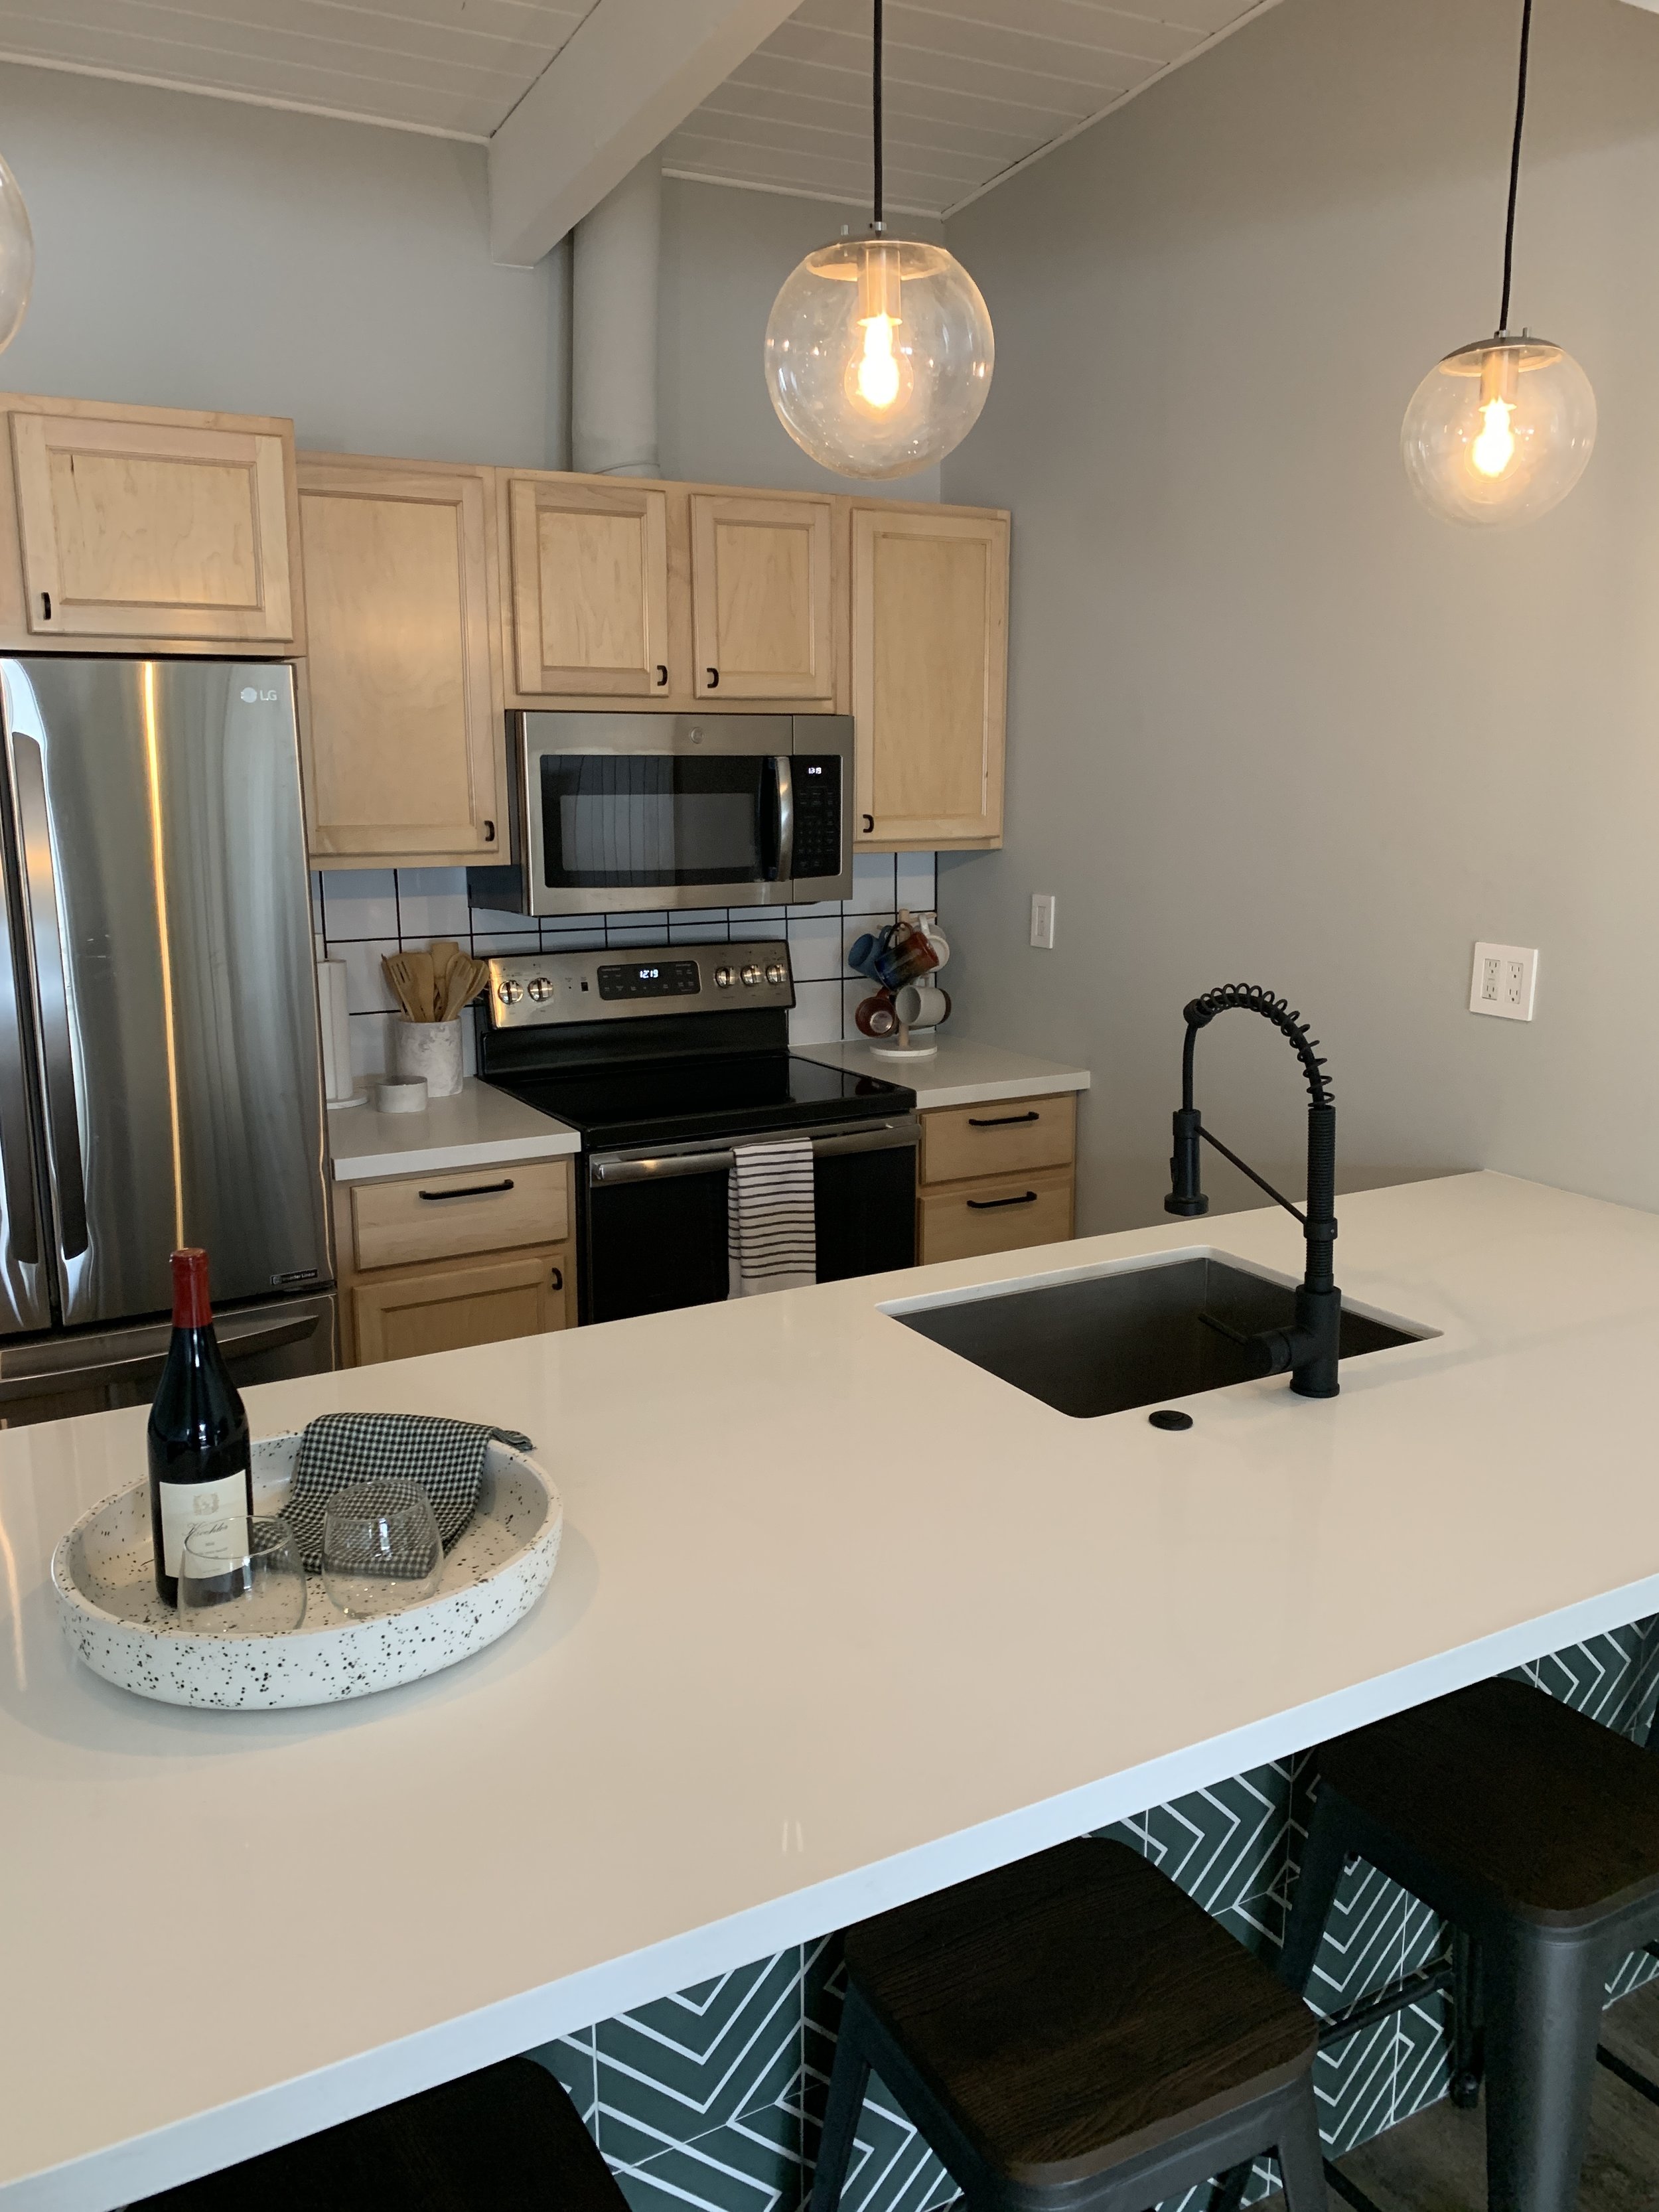
I’ve never designed or renovated a kitchen before, but thanks to a natural inclination to jump headfirst into projects (and what is probably an unhealthy amount of self confidence), this didn’t deter me in the slightest. I knew pretty quickly what I wanted this kitchen to look like - it helped that the space is so small, and we didn’t need to change the floor plan dramatically. My goals were simple: open the space up by getting rid of the upper run of cabinets on the far wall (more cabinet space would be nice, but this was a poor original design IMO due to the fact that it created weird unusable dead space underneath), bump the countertop out to create a proper breakfast bar, and brighten the whole thing up with light colors and clean, modern finishes and stainless appliances.
The full list of projects was as follows:
Paint
Move dishwasher hookups and drain to right side of sink (plumber)
Finish and install new cabinetry
Install new flooring
Install countertops (contractor)
Tile front of peninsula
Tile Backsplash
Install sink and plumbing fixtures (plumber)
Install appliances
The cabinets were far and away the most time consuming and labor-intensive part of this whole process. We initially planned to buy Ikea cabinetry with custom fronts by Semihandmade (spoiler alert, that name will come up again in a future post), but after pricing them out (and reading some harrowing tales of DIY Ikea kitchen installations online), we decided to go with prebuilt, unfinished cabinetry from HD Supply. This ended up saving us a bundle in assembly time and cold hard cash, but it meant I had quite a job on my hands. After the painstaking process of measuring, planning, configuring, and buying the cabinets, I faced the task of staining, sanding, and sealing these suckers. It took the better part of two weeks and every last drop of patience I had (admittedly a limited supply), but I think they turned out great.
Installation was a whole new saga, and it’s not a job I’d recommend anyone embark on without another pair of helping hands…lesson learned. It took me a full day to do it by myself, but I eventually got these things leveled, plumbed, and mounted.
Flooring came next (shout out to my amazing brother-in-law Dustin who came to help with this backbreaking task), and then countertops. From the get-go I knew that I wanted white quartz, and I had my heart set on a waterfall edge…finding someone to fabricate and install said waterfall edge in Mammoth Lakes was nearly impossible. Completely impossible, in fact, as I had to hire someone from Reno, NV in the end. A local hardware store *did* kindly offer to bring someone up from LA for the low low price of $10,000 (good one, guys), but alas I had to turn them down. We LOVE our big, clean, white countertops, and even though it’s a tiny kitchen, it feels like we have lots of room for food prep, baking, and general entertaining.
Far and away, my favorite element of this kitchen is the cement tile from Riad Tile on the front of the peninsula. This was such a labor of love (cement tile is HEAVY and installing it required a lot of time and patience), and it brings in a much needed splash of color and pattern.
A quick note about Riad Tile: the first shipment of tile got ANNIHILATED by the freight shipper, and I was left with only about 25% of my order that was usable. It was carnage:

BUT, credit where credit is due: Riad has fabulous customer service. They re-packed and re-shipped my entire order (in styrofoam this time) in no time. The project was slightly delayed but no real harm was done. I’d order from them again in a minute.
One more shot of the final product for good measure:

And just like that, that’s a wrap on the kitchen! Full details and links are below for all of the finishes. Next up: the living room.
